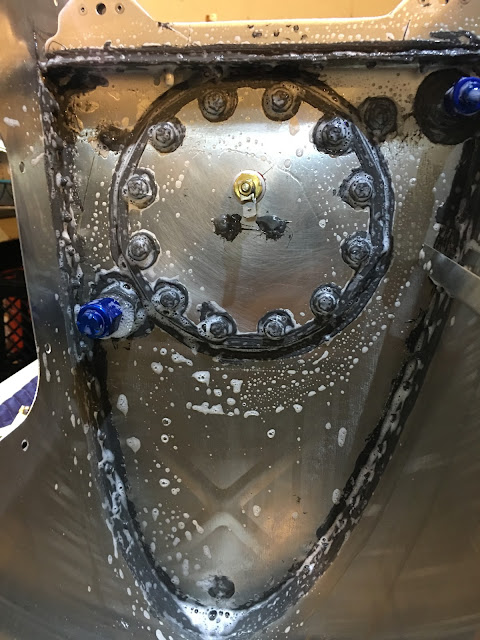
Making sure the soapy water is extra soapy!
No leak!
Balloon stays inflated. Also checked the vent tube fixture and no leak there either. We're good to go!!
I got a recommendation a while ago to check the fit of the bolts into the Z-brackets before putting it on the wing and that turned out to be a good idea. When you put the bolt into the hole it should quickly catch in the nut plate (don't turn it much for this test). All caught quickly except for this one which really didn't catch.
Here's looking down a good one...
And here's looking down the one that didn't quite catch. The nut plate is ever so slightly off center. The solution was to take a chucking reamer and carefully enlarge the hole (not the nut plate, just the bracket). Once that was done the bolt caught easily. Nice!
Marked the wing bolts.
NEXT TASKS:
- Fuel tank on. Just loosely bolted at this point. For all the following steps I'm going to make sure that the jigs remain level with each other and that the leading edge across the whole wing is nice and straight.
- Top skins riveted on (STRINGERS!). Fill rivets with Bondo.
- Leading edge riveted on (STRINGER!). Fill rivets with Bondo.
- Rivet fuel tank on. Fill rivets with Bondo.
- Install landing lights.
- Wing tip assembly and light installation.
- Put the aileron and flap on the wing to check for straightness of the trailing edge (Thanks Peter, I saw that on your blog! ;-)).
- Finish sanding of left wing bottom rivet heads.
- Finish right wing.
- Finally finish one of the composite tips of the elevator.
- Fill rivets of elevator with Bondo.
- START ON FUSELAGE!


No comments:
Post a Comment