


1 hr deciding I don't like hex head screws.... Have you ever noticed how close a six-sided shape is to a circle?.... In other words, I've found that they too easily strip if there's much resistance to turning it. And I'm using top quality screws with a perfectly matched top quality hex key...
Well, that happened with screwing in the panel and now I have a screw that is totally stripped, which is tightly attached to a loose rivnut... I'll figure out how to get the screw out, but I'm switching these screws to philips heads. M4, black, carbon steel philips head screws arriving tomorrow...
Wednesday, October 31, 2018
Tuesday, October 30, 2018
Well, Apple announced their new iPad Pro line-up and I was waiting to see if the new 11" Pro would be the same chassis size as the current 10.5" Pro (they decreased the bezel size)... Well, they increased the width by .2", so it won't fit in my panel dock. :-(.
But, the good news is that the 10.5" will still be available and it's now cheaper. :-). The 10.5" is way more than enough for my purposes, so I'm fine with not having the absolute latest and greatest.
But, the good news is that the 10.5" will still be available and it's now cheaper. :-). The 10.5" is way more than enough for my purposes, so I'm fine with not having the absolute latest and greatest.
Last night I tried to finish off screwing in the panel to my dash, but a couple of the holes are a bit further off than I could easily screw in to. And also, because of that, one of my rivnuts came loose... So, I have to take the panel back out and fix all that up (ugh). For the holes, I'm just going to enlarge them a bit to allow me to screw into them. The rivnut will obviously have to be replaced.
In case you're interested here is the portion of the circuit diagram from Stein that relates to the electrical system. The VPX is the box on the left.

And, oh yeah, my home team won the World Series this past weekend. :-D

In case you're interested here is the portion of the circuit diagram from Stein that relates to the electrical system. The VPX is the box on the left.

And, oh yeah, my home team won the World Series this past weekend. :-D

Monday, October 29, 2018
JimP mentioned on the Sling Builders forum on Facebook about using a different regulator for the 914 than the default one supplied with the kit. Seems the default one has had a history of failures and there are better regulators out there.
Van's uses the German made Silent Hektik F4120 and looking at the web page for it I'm also convinced that it is a much better choice. Also notable is they say that any regulator (not just theirs) should be in the engine compartment and not the cabin as it needs air flow to keep cool - otherwise you're asking for premature failures... So, I'll have to move that mounting to the engine-side of the firewall.
Van's uses the German made Silent Hektik F4120 and looking at the web page for it I'm also convinced that it is a much better choice. Also notable is they say that any regulator (not just theirs) should be in the engine compartment and not the cabin as it needs air flow to keep cool - otherwise you're asking for premature failures... So, I'll have to move that mounting to the engine-side of the firewall.
Sunday, October 28, 2018
3 hrs. on the panel/dash.
Looking through my box of goodies from SteinAir I saw that they actually included some of the fuses I thought I had to buy. Notably the 25A and 5A fuses for the internal alternator. I have the 50A fuse and holder on order and I'll post the info on them when they arrive.

Time to put on the spade quick disconnect connectors for the panel grounds. 13mm of insulation stripped off seemed about right.

Crimping...

Whew... Lots of connectors...

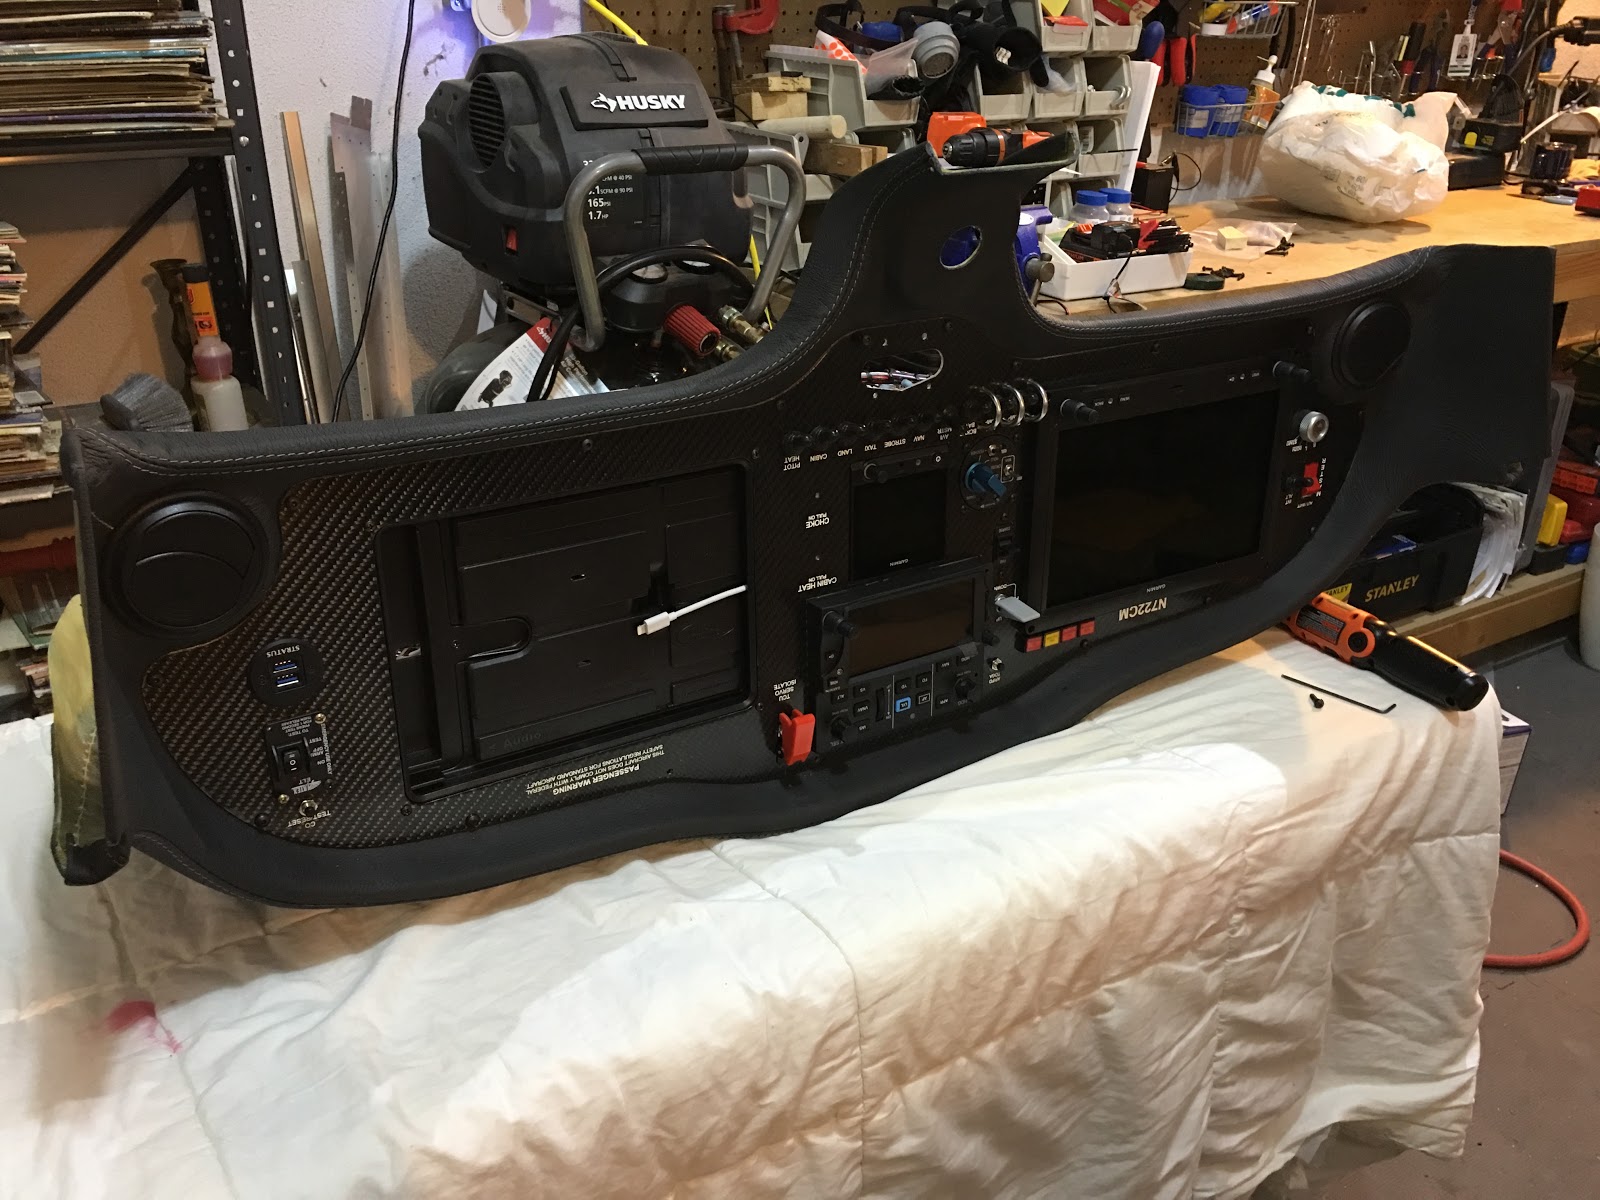
Time to put the panel in the dash. Easier upside down I think.

Put a 14 gauge power wire temporarily on the VPX for connecting it once the panel/dash is in.

Backside view.

Looks like the material I removed for the parachute handle is just the right amount.

Flipped over. Looking good!

Looking through my box of goodies from SteinAir I saw that they actually included some of the fuses I thought I had to buy. Notably the 25A and 5A fuses for the internal alternator. I have the 50A fuse and holder on order and I'll post the info on them when they arrive.

Time to put on the spade quick disconnect connectors for the panel grounds. 13mm of insulation stripped off seemed about right.

Crimping...

Whew... Lots of connectors...

Time to put the panel in the dash. Easier upside down I think.
Put a 14 gauge power wire temporarily on the VPX for connecting it once the panel/dash is in.

Backside view.

Looks like the material I removed for the parachute handle is just the right amount.

Flipped over. Looking good!

Saturday, October 27, 2018
3 hrs. on the dash.
Got my spade connectors and crimper. Don't buy cheapo connectors.

Time to stitch the dash to ensure the leather doesn't creep back (it's only glued). I made a 5/8" jig to make the drilling easier. I found that a 3/16" drill bit was perfect for fitting the Speedy Stitcher awl.

Drilling along the ridge at the edge of the dash. Lots of holes...

122 to be exact (your mileage may vary)...

I figured it would be easier to do the stitching with the dash positioned like this.

Need to measure out enough thread to go all the way around the dash plus several inches for tying the knots at the end.

First stitch done...

Backside view. Be mindful of where your hand is on the backside when you're pushing the needle through - it is wicked sharp!!

Pulling the long thread through the loop.

Almost done... It's convenient that the awl just hangs there. Makes it easy to pull the thread through the loop.

At the end and pulling the needle back out, so I can cut it and tie it up on the backside. A few knots and it was secure.

My grandma would have been proud! She was a seamstress. :-)

Here's a video I made of how to do it.
After some measuring I figured I needed some more room for mounting the parachute handle hardware. This should definitely be enough.

Starting to ream out the panel holes (they were a bit too small for the M4 screws). I'll finish that tomorrow and mount the panel in the dash. :-D

Friday, October 26, 2018
I joined rotax-owner.com and asked about the location of the fuses (or circuit breakers) for protecting the alternators and got this response from a retired electronics tech:
"You are correct that you do not want to run unfused wires long distances. An InLine, Weatherproof, ATO Blade Style Fuse Holder can be installed within 6 inches of the Regulator. Remember that the Capacitor needs to be installed on the Regulator (Un-Fused) side of this Fuse.
Circuit breakers are a convenience because they can often serve double duty as a switch. Breakers do not trip without a reason. Do not reset a breaker without first determining the reason it tripped. This can rarely be accomplished in flight."
I definitely won't be installing my alternator CB's (or I may just go with fuses) in my panel.
Thursday, October 25, 2018
1.5 hrs. on the dash, etc.
Measured the Dzus grommet to see if it's the right size to use for the nose wheel towbar hole... And it's perfect! According to TAF the towbar is 7.84mm, so 8mm is perfect for the grommet.


Looking at the sides of the dash, it seemed like one side hung down the side of the fuselage more than the other, so I measured. This side about 46mm.

And this side about 54mm. So, my observation was correct. Does it matter? I'm thinking no, but I'm not certain.

I've been advised (thanks Simon!) that it's a good idea to stitch the outer edge of the dash since it's just glued down and he had seen some Slings where it started to pull up. So, better to stitch it firmly down now before it's installed in the plane. So, I bought this leather stitcher.

Following the instructions on how to thread it.... Line up the grooves...

Put on the chuck.

Close up of the groove of the needle lined up with the groove of the part that holds it in place (not sure of the name...). I'll do the stitching on Saturday.

Here's a video of how to use the Speedy Stitcher. There are other videos too if you search.
Need to make room for the mounting hardware (nuts?) for the parachute handle since I saw the dash fiberglass through the lower holes of the handle mount.

Used a fine saw and a file to cut out the dash in that area. I think this should be sufficient. I'll take some measurements to confirm before mounting the panel.

Got my black M4 screws from Belmetric and black nylon washers from Amazon. Fits! ;-)

Measured the Dzus grommet to see if it's the right size to use for the nose wheel towbar hole... And it's perfect! According to TAF the towbar is 7.84mm, so 8mm is perfect for the grommet.

Picture from TAF of the towbar dimension.


And this side about 54mm. So, my observation was correct. Does it matter? I'm thinking no, but I'm not certain.

I've been advised (thanks Simon!) that it's a good idea to stitch the outer edge of the dash since it's just glued down and he had seen some Slings where it started to pull up. So, better to stitch it firmly down now before it's installed in the plane. So, I bought this leather stitcher.

Following the instructions on how to thread it.... Line up the grooves...

Put on the chuck.

Close up of the groove of the needle lined up with the groove of the part that holds it in place (not sure of the name...). I'll do the stitching on Saturday.

Here's a video of how to use the Speedy Stitcher. There are other videos too if you search.
Need to make room for the mounting hardware (nuts?) for the parachute handle since I saw the dash fiberglass through the lower holes of the handle mount.
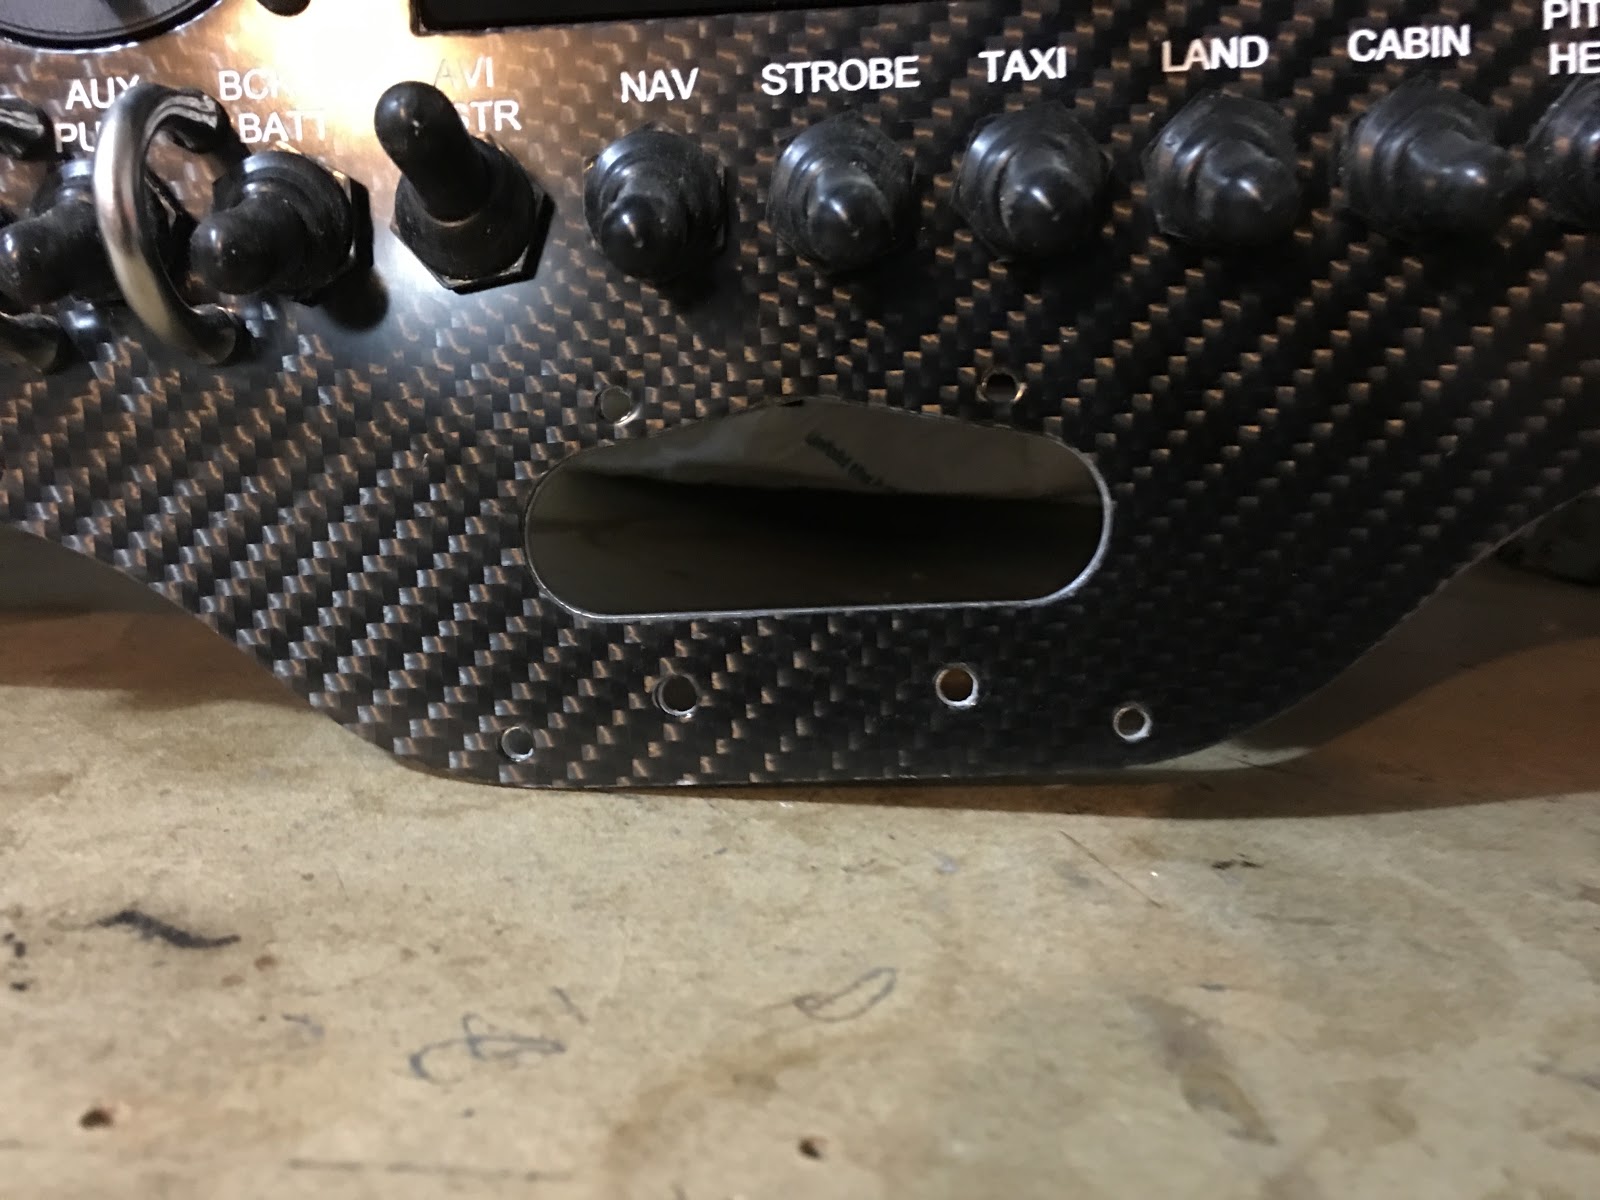
Used a fine saw and a file to cut out the dash in that area. I think this should be sufficient. I'll take some measurements to confirm before mounting the panel.

Got my black M4 screws from Belmetric and black nylon washers from Amazon. Fits! ;-)

Got my laser-etched stick grips from Midwest Sky Sports! :-) Mine are the Tosten CS-8's. Midwest orders them from Tosten to be made with a special plastic that Midwest can laser etch.
This is the pilot grip. The co-pilot grip has the left and right buttons swapped. I don't currently have the Ident wired, but I can add that.

This is the pilot grip. The co-pilot grip has the left and right buttons swapped. I don't currently have the Ident wired, but I can add that.

Monday, October 22, 2018
Quick half hour to finish putting in the rivnuts in the dash.
The 6 rivnuts I needed to add are done. Now I just need to wait for a few misc. parts to arrive before I can put the panel in the dash.
NOTE: If you need to add any lower rivnuts you should bend and hold the dash down to the position it will ultimately be in before you mark where the rivnut holes will be. Otherwise the holes won't be located correctly.

Sunday, October 21, 2018

1.5 hrs. on the panel mounting.
After drilling pilot holes in the center of the panel holes I removed the panel so I could drill out the holes to size for the M4 rivnuts.

I drilled them out to 5.5mm and then used my M4 sized chucking reamer to get them to size.

Did one rivnut and realized that you shouldn't put the rivnut over the leather as it's not long enough. That one won't move, but it's not what we want.

First I tried making a nice circle around the hole to remove the leather there, but it's so firmly glued down that that was impossible. So, I just cut out a larger rectangle and slowly shaved that down. Much better. I'll finish all these holes on Wednesday-ish... Tomorrow is my birthday, so it'll be family time, and the World Series, with my home team the Boston Red Sox starts Tuesday night. :-)

Saturday, October 20, 2018
2.5 hr on the panel/dash. After getting frustrated trying to get the mock-up panel in the dash and considering other factors (the dash needed 6 rivnuts installed that were missing in the panel), I decided to abandon that approach and just use the panel itself.
I quickly discovered that it would be way easier to install the panel in the dash now vs. trying to wrestle it into the cockpit to install it into an already installed dash. Drilling the holes, installing the rivnuts and general lining up and installing the panel is much easier on a bench than in the confines of the cockpit. The panel is quite heavy (and awkward with all the wiring) so I'm very glad to be doing it on the bench.
Going in upside-down first was easier. BTW, doing this alone is near impossible due to the weight and awkwardness of the panel - Thank you Kerry for the assist!!

Found that a few components needed some fiberglass cut away in order to fit.

Well done wiring! Thanks SteinAir!!

Ready to cut a couple of notches.

And on the other end, the ignition key needed some room.

Much better! Now the panel could be pushed into place.

Enough screws in to drill pilot holes for the missing rivnuts. Looking good! I just ordered black M4 buttonhead screws to use instead of the silver cheapo screws shown here (bought on Amazon - a mistake as they stripped very easily...). Better to buy from a place like Belmetric. Here's the link to the M4x25mm screws I bought to use here.

Resting with Crosby after working on the plane. ;-)

Subscribe to:
Posts (Atom)