Subcribe to our RSS feeds Join Us on Facebook Follow us on Twitter Add to Circles

Categories

Sunday, April 29, 2018

2 hrs. misc.

Looking into the box of goodies that came back with the panel.  Nicely done SteinAir!

Using the supplied (with the VP-X box) crossover Ethernet cable I connected it to my laptop...

...but, it's not seeing it... :-(  I've emailed SteinAir to see if they connected with the box this way or only via the Garmin G3X (which clearly does see the box).

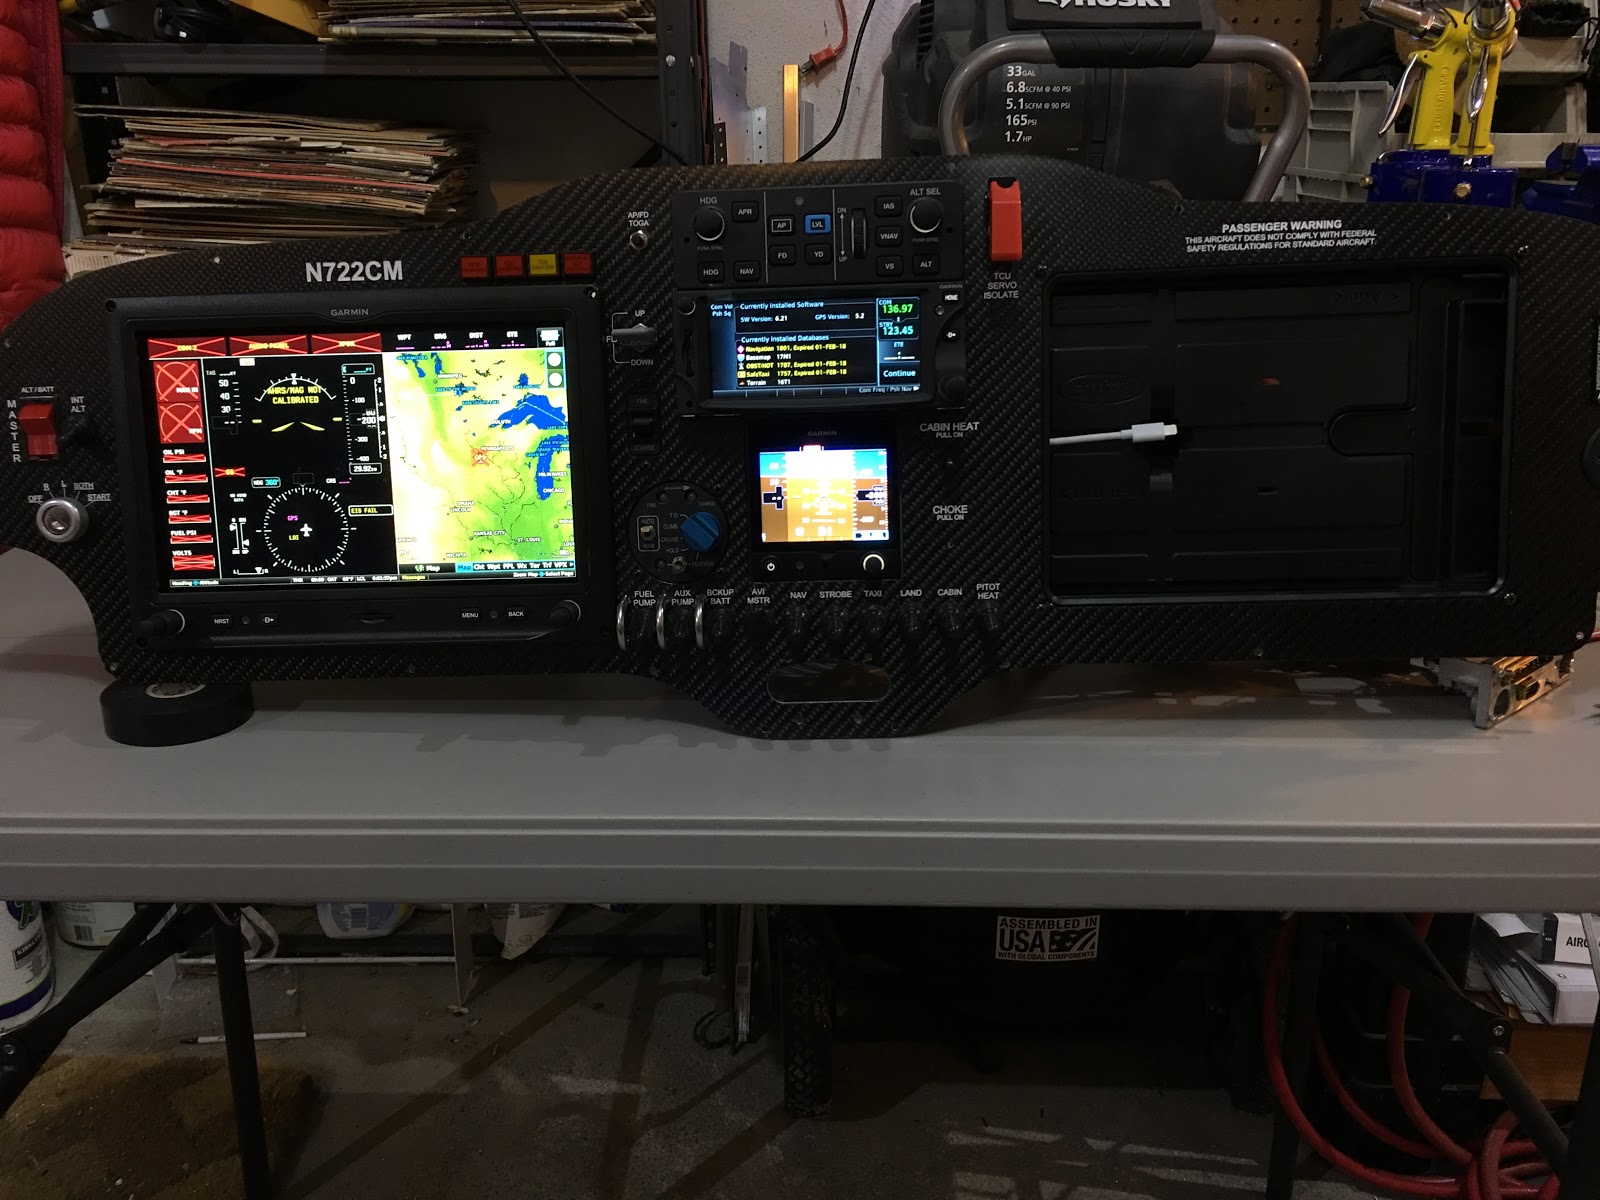
I don't get tired of playing with this.  I did some simple setup on the Garmin G3X.

The G3X sees the VP-X and the current and voltage measurement matches quite closely with what my desktop supply indicates.

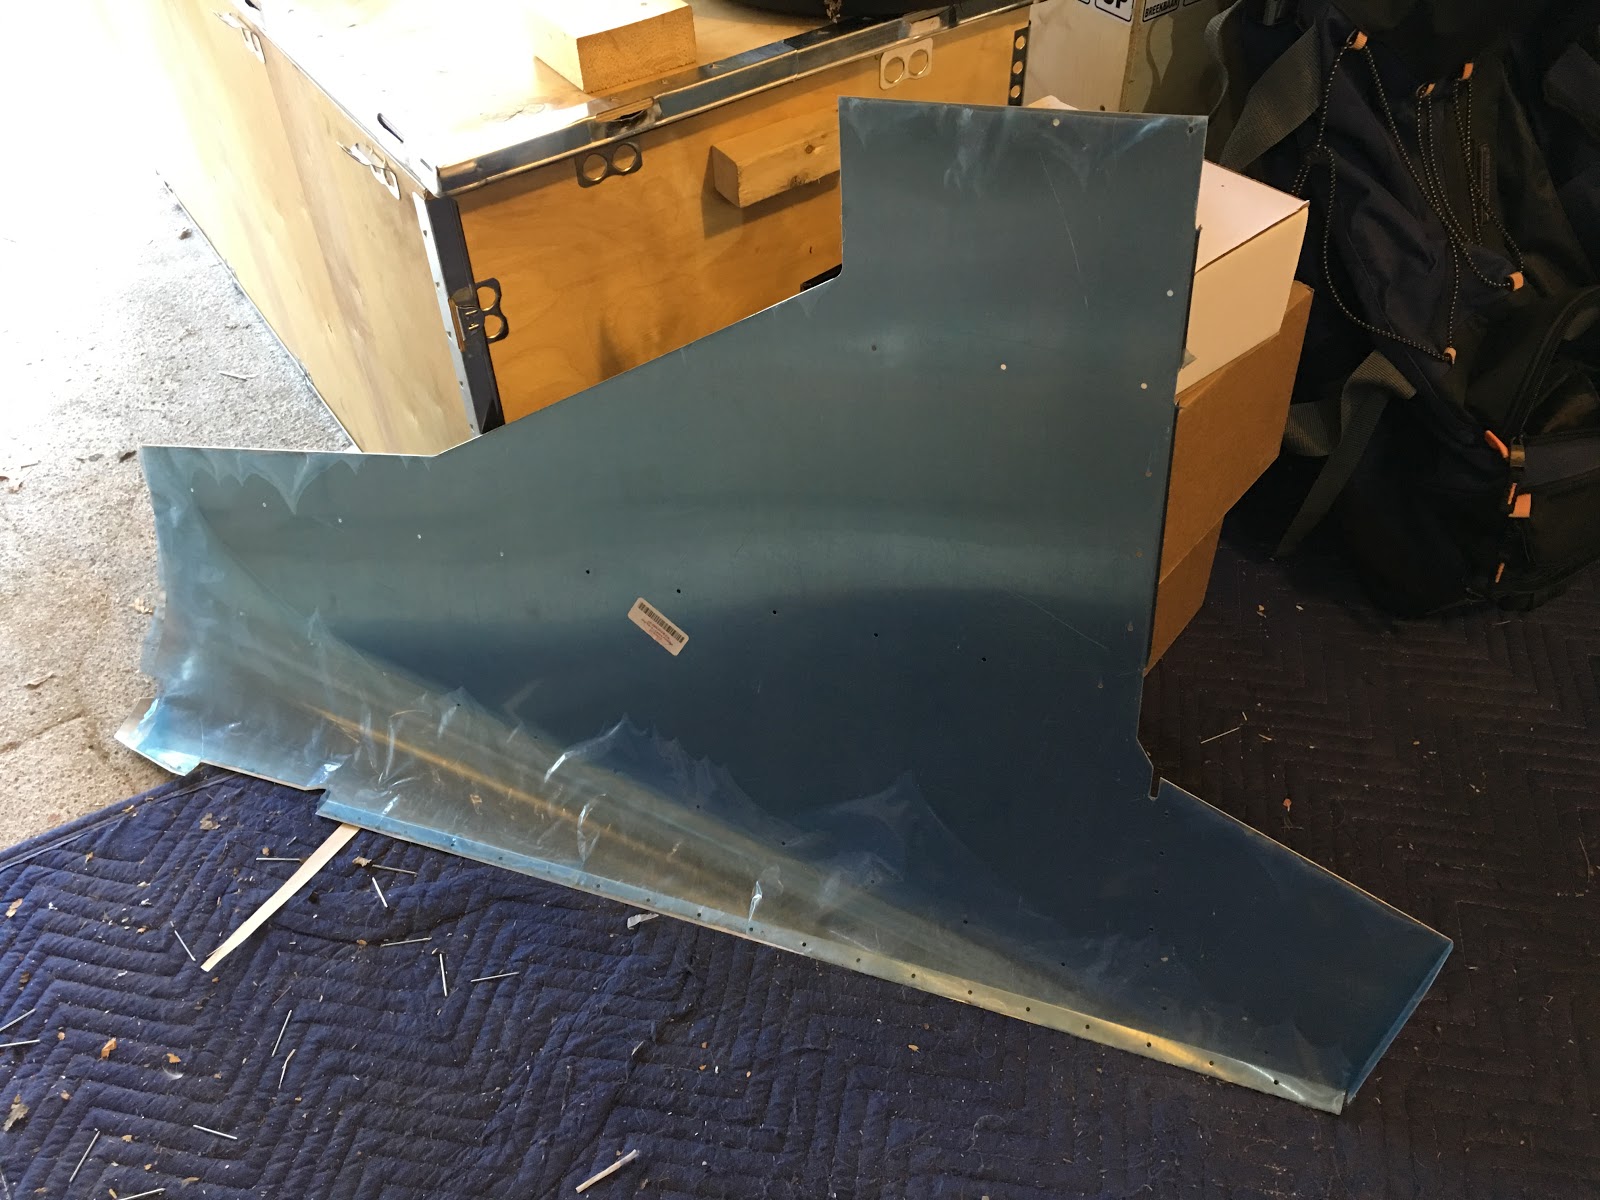
So the rear interior skin doesn't lie flat, so I've sent an email to TAF SA to ask what's what.  I don't think it should bulge out here and....

...here...

One of my nosewheel pushrods is missing a "thin nut."  Adding to the short list of hardware I need from TAF CA.

Looks like these covers go here...

Checking out the fitting of the nosewheel pushrods.  I want to get these in now while I still have easier access.

Saturday, April 28, 2018

2 hrs. mostly on interior skins.

2 rivets I forgot about (1 on each side)...  Yanking that cleco out was a bit hard....

...  Hey, metal is sharp... :-O

That flange (and some more probably) will have to come off as it blocks access to the wing bolts.  Meanwhile, many of the holes were not lining up for this front interior skin.

But, wait... I have a newer rev of that skin, maybe it's better...?

Nope, holes way off...  As compared to the older rev...

Still off, but better than the newer one.  New holes will have to be drilled to line up with the holes in the channels.  But, honestly, I have no idea how to locate those holes.   How do you do it??

Putting in the rear interior skin for a test fit (though this apparently goes in later).  Is it supposed to bulge out over that upright or should there be a slot cutout there?

Not sliding into place in the back, so some cutting will be needed there too...

Friday, April 27, 2018

1 hr. riveting the inner seat rail and center console in place.

Standing inside.

Wife came in to hand me a tool and took a pic. ;-)  I have to admit, it's not easy to sit in there for any length of time (I'm sure it would be better if the seats were in...).

And the inner seat rail and center console are riveted in!  I just noticed that the rail is labeled "3R"...  Well, this is the left side and that rail is correctly located, so it looks like it was mislabeled.  It happens...

Since it took me 10 minutes to figure out how to put this cover on, I figured I'd make you a video on how it's done.

Wednesday, April 25, 2018

1 hr. misc.

Put a piece of soundproofing above where the reel goes.

I thought getting a piece in this corner was going to be tough, but it wasn't that bad.

Before committing to riveting the center console I wanted to make sure there wasn't any cleco's under it.  There was, but I was able to take it out without having to remove the console.

This cleco plier was essential for removing it from above.  So, I think I'm ready to rivet the console and inner seat rails in place (they're actually mostly already riveted).  Any objections? ;-)

Tuesday, April 24, 2018

Just a quick half hour un-boxing my remote panel boxes.

Got out my remote COM, audio panel, backup battery, switch box and in the lower left the transponder/ADS-B.  I'll plug them in this week and power up again.  Maybe I'll start going through whatever setup is possible now.  Also start to plan how I'm going to hang those on the sub-panel.

Monday, April 23, 2018

.5 hrs wiring up and powering up my panel!

Needed to quickly ground a whole bunch of wires - this was the fastest way I could think to do it.  Wrap all the stripped ends around a rod and tape it up.  Worked like a champ. ;-)

Power and ground connected to my supply.

Powered up it draws about 4A.  This doesn't include the remote boxes which I haven't connected yet.  Maybe I'll try that next weekend.

And it works! :-)

Cut the power and the Garmin G5 wants to keep going.

It's Alive!!!! :-D  Hehe...

Sunday, April 22, 2018

5 hrs. finishing reaming out parachute bolt holes (ugh) and starting install of shoulder seat belt reels.  Also put on a couple more pieces of soundproofing.

What should have been a 10 minute job was, for me, a 3 hour job.  Because the hole wasn't present in my rear spar and that material was thick, it took a very long time to drill through and ream it so the AN6 bolt would go through.  And as you can see here, the channel is right up against the nut, so tightening it will be a bit difficult.

The reel comes like the one on top.  But, the bolt needs to face the other way (like the photo).  The reel on the right has been fixed.

Taking out the belt so it can be reversed and threaded though the guides in the fuselage.

Making sure it's oriented correctly before putting it back on the reel.

Re-threading it on the reel.

Reversed and threaded through the guides.

Down in place, but I won't put the nut on now because I noticed in the manual's photos that the parachute is bolted in place first before attaching the reel.  That makes sense because it would be difficult to put that bolt in place with the reel already in place.  So, the canopy will go on first and the parachute cables attached before bolting the reel.

Thursday, April 19, 2018

1 disappointing hr...

This is a rear view of the where the rear parachute cable bolt goes through.  Notice it's not drilled out.  Wish I knew the purpose of this hole before I had the side skins on because it's now MUCH harder to drill this out and ream to size.  After this picture was taken I started to drill it out...  It's going to take a while to get it right without over drilling it.  I've bought various drill accessories to make this easier and so far I still don't have the right combination of tools to work in this tight space on a hole of that size.  I'm going to update my Task List so that this is way earlier in the process, so other builders don't have this difficulty.

Sunday, April 15, 2018

3 hr. soundproofing, moving the panel and contemplating my navel...

More soundproofing done (on both sides).  Will hold off on finishing it until I get the seat belt reel installed and the parachute bolt hole reamed out to size.

Installed brackets on the board so it doesn't slide back when I'm sitting on it.

Looking good.  Despite being an EE, I can't say I'm looking forward to connecting all those wires to the panel...

Moved the panel to a new table I bought (to clear off my main work bench) and started to connect up the VP-X.  Need to confirm how I connect my power supply before I do it wrong and fry something...  I know I have to connect power to the lug in the upper right and my panel builder at Stein say I have to strip all those black wires on the left and connect all those to ground.  But, what about those white wires that are bundled with them?  And there's one that has a connector on it, what's that for?  EDIT: I heard back from Mike at SteinAir - The white wires are also ground and the one with the connector is also ground, he just forgot to clip that off.

Friday, April 13, 2018

2.5 hrs. finishing the rivets underneath and more soundproofing...

Finished all the rivets underneath as I was told by the factory that it was OK to do that (I asked if any of the wing skins attach here and the answer was no).  As I mentioned previously the wing root plate flange was supposed to be tucked into the fuselage, but they told me it doesn't matter.

Tied up the wiring to get it out of the way.


That bottom piece of soundproofing... Another test of patience... :-O

Both sides all done forward of the spar.  Will finish it all off tomorrow.

Wednesday, April 11, 2018

1.5 hrs on soundproofing...  I can't really do this work for long periods of time...

Wanted it to go nicely around the duct, so I tried this.

Worked out well.  I also want to put the material over the duct, but I need to see how the OAT probe, it's ground strap and the inner skin will attach first.