Subcribe to our RSS feeds Join Us on Facebook Follow us on Twitter Add to Circles

Categories

Monday, July 31, 2017

Great time at Oshkosh!  Hung out with lots of Slingers, including Bob and his wife Joan.  Also got some new Sling Bling (a new hat).

Met and had a long conversation with Stein Bruch of SteinAir.com.  I'm definitely going to go with them to build my panel.  They're the big kahuna of panel building, and there's a reason:  They know what they're talking about and do a great job.  He said that they have a lead time right now of about 6 months from first quote to shipping the panel, so I'm starting to put together all the info they need to quote me the panel.  Once I'm done with that info I will post it here as it will be useful for other builders.

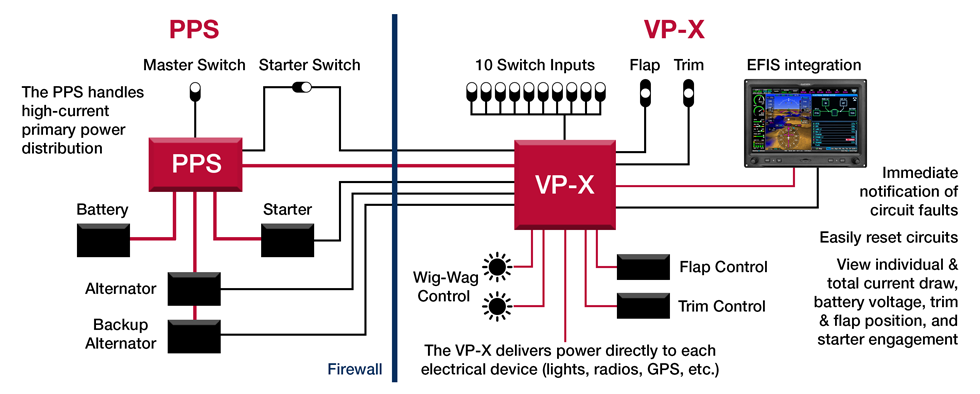
Stein advised me to not go with the first generation of the PPS from Vertical Power.  Very expensive ($1500!) and not clear that it's a big win over the $100 worth of traditional parts it would be replacing.  He did though totally endorse using the Vertical Power VP-X Pro which I already own.  They will completely wire that up as part of the panel build.

Bought my antennas and magnetometer from Aircraft Spruce while I was there, so those should be arriving in a couple of days.

Also, I was advised by TAF to get my order in for the Rotax 915 now...  They've already got a list of builders that want it.

Here's some pics from the show:

Me and some friends.  All smiles when near airplanes!

"Bombing run" as part of the night airshow.
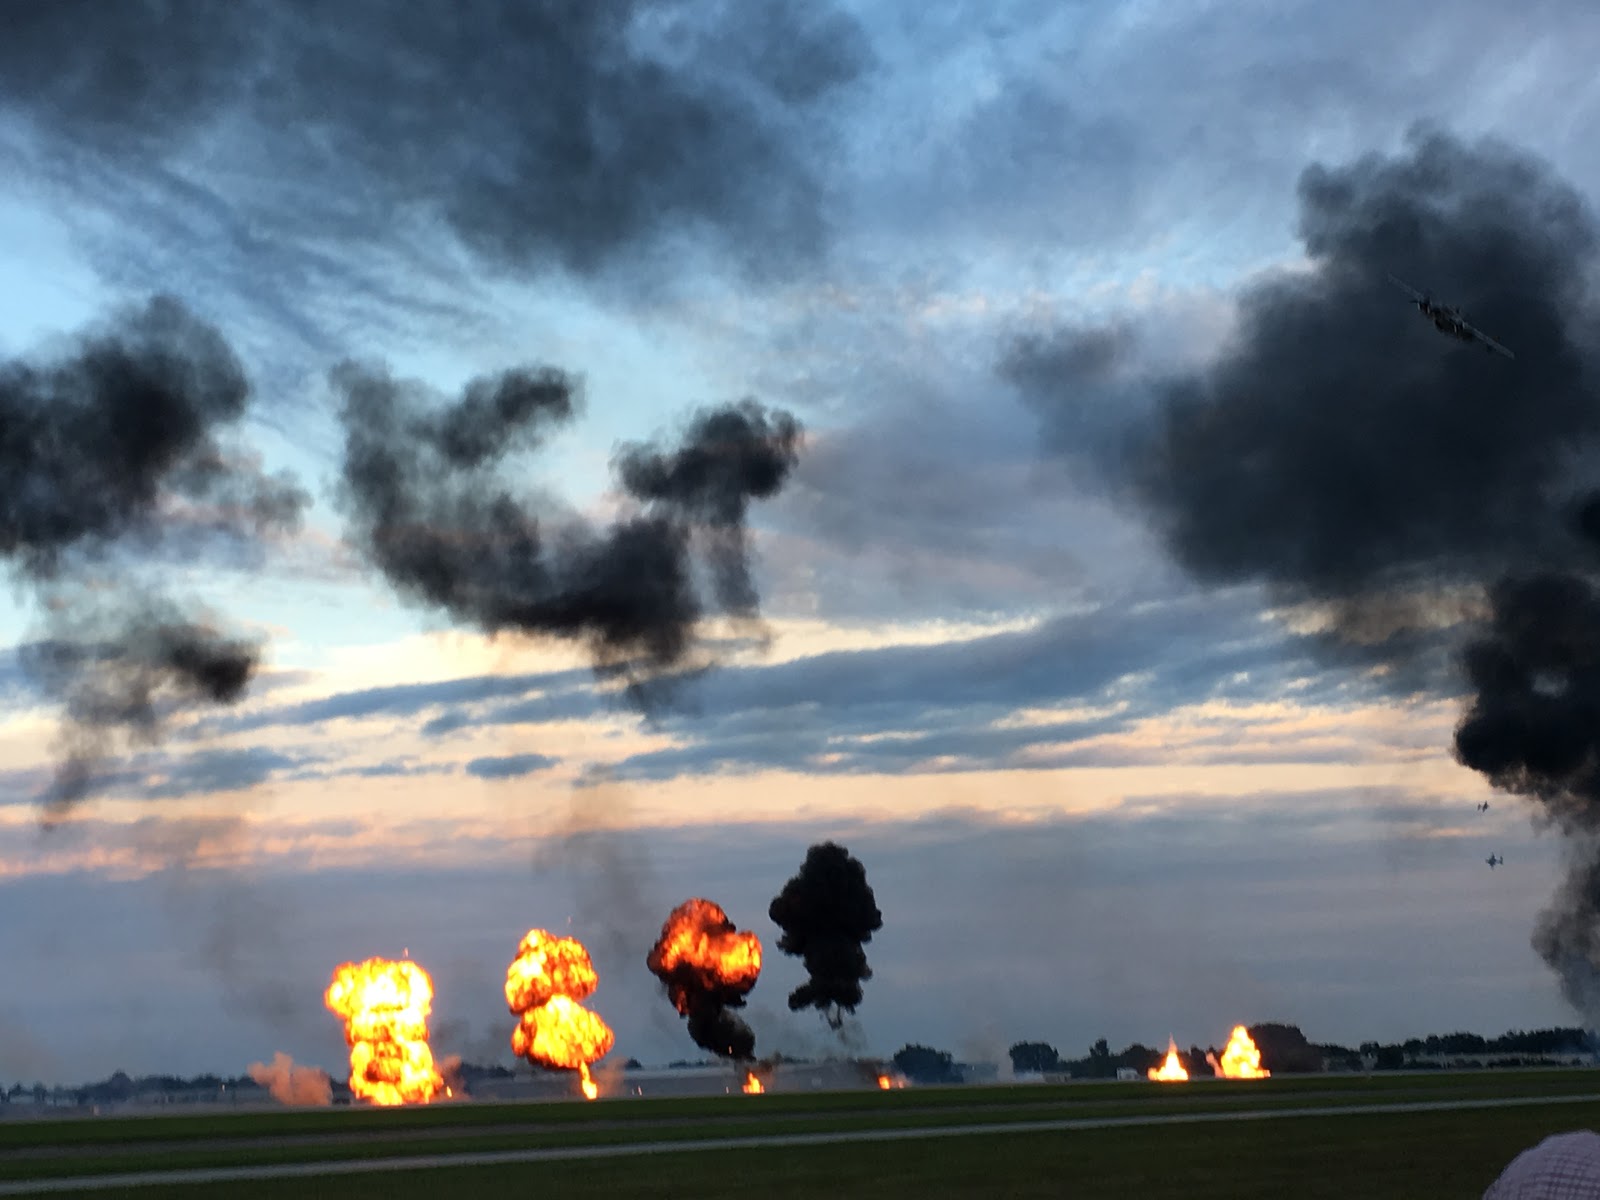
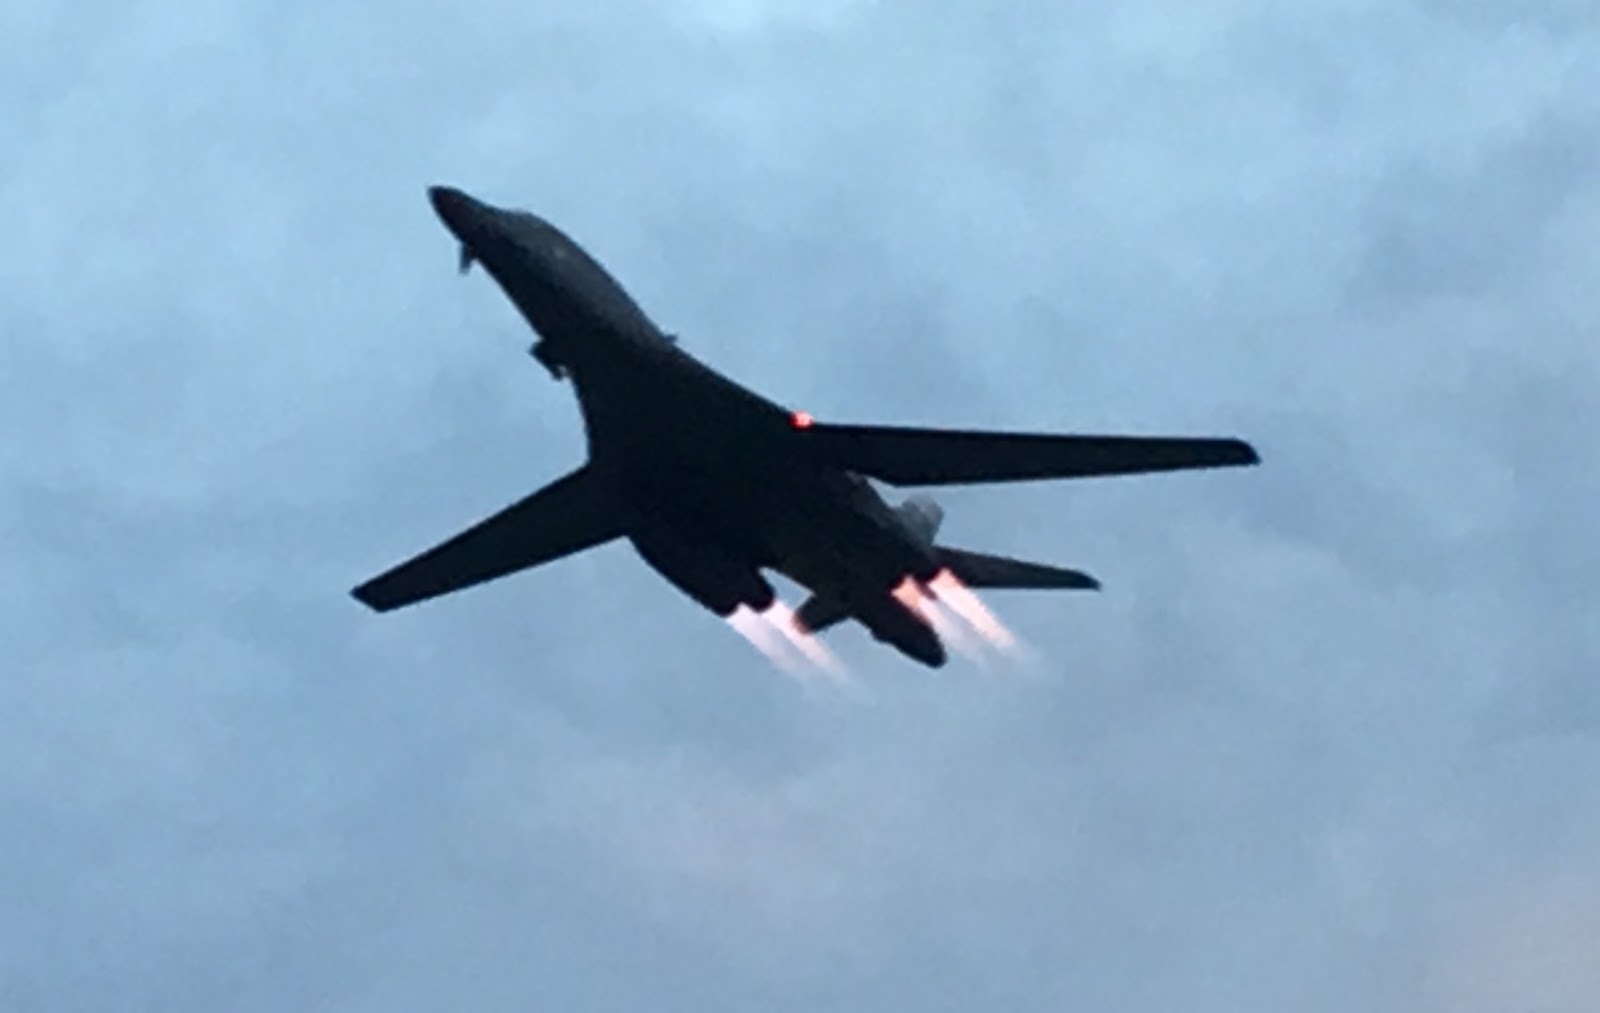
B-2B screaming by!!

:-)

Beech Staggerwing.

Me and friend Steve sitting in the Sling 4.

In the Garmin booth, a view of the back of a G3X panel.

External GPS antenna.

Blue Angels!

One of my favorite stops in Oshkosh!  Leon's Frozen Custard. :-b

Monday, July 24, 2017

This new device, the Primary Power System from Vertical Power looks very interesting.  I like simple!  I already have the VP-X, so this would fit very nicely.

I'll check it out at OSH and let you all know.

The Vertical Power System

Sunday, July 23, 2017

Too much other stuff going on the last several days for me to work on the plane... :-(  Also, I've been figuring out what I need to get at Oshkosh for the build.  So far, it's mostly antennas (COM's ADS-B, etc.), magnetometer, some wiring, connectors of various sorts and crimper(s).

If you look at my Task List you'll see I really need to get most of the center fuselage wiring done, and antenna backing plates installed before I feel I can move on to putting on the side skins and top rear skin and really start to move ahead quicker.

Leave for Oshkosh in 3 days!! :-)

Sunday, July 16, 2017

1 hr. Installing 2 BNC connectors for COM1 and COM2.  I show the entire procedure to install the connector below.

Mark off 3/8" and 3/4" from the end and carefully take off the insulation from the 3/8" point.  I use sharp diagonal cutters for this by putting them around the cable applying a little pressure and rotating it around until you're just through.

Now clip back the shielding nice and cleanly all the way to the outer insulation.

Now carefully cut off the outer insulation at the 3/4" point.

Cut off the inner insulation about 3/32" away from the shield point.  You will have to shorten the inner wire to fit in the next step, and that's already shown here.

Put the inner pin on the exposed wire so that it seats against the inner insulation.  Like I mentioned above I had to shorten the wire to allow the pin to fully seat.

This shows where the pin will sit when you crimp it.  The wire, of course, must be in the pin when you do that.  The arrow shows the section you'll use for the outer sleeve crimping later.

Pin crimped in place and tug tested.   Now the outer sleeve is slid over the cable.

Now take the connector and push it on to the cable until the pin audibly clicks in place.  At this point you should use a ohmmeter to make sure the inner pin is isolated from the outer metal.

Slide the sleeve into place and....

Crimp!  Crimp it twice at different angles to secure.  Tug test and one last ohmmeter test and you're done!

Saturday, July 15, 2017

2 hrs. routing some wires through and investigating wiring to be done.

Starting to route wires up to the front.  I won't be tying these down for awhile as I'll most certainly be adding more wires.

Routing through.

...and up to the front.

Sunday, July 9, 2017

1 hr (really less) doing the right inside seat rail.

Looking at the 4.8mm holes on the right inside rail I could see the holes were fairly far off.  Of course this made me worry that the right seat would be too wide to fit between the rails, but a quick measurement assured me that it will fit just fine.  So, I just drilled and reamed the holes out.

Done.  Well, except for the small holes at the back of the rail.  I'm holding off on those since I'm not sure yet if anything attaches to them from underneath.

Saturday, July 8, 2017

4 hrs. on misc. things.

Time to fabricate a new console cover hinge.

Cut to length.

I've never fabricated a hinge before, so I discovered you need to crimp the last section on each end to prevent the rod from slipping out.

The 3 holes that are for the screws into the cover were perfectly placed so I copied those holes.

They needed to be countersunk and I found that my deburring tool was more than up to the job.

Nice!  Now for the 4 holes on the other side.

Line up with the holes on the console.

Marked and center punched, so it's ready to be drilled with a small pilot-sized drill bit.

Sized and reamed, perfect fit!

Riveted in place...  I was concerned that the cover wouldn't line up once I installed the hinge and closed it...

But, it's perfect!  The velcro piece that attaches to the console has some stickiness to it, but I found it wasn't nearly enough to hold it down when trying to open the cover, so I used the Barge glue to attach it and that stuff sticks!

Got my new rear seat hinge, so it was time to finish the rear seat.

A whole bunch of rivets to attach the hinge.

Got my missing set of the rear seat latch parts, so it was time to work on that.

In place and ready to rivet.

One side didn't have a bunch of holes, so I drilled those out.

Slight difference in the hole pitch.  I'll figure this out later since I'm not quite sure of the layering of parts with respect to the seat covering.

Console done, so it's back in place.

Time to rivet in place CF-PLT-015 with countersunk rivets.

Couldn't get the rivet gun straight in, so I use this wedge to rivet here.  You need to pre-bend the mandrel of course.

Nice!  Left inside rail done.  I'll do the right side next.  The outside rails I've been advised by the factory to hold off on until the seats are ready to be fitted.


Friday, July 7, 2017

Several missing parts arrived today!  Now I can finish up several assemblies.  Hope to work for several hours on the plane this weekend.

Finally got my rudder tip, which I never had.  Rear seat hinge, blank hinge to use for the center console and rear seat latch related parts.

Thursday, July 6, 2017

Wanted to let people know that the factory has changed the official location of the static port on the Sling 4 (don't know about the 2).  They say it's fine if it's in the old location, just make sure to do the calibration (though it begs the question of why it was moved).  Here is the new location, which is further back from the previous location:


Monday, July 3, 2017

2 hrs. adjusting the static port line routing and starting work on routing the wiring through the center fuselage.

The factory mentioned to be careful about moisture in the static line and that made me think it wasn't the best arrangement to have the fitting angled down.

Better to do it this way so that moisture can't easily get into the lines.  Will tie it down later.

Was thinking of fabricating the backing plate for the COM1 antenna, but the instructions seem to indicate that it comes with a backing plate, so I'll wait to get that at Oshkosh and see if that is usable.

Wiring/routing diagram from the factory.

This edge grommet was way too stiff to try and put it in this hole...

This softer edge grommet worked much better.

You can see several of them in place in this pic.

Using this to allow for wire ties to be riveted to the aluminum.

Wire wrap goes through like this.

Hole for the cable tie base.

Riveted in place.

Putting on better heat shrink tubing for labeling the wires.  Tomorrow I'll start routing these forward!