Subcribe to our RSS feeds Join Us on Facebook Follow us on Twitter Add to Circles

Categories

Wednesday, September 30, 2015

2 hrs. installing the rear support channel to the rear spar and installing the piece to hold up the landing light wires.

Rear support channel cleco'ed into place.

And it's done!

Drilled out the rivets for installing the "wire holder."

Marked the holes, center punched it and drilled it out (smaller than the rivet so that I would use the chucking reamer bit to final size it).

And it's in!

NEXT SESSION:
  1. Start the wiring after installing all the grommets and any necessary edge grommets (is that what it's called?).
  2. Flip the wing over to prepare to install the bottom skins!

Tuesday, September 29, 2015

4.5 hours riveting (and bolting) the step ribs.

Started from the right side of the step rib group so that I could move the ones to the left over to maximize the room I had to rivet.  Even with that extra room, some of the rivets needed to be hand riveted.  A lot of force is required to hand rivet - makes for a very loud snap as the mandrel is pulled and snapped off!

The top rivet connecting each of the step ribs was too tight to put a rivet gun straight in, so I bent the rivet mandrel and used a homemade adapter to ensure the rivet was driven flat.

This is what that looked like just before riveting it.  With it bent out like that it was easy to slide the rivet gun over the mandrel.

A little bit clearer view.

And they are all riveted!!

NEXT SESSION:
  1. Rivet the rear support channel to the rear spar.
  2. Prepare for wiring...

Monday, September 28, 2015

1 hr fabricating the piece to hold the landing light wiring as it goes through the cutout in the main spar.  This will prevent the wiring from just laying on the bottom wing skin, which you don't want.

Using a spare piece of aluminum to cut out the pieces (one for each wing).

Using my trusty Andy Snips to cut out the pieces.

Finished piece in place (I buffed it smooth and rounded the corners using the ScotchBrite wheel on my bench grinder).  Only need to drill out the rivets from the spar, mark and drill out the holes in the piece matching the holes in the spar and rivet in place.

Saturday, September 26, 2015

2. 5 hrs riveting wing ribs to the spars!  Then spent .5 hrs cleaning up my workspace.

Starting to rivet the ribs to the rear spar!  Yay!  Finally!!  Notice I'm leaving open holes for the rear support channel.

One of the ribs didn't have holes where the the attachment connector did (top and bottom).  Used my trusty tight-fit tools angle drill attachment to get in there.

The assembly for the landing lights - assembled and attached!  Notice I left one hole open where the rib attaches to the main spar.  Those holes weren't well aligned so the holes in the spar were somewhat elongated.  With that slightly weakened attachment I decided to drill out one hole to put in a 4.8mm rivet instead of the 4mm rivet for added strength.  I did this for another rib too.

The backside of a rib after I enlarged the hole and riveted the 4.8mm rivet.  2nd from the top.

My cleaned up workspace.  Makes me happy (and more efficient) when my workspace is clean and organized.  :-)

All the ribs are riveted except the step ribs...

NEXT SESSION:
  1. Rivet the step ribs
  2. Rivet the rear support channel to the rear spar.

Wednesday, September 23, 2015

2 hrs. starting to ream out the holes to attach the ribs to the spars - finally!

Rechecked the rib alignments with my jumbo straightedge.  Looked good, so starting using my 4mm rivet-sized chucking reamer on all the rib holes.

NEXT SESSION:

  1. Start riveting the ribs to the spars!!
  2. Fellow builder Gordon recommended that I clear away much of the sealant around the fuel drain to all free flow of water and debris out of the drain.  With so much sealant, it could block the flow.

Monday, September 21, 2015

2 hrs. assembling both fuel senders and installing the one for the right tank.

Put the assembly through the plate and applied Loctite 277 (though I noticed the instructions didn't mention adding Loctite for this step, I don't think there's any harm).

Added the washers and bolts and tightened down, a lot...  Had to compress the o-ring into the countersunk hole.

Finished the assembly on this side of the plate.

Connected the float and cork gasket.

Installed into the tank!  Lots of tightening required of the bolts (Loctite 277 applied!).  Could have kept going on those bolts because they just keep compressing the cork gasket, but stopped when it seemed reasonably tight and the cork somewhat compressed.  Didn't want to go too far.

The bolt side.

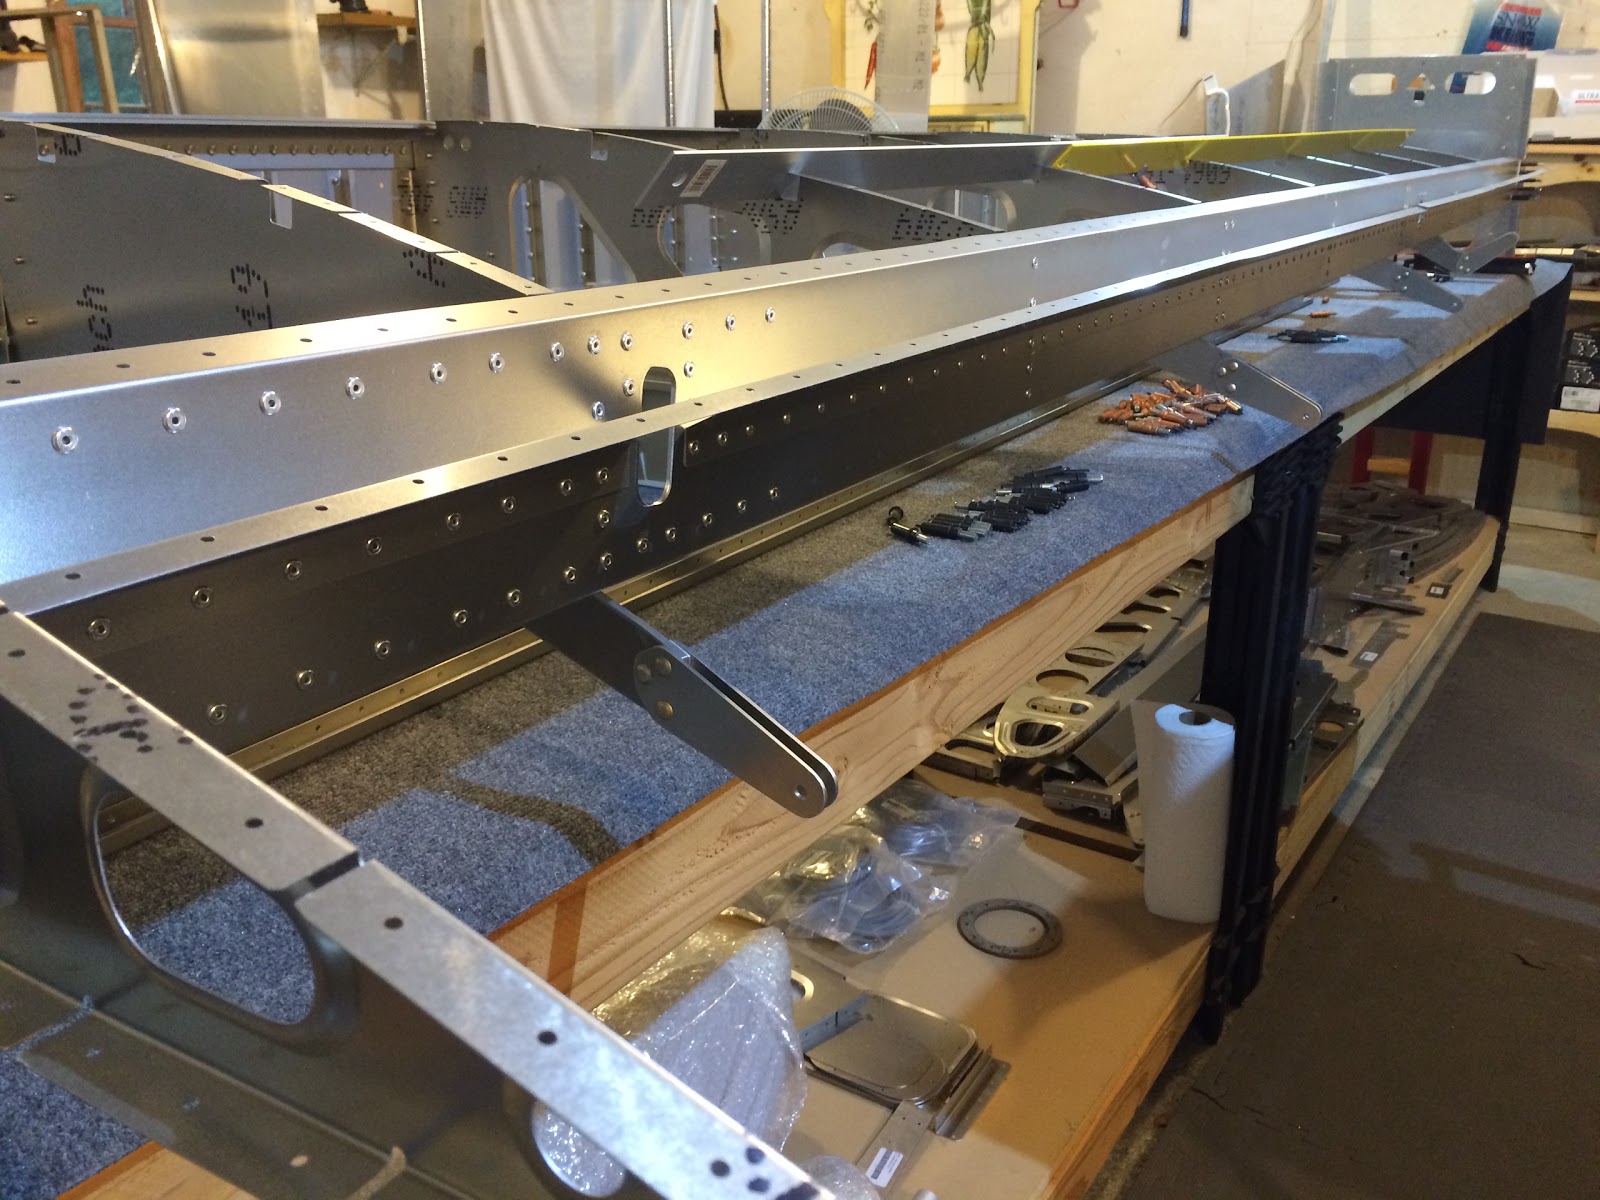
Bought a 6' ruler today and connected my 4' ruler to end up with a very long straight edge to really check the evenness of the ribs.  Especially the leading edge since I've heard of others having problems with unevenness across the leading edge ribs.

NEXT SESSION:
  1. Return to work on the right wing.  Time to really make progress on the wing!  Want to get those ribs riveted to the spars.

Sunday, September 20, 2015

4 hrs. working on the fuel tanks...  Drain and fittings....

While I'm mixing up sealant I might as well do all the fittings for the left tank.  Here I'm making sure I'll be installing all the right parts in the right orientations.  Also formed the hold-down strap for the left tank.  With much of the detail work done for the left tank, that assembly should go much quicker than for the right tank.

Applied Loctite 577 to the fittings for the right tank and installed the parts.  Here's the breather tube assembly.

Left tank fittings sealed and strap riveted down.

Fuel drain installed!

With the drain plug installed (applied Loctite 577 to the treads of the plug).

The flip-side.  Messy, but it won't leak.

NEXT SESSION:

  1. Didn't get to putting in the fuel sender assembly for the right tank, so that's the next thing.

Saturday, September 19, 2015

Spent 2 hours assembling a mobile tool chest.  I mentioned before that I wanted to be more organized with all the small parts, so I got a cheapo Harbor Freight tool chest ($99 on sale!) and a bunch of storage bins.

I'll put the remaining wing parts in here, but the big load will come when the fuselage sub-kit arrives within the next 2 weeks.

1.5 hrs. on the fuel tank.  Not easy to get back into it after 2 weeks away...  Spent half an hour just figuring out what to do...

Had to drill out to 4mm the holes for the fuel drain.  Notice how close the new holes come to the drain hole.  Not concerned since these aren't structural - they just need to be sealed well.  But, just be careful if you're doing this drilling to angle the reamer in such a way as to not breach between the rivet hole and the large hole.  I wasn't really paying attention as I didn't realize how close it was going to be.

Getting ready to bend the strap for holding the fuel pickup down.

Measuring where the initial bend will be.

Using a drill bit about the same size as the pickup to bend around and needle nose pliers I got it.

In place.

A new thing I'm going to be putting at the end of these blog entries is a "NEXT SESSION" section.  It's always a good idea to plan your next session so you're not wasting time figuring it out at the beginning of that session.

NEXT SESSION
  1. Seal and rivet the drain and the strap.  Must remember to put Loctite on the threads for the pickup fitting!
  2. Put in place the fuel sender assembly.
  3. Return to work on the right wing.

Wednesday, September 2, 2015

Will be away for the next 2 weeks, so I won't have any updates for that period.  So, I'll leave you with a photo of my dog before I go. ;-)