Subcribe to our RSS feeds Join Us on Facebook Follow us on Twitter Add to Circles

Categories

Sunday, October 30, 2016

Since the manual isn't clear on the fuselage side skin spacer and gusset placement, here's the info.

From the factory

Also check out Peter's log entry for the bigger view of where they all go.

Also, I've updated the Links page as there are some new builders with blogs (if you're out there building a Sling and I don't have a link to your blog, please let me know!).  There's also a new Sling builders page on Facebook that is linked there.

Saturday, October 29, 2016

1 hr. putting in some more soundproofing and priming some parts.

Some more soundproofing in.

These spacers and gussets go into the side walls of the center fuselage.

Friday, October 28, 2016

1 hr. fixing the flap motor bolt issue and peeling plastic...  Since I'm still waiting for some parts from SA, I think I'll put in more soundproofing tomorrow and prep and prime some parts.

Still trying to figure out where I'm going to put my transponder/ADS-B antenna...  Maybe just behind the gear or right behind the rear seats in the rear fuselage.  For the 2nd option I need to understand if there's any issue with proximity to the Garmin magnetometer.

It wasn't that the bolt isn't long enough, it's that you're only supposed to use 3 washers...  It would have helped if I read the instructions (thanks Gordon!)...  No washer at the bolt end.  With that change the cotter pin went in no problem.

Peeling plastic off the front side skins.

Thursday, October 27, 2016

With permission from the factory I've posted nearly 700 photos of Sling 4's (mostly) under construction.  I've divided them up so they're easier to browse.  I've found these to be very useful, so I'd guess you will too.

See above for the new "Factory Photos" menu item.  Enjoy!

BTW, if anybody has some useful build photos they'd like to share, please forward to me and I'll add them.

Wednesday, October 26, 2016

1 hr. center fuselage.

Since I'm missing some parts (rudder pedal bushings among some other things) it kind of discourages me from making much progress.  I'm hoping parts arrive from the factory soon...

Another thing sucking down time is that I'm working on a new aviation safety related startup.  You'll be hearing more about that sometime in the next month or so.

In order to get restarted I'll be going over and extensively updating my Task List tomorrow morning.

My method to put washers in where you can't hold them.  Worked perfectly.

But.... even using thin washers the bolt really isn't long enough for the purpose - I can't quite get the cotter pin in because the hole is not completely uncovered.  If I tightened the bolt anymore it would be too tight.  So, I need to order a longer bolt (probably AN5-15 or 16)...  Kind of annoying because I just did two orders with Aircraft Spruce so I'll have to pay another shipping cost...

Even though it didn't have the cotter pin in, I could still test the motor and linkages.


Monday, October 24, 2016

I'm planning to use the Garmin GTX 45R for my combo transponder/ADS-B In/Out solution along with the RAMI AV-74 blade antenna and was wondering if anybody building a 4 had given any consideration to where to locate that antenna?  Since I'm installing soundproofing, and considering how difficult it is to remove, I'd like to plan now as to where it will be so I can do the right thing now with regards to any installation brackets, holes and the soundproofing.

I'm assuming the COM2 RAMI AV-17 antenna will be in the bottom of the rear fuselage, so I don't need to worry about soundproofing issues.  Anybody doing things differently?

 Thanks!

Sunday, October 23, 2016

3 hrs. center fuselage

Test fit of the joystick assembly showed that it was too tight, so it was time to enlarge the hole.

This is how I enlarge the hole.  Worked well with a subsequent test showing easy twisting.

I saw that a couple of other people had enlarged this opening to allow the rudder cables to pass through with more clearance.  This is CHL-40.  I widened each side by 6mm.  Here it's marked.

Used snips to cut away the metal.

Cut, filed and ScotchBrited...  Looks good.

Protected with edge grommet.

I had mentioned the other day that I had over-tightened this, so I pulled the cotter pin, loosened the nut by one "opening" and reinserted a new cotter pin.  Much better.

Saturday, October 22, 2016

2 hrs. center fuselage

Studying the factory photo of the interior I determined that I could rivet the last 3 rivets of the floor.  See the upper right of this photo.  All the other holes will wait until I'm putting in the interior skin.

Put in some more soundproofing.

Starting to prep parts for the center fuselage side skin assembly.

Thursday, October 20, 2016

2 hrs. center fuselage.

Gathering the parts for the rudder pedal assembly.

Hmmm....  Notice anything missing?....  There should be bushings already installed on the rudder pedal tubes since it's all welded together.  Me thinks I have a bad set... :-/

With work stopped on the rudder pedals I turned my attention to the flap motor assembly.  You should put the bolt/washers/castle nut on before riveting it to the center console assembly.

The proper way to put the cotter pin through.  I think I might have made it too tight though since it does need to move a bit when operating the flaps.

Looking through Peter's factory photos I found this one, which shows you it's best to hold off on riveting some of the outer rivets on the front floor.

Wednesday, October 19, 2016

2 hrs. forward center fuselage work.

A whole bunch more rivnuts installed.

Starting to rivet the skin to the assembly.  For the outside lines of rivets you should draw lines to understand which holes can be riveted now and which are used later to rivet the inner side skins (thanks Gordon!).  I only riveted the "rivet now" line until the crossover point, because I wasn't absolutely sure if it was ok to rivet those.  I'll check my trove of factory photos (thanks PeterC!) to see if it's OK to rivet more.

Another view.

All cleco'ed up and ready for riveting.

Most are done.

Tuesday, October 18, 2016

1.5 hr. center fuselage misc.

Put some more soundproofing behind the gear mounting channel.

Removed the joystick mounting hardware so I could ream out the 2 rivnut holes in the angle piece seen here between the main spar and the floor.

I put a rivnut in the upper hole (not yet in this photo), but held off on putting it the lower one since that exact alignment won't be determined until the floor angle is precisely set. 

Put a whole bunch more rivnuts in...  Today was a rivnutty day. ;-)

Monday, October 17, 2016

3 hrs. on the center fuselage.

Put in some rivnuts on the top of the ribs.  I think those other holes get rivnuts, but I need to confirm.
 
Time to put on the soundproofing underneath the skin.  Cut to about the right size (easier to work with then the whole roll hanging off).  Ready to make the first cut.

First cut done, now ready to make the second cut.  Remember that these pieces must fit completely within the channel outlines.

Making my way across.  Not doing the center section since wires may go through there.

All ready to go!

Now to make sure I'm not covering any rivet holes.

I decided my application method would be to double check the fit on the bottom (clear of the channels on all sides) and then carefully centering it between the rivet holes on the bottom of the top skin.  Here's the first piece applied.  I flipped it over into place to check the fit and it was perfect.

This second piece needed a section cut out to provide for the rivet holes.

All the pieces applied!

Flipped over and back on.  Perfect!

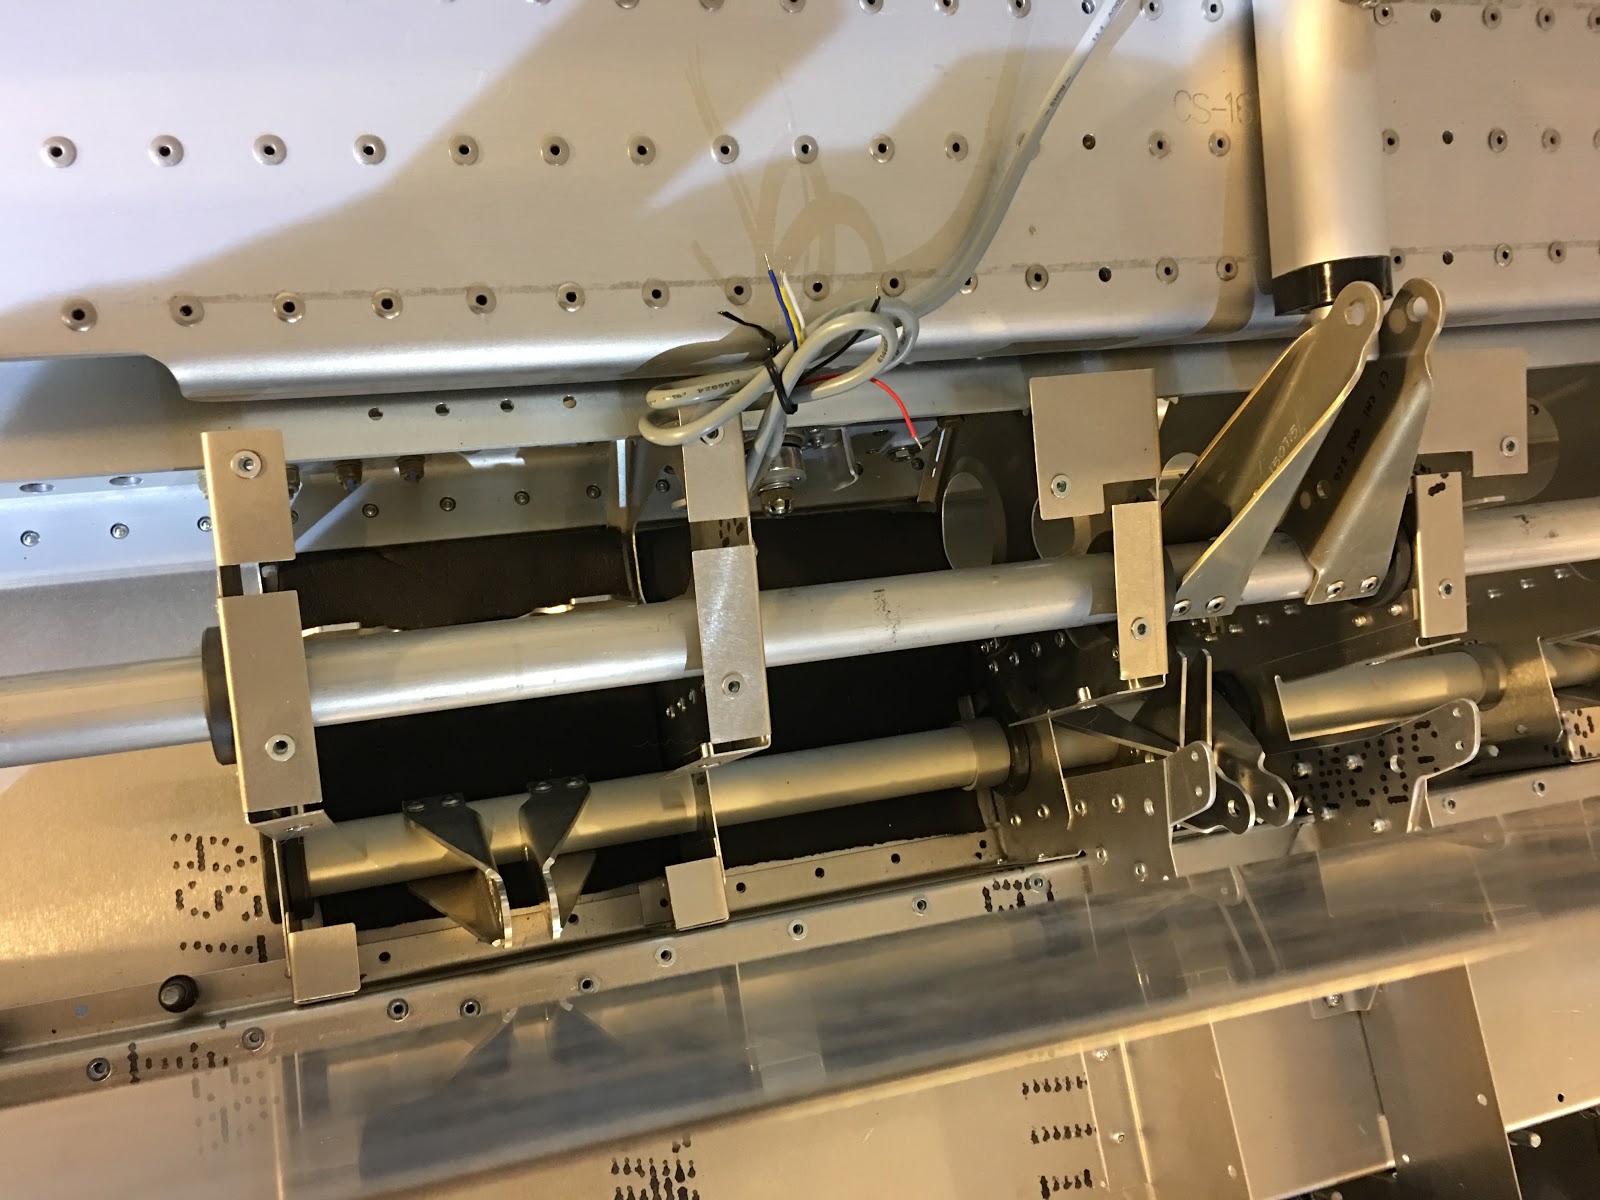
Miscellaneous parts back on.

To close out the 3 hours I applied a couple of pieces in the rear section of the center fuselage.

Saturday, October 15, 2016

2 hrs. finishing up part cleaning and priming and center fuselage work.

Bunch of small parts to finish up.

Skin back on to strategize the next step which is to soundproof the other side of this sheet.

While I was contemplating my navel about the soundproofing I started putting in rivnuts.

Friday, October 14, 2016

2 hrs. finishing the soundproofing (lower layer) in the forward center fuselage and cleaning and priming a big batch of small fuselage skins.

Finished the center strip, so the lower layer of soundproofing is done.  Next will be the layer that sticks to the skin that goes over this section.  Lots-o-insulation!

Big batch of skins done.  Some more channel and other misc parts tomorrow.

Thursday, October 13, 2016

2 hrs. working on center fuselage soundproofing.

Updated my Paint Scheme page with my selected paint scheme. ;-)

The inside skin is off..

Had to rivet in the stick supports first.

Starting to cut the soundproofing (1/4" thick) to size.

Clamped down to get it to stay in place while I cut.

Placed a ruler down to demarcate the line to be cut.

Cut with an Exacto blade.

Pulled off the backing and put it in place.  Not so bad!

More pieces in place.

My special technique. ;-)

2 hours later and this much is done.  Center strip still needs to be done.