When assembling the rear seat backrest stop these two parts seem to leave a gap...
But, a little pulling and they seem to cleco together.
Some piece is supposed to close off the front of this rib, but I don't know what that part is...
I tie-wrapped my position/strobe wire bundle all the way through the rear fuselage. Also put some edge grommet where it comes out of the longeron to head up to the rudder.
The right side aileron stop. Not sure the manual mentions that there has to be one on the right too.
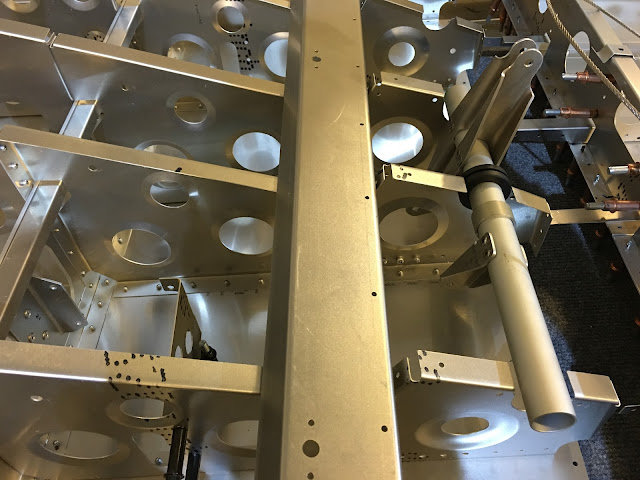
For some reason I have two Elevator Torque Tubes (CT-AEL-002-C-C) and they seem slightly different. Which is the right one?
It will go here.
RF-ANG-019 a luggage support bracket goes here on each side.
NEXT TASKS:
- Make dimensionally correct dummy wing spars to insert and bolt into position in the center fuselage so that the slot and it's uprights are properly spaced when it's being riveted into position. Do this while the main spar is not cleco'ed to anything so that it's free to move. This was recommended by various people so that the side skins don't buckle when the wing is finally installed (I saw this on the Sling 4 at OSH). DONE.
- Fix landing gear uprights. I have to reverse brackets that attach to the uprights. DONE.
- Redo rivets in rear cone. I have 1 short vertical line of rivets that need to be up-sized to match the other side. DONE.
- Rivet rudder cable guides in place. DONE.
- Run wires through rear fuselage (see paper note #3). Peter's 6-8-2016 entry. STARTED. TRIM WIRE COMING TOMORROW.
- Fit aux. luggage floor gusset (needed for original rearward seat location?) WAITING FOR ANSWER FROM SA.
- Fit rear seat backrest stops for rearward location (see paper note #7). See Gordon's 4/3/2016 entry. CLECO'ED ON.
- Rivet main spar control and autopilot brackets (pg. E2). Some holes should be drilled out to 4mm.
- Install servos and connections (see various paper notes). Maybe next step first??
- Install pushrods to servos.
- Install CF-BKT-019-L/R on landing gear box.
- Ream out landing gear holes to proper size before main spar is in place.
- Rivet gear mounting channel before main spar is in place. But, don't rivet to floor as that will have a cover installed later.
- See paper note #6.
- Install luggage floor cross brace.
- Install RF-LGN-303-C-C-O as seen on Peter's 5-17-2016 entry.
- Install RF-ANG-019 Luggage Floor Support (see paper note #4). Peter's 6-13-2016 entry. CLECO'ED IN PLACE.
- Where do these parts go?:
- RF-BKT-023-L/R
- CF-BKT-027-L/R
- Install joystick control column. See Peter's 5-13-2016 entry.
- Install elevator control stop on the torque tube (see paper note #2).
- #8 locking rings for torque tubes? See Peter's 5-4-2016 entry.
- See Gordon's 4/3/2016 entry concerning flap torque tube installation.
- Test fit all control torque tubes
- See Peter's 5-18-2016 entry on the control bush mounting bracket install.
- Complete any work on Pg. E3 of manual (main spar & undercarriage channel).
- Pg. E6 Forward Floor Sub-structure.
- Work on parachute box and rear bulkhead.
- Flap actuator bolted before riveting - investigate further.
- Rear/Center Fuselage Join heads up: Need room to rivet 2nd longeron from the top on the center fuselage, so next one below shouldn't be installed until that is done. See paper notes: #1, #5 and #8.
- Luggage support/strengthening channel - See Peter's 7-20- 2016 entry and 7-15-2016 entry.
- Sound proofing installation.
- Test fitting of forward fuselage side skins.
- Make sure you understand where various spacers go in the center fuselage.
- To be continued... ;-)


No comments:
Post a Comment