Subcribe to our RSS feeds Join Us on Facebook Follow us on Twitter Add to Circles

Categories

Thursday, August 20, 2015

2 hrs. working on the fuel tanks.

Stirring Part B in prep for measuring out to mix with Part A.

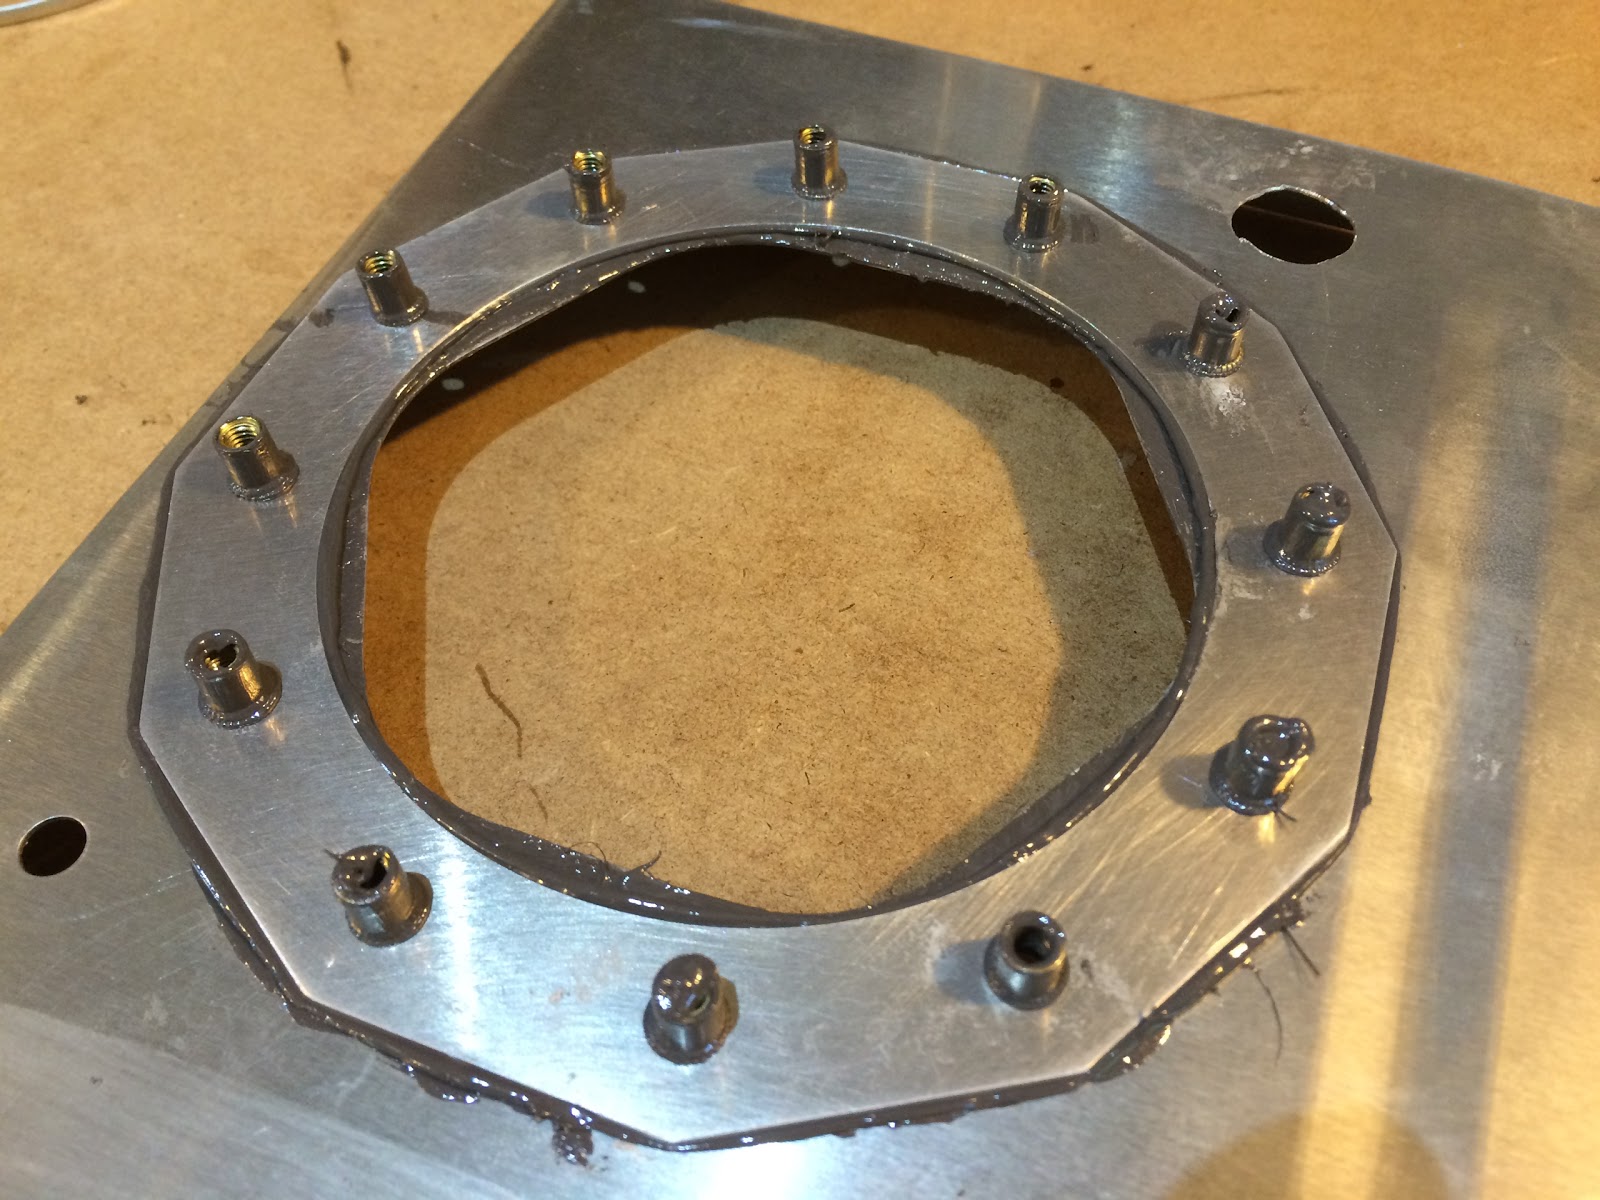
Applying sealant to Rib 101 of the fuel tank (this is the left one which isn't installed yet (easier to do it before install...) to attach the PCD Flange Plate (seen underneath).

The plate is connected with rivnuts, which had to be coated with sealant...

The other, messy, side.

Cleaned it up a bit.  Both sides done and ready to do the next step, which is the fuel sender.

Tuesday, August 18, 2015

1 hr. enlarging the holes for the fittings into the fuel tanks.

Since I didn't have a drill bit big enough to enlarge the hole I ran a chucking reamer around the hole to make it big enough and then a large drill bit to round it out a bit (it was raggedy from the reamer).  It doesn't need to be perfect as there will be washers on both sides and gobs of sealant.  NOTE: If you have to do this, best to do it before it's installed in the tank as it creates lots of metal shavings...  The right one was already installed, so I had to vacuum that out (and still need to go over it with a wet rag to get the remainder).  The left one isn't installed yet, so I did that now.

Monday, August 17, 2015

2 hrs. rereading the wing instructions so I really understand the order of tasks (better get this right!  Especially related to the fuel tank connecting to the wing.), finishing the final test-fit of the top skins and rear support channel (then removing all of them) and playing with the brackets that connect the tanks to the wings.  Also puzzling over how to the PAR 36 landing lights attach to the landing light support structure.


This is what the landing lights assembly connects to, but the front and rear landing light pieces (not shown) are too small for PAR 36 lights (that's kind of annoying since that's an industry standard size).  I'll be doing some fabricating to put together an adjustable structure together to hold the Sunspot 36LX lights and attach to the piece shown in this photo.

The rear wing skin support channel.

Sunday, August 9, 2015

4.5 hrs over the last two days working on the wings as I wait for the new sealant to arrive.

Well, since I got the reamer for enlarging the holes in flange plate, I did that for both tank's parts.

Cleaning up the holes.

And they now match!

For my misaligned holes in wing skin 1 it was recommended to dull the sides of a drill bit for drilling up through spar to the skin.  Well, there was no room to fit a drill to go from that angle, so I ended up carefully using a tight-fit angle drill to drill through.

Held down the skin with these cleco clamps.

Not pretty, but that part of the skin will be covered by the wing tank skins.

Tried out one of my 4 Sunspot 36LX LED Landing Lights.  Bright!!

A test fit of my incomplete right wing tank.  It fits!

Nice to hold in my hands the first piece and brains of the electrical system.  VP-X Pro.  Nice.

Wednesday, August 5, 2015

1.5 hrs with some more ProSeal and some other related items...  Mixed a batch to try and touch up inside the tank.  I think I might have been using a bit too much of the Part B (black stuff) since I've basically run out of that while I still have Part A...  Problem?  Maybe this is why my mixes have been hardening up quicker than I'd expect?  Have I mentioned that I don't like sealant...

Since I'm out of Part B I may have to put aside the tank work until the new sealant arrives (which I'll probably run out of before finishing the other tank...).

Drilled the hole for the hold-down strap that has to be installed (near the black Sharpie mark on the rib).

Getting my rivnut gun ready to install the rivnuts...

...Only to discover that the holes in the flange plate are too small...  Tried to drill out the hole to size, but using a handheld drill (I don't currently have a drill press (though that may change...)) resulted in a messy hole.  Using a reamer would work better, so I ordered an appropriate sized chucking reamer bit (15/64").

Yet another ProSeal application approach tried...  Small bristle brush with the hairs trimmed down to about 1/4".  Worked OK for dabbing the sealant on rivet heads.  Short of using one of those expensive sealant "caulking" guns, there's no tidy way to do it (that I've found)...

Sunday, August 2, 2015

1.5 hr's gathering parts and reading the instructions for the next step in the fuel tank build: attaching the fuel sender and other fittings.

Gather all the parts.

It seems that the hole to the lower right of the largest hole in this photo needs to be enlarged to allow the passing through the 90 degree fitting which passed through it.

A change that was made after my kit was shipped involves drilling a 3.3mm hole through the rib to install a strap which holds down the inlet tube.  The hole is specified to be drilled 32mm from the back and 24.14mm from the bottom.  Not 24, but 24.14?  I can't measure that close...  So why was it specified that way?...  Given that there's already sealant there, I'll be lucky if it's somewhere between 23 and 25...

Saturday, August 1, 2015

3.5 hrs. sealing the right fuel tank.

Have I mentioned that sealing is NOT fun?  For someone like me that likes things neat and tidy, sealing.... sucks.  Thick and sticky do not make for an easy time applying the sealant.

Honestly, if I had known I could get the tanks already done (and I knew or was told how annoying it was), I would have definitely done that.  Many people have more patience than me and have a high tolerance for messy, so if you're one of those, go for it.  Otherwise, get tanks built in the factory...

I have over 22 hours into the tanks and I'm not nearly half done...

Messy!  It actually looks better live than it does in these pictures (it's not as "shredded" or incomplete looking). Anyway, maybe before I close the tanks I'll use a stiff brush to slather on more sealant to cover it more completely.  I was applying it somewhat strategically to ensure I had enough sealant, but I've discovered that the 1 pint I got with the kit is only half of what I'll need.  Ordered another pint last night from Skygeek (This is what I ordered).

One of slightly less messy corners.

On a more fun note, I got in all the goodies I ordered at AirVenture!  My landing lights, wing tip lights, flap position sensor and underneath is my Vertical Power VP-X Pro electrical control system. :-)