


While my plane is elsewhere I will try to be productive in other ways. For example I'll work on the panel, making sure all the connections are there that I expect and if not, add them (e.g. I'm not sure the power connections to all the lighting are there on the connector to the VP box).
I've also been in communication with the factory getting clarification on the oil connections and in the course of that they sent a bunch more photos, which I've added to the Engine page of the Factory Photos.
Friday, August 30, 2019
Saturday, August 24, 2019

Friday, August 23, 2019
Lots of cleaning...
Tarp on....

2 hours of vacuuming and organizing and it's ready to be back in business...

But, things look precarious up there, so I'm not sure I want the plane back in there until it's fixed... I think I can store the plane in a neighbor's garage, so that would work. Should be fixed soon-ish..

Tarp on....

2 hours of vacuuming and organizing and it's ready to be back in business...

But, things look precarious up there, so I'm not sure I want the plane back in there until it's fixed... I think I can store the plane in a neighbor's garage, so that would work. Should be fixed soon-ish..

The tree is gone and the plane is totally fine! Thanks to the whole crew at New England Tree Masters for doing a great job ensuring the plane was safe and carefully removing the tree! If you live in the area and ever need tree work, they're the ones to hire! Special thanks to Carlos for his crew leadership and extra concern for the plane.
Carlos carefully removing debris so we can safely open the garage door and get the plane out. You can see a little bit of the structure I constructed over the front of the plane to protect it should anything else fall.
You can also see a little bit of the structure I built to hold the wings on that wall. It's a crazy strong, over-designed structure that I'd like to think helped hold up the tree and prevented it from doing far worse damage.

I was right under this area just 20 minutes before the tree fell.... That would have hurt....

Giant crane!!

Getting ready to go up and secure the tree before we open the garage door and move the plane out. And thanks to the Acton Police Department for providing a friendly officer to keep the whole operation safe for the neighborhood!

Up, up, up....

Down to the tree...

At this point the plane was out (the crew helped me move the plane out).

Goodbye to that tree!

Eats trees like candy...

Getting covered by a tarp later today.

The plane away from all the action. I'll clean out the garage and then move it back in there until the work will start on repairing the roof and ceiling. Crazy few days....

Thursday, August 22, 2019
A bit of a disaster struck my garage last night.... The plane appears to be totally fine, but a very large tree fell on the garage last night. It broke through the roof and opened up the ceiling, raining some debris on the plane, but nothing large hit it.
I was working on the plane just 20 minutes before the tree fell... Good thing I wasn't there, because where I was sitting was right under most of the heavier debris.
The tree will hopefully be removed tomorrow and then will begin the process of cleaning the garage (total mess...) and repairing the roof and ceiling. Pretty depressing - but, it could have been much worse....
It'll probably be a week or two before I'll be back working on the plane.
Wednesday, August 21, 2019
1 hr. mostly trying to figure a few things out...
A few things arrived today including the Adel clamp pliers. The setup: Awl in the holes, pliers on and tightened and awl jiggled around to make sure it's nice and lined up.

Awl out, bolt in and washer and nut on. Perfect! Way easier than any other way I tried.

Also received my new fuel filters.

The fuel comes in and flows into the outer perimeter of the container and then filters into the center part where it flows out the top.

The info on the back of the card.

My rough sketch of the oil system based on drawings and photos. Still a bit unsure of the routing of some of the lines. The Factory Engine photos don't show much of the left side of the engine.

Putting on the barbed fitting for the oil cooler. Loctite 577, hand tight and then 1.5 turns. Well, I'm either too strong or too weak because I could only manage 1 full turn after hand tightening. I wasn't comfortable with trying to tighten it beyond that.

They go in here, but I'm not going to tighten these in until I have a better handle on the clocking of the fittings.

I'm trying to confirm with the factory, but I think the oil pump inlet fitting gets replaced with the one in my hand.

Monday, August 19, 2019
1 hr. trying a grommet solution for the fuel lines pass-through in the center fuselage.
Got some large grommets and it seems to work if you pass the fuel lines straight through....

... But, it's clear it won't be coming straight through... and, yeah, that's a sharp edge that will have to be totally addressed... Still, the lines will probably come through at an angle and this grommet is just too thick. Will try yet another solution... The edge grommets I have on hand are just too stiff to bend that tight, so I'll try to find some other softer edge grommet.

I decided I'm not happy with the supplied in-line fuel filters. I just feel like they can come off too easily. So, I'm going to get a very similar filter, but it has barbs, so no way it's coming off. The Rotax spec is for a 100 micron filter and this one beats that at 74 microns. Another thing I like is that you can see through it to inspect the filter whereas the supplied ones you can't see the filter. I ordered 4, so I'll have a replacement set on hand when the time comes.
With those filters I'm going to install them further up, closer to the selector, so that will make it even easier to inspect (as opposed to buried in the channel on the floor).
I also ordered Adel pliers that should make it much easier to put those clamps on. Thanks Pascal!
With those filters I'm going to install them further up, closer to the selector, so that will make it even easier to inspect (as opposed to buried in the channel on the floor).
I also ordered Adel pliers that should make it much easier to put those clamps on. Thanks Pascal!
Sunday, August 18, 2019
Just 1 hr on fuel line stuff and getting my hands dirty starting to think about the oil system....
As per the manual I tied the fuel feed/return lines together. 3 of them, with one close to the firewall.

How to get these close enough to be able to thread a nut on?.... They're stiff and springy so hard to hold together to do it.

Contemplating this very schematic diagram... Lots of info missing... And the 5/16" ID is incorrect. It's 1/2" ID. More info in the TSi manual, but I'm not sure what's different and what's the same.

Is this fitting replaced?

They specify 22mm OET clamps for this hose, but that seems way too big.

What's this for?

These seem like the correct parts..

Well, took this cap off to see what the fitting was... Turns out, that was a mistake...

...as oil started spilling out... Guess I should have known... Didn't lose much. Time to write the factory...

2 hrs. on the fuel system (work was yesterday).
Holding up the wiring so I can slide the fuel lines through.

Tricky to get it around the bend into the center channel, but using a screwdriver I was able to do it without much trouble.

Tight fit on the left side.

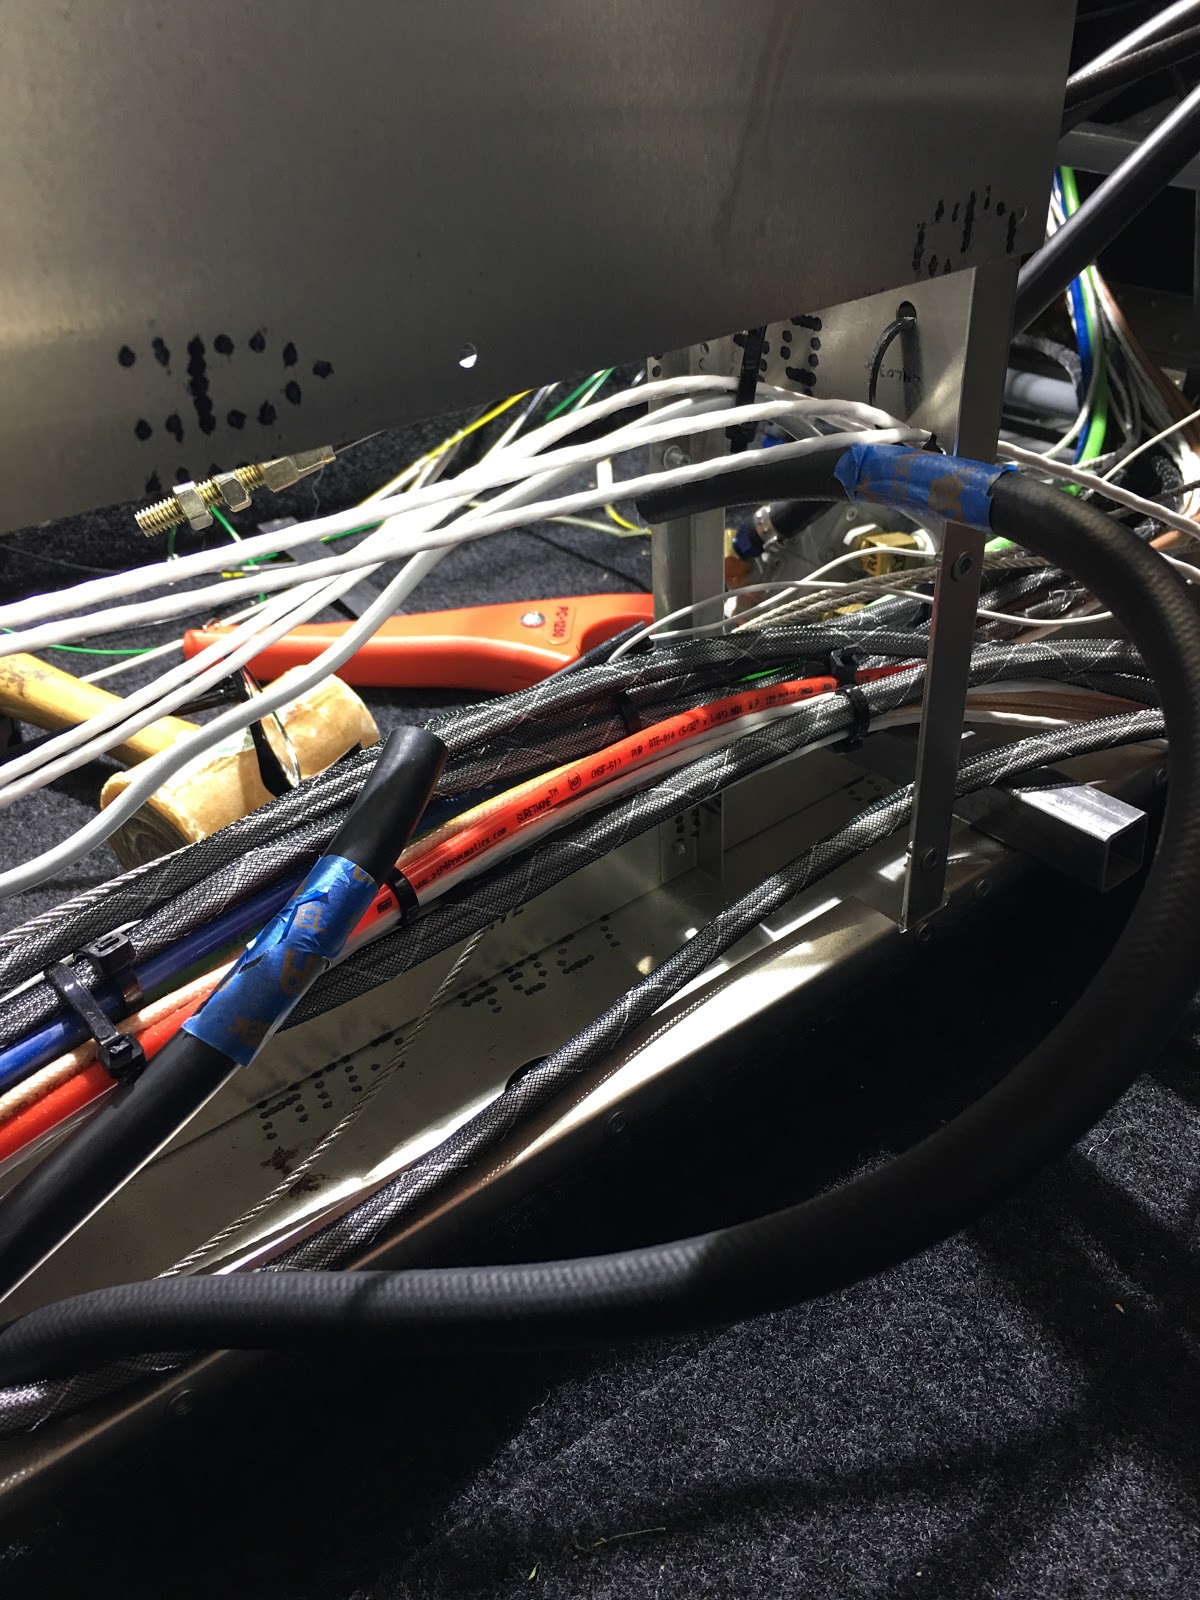
Wrapped the left side hoses with blue tape so I would make the right connections.

All hose through!

No, that's not engine oil on the filter, but the gasket material I mentioned the other day.

Filters connected.

Even using the right size clamps it's still hard to slide them into position. But, several ounces of sweat later, everything was in place and clamped.

Jockeying the filters into their proper location. This all will be finalized after the selector is place in the panel.

Another view.

Did a clean up and organizing (tools back in place) after the work today. I need an organized work environment..

Ever notice this in your sink or bath tub? It's a hydraulic jump! I remember learning about it back in college in the Fluid Dynamics class. We had to calculate the radius at which the jump would occur. The professor for that class was a bit crazy (which meant the class was fun) - he demonstrated shock waves by exploding an M80 in class. 😎. The class all reared back and covered their ears - he just stepped back a couple of feet and did not cover his ears (he barely flinched!). I'm sure he must have been nearly deaf after a few demos of that...

Holding up the wiring so I can slide the fuel lines through.

Tricky to get it around the bend into the center channel, but using a screwdriver I was able to do it without much trouble.

Tight fit on the left side.

Wrapped the left side hoses with blue tape so I would make the right connections.
All hose through!

No, that's not engine oil on the filter, but the gasket material I mentioned the other day.

Filters connected.

Even using the right size clamps it's still hard to slide them into position. But, several ounces of sweat later, everything was in place and clamped.

Jockeying the filters into their proper location. This all will be finalized after the selector is place in the panel.

Another view.

Did a clean up and organizing (tools back in place) after the work today. I need an organized work environment..

Ever notice this in your sink or bath tub? It's a hydraulic jump! I remember learning about it back in college in the Fluid Dynamics class. We had to calculate the radius at which the jump would occur. The professor for that class was a bit crazy (which meant the class was fun) - he demonstrated shock waves by exploding an M80 in class. 😎. The class all reared back and covered their ears - he just stepped back a couple of feet and did not cover his ears (he barely flinched!). I'm sure he must have been nearly deaf after a few demos of that...

Saturday, August 17, 2019
McMaster-Carr is a really great vendor to get various things. You know you're getting excellent quality and they have a super wide selection. Just ordered grommets that will work for the fuel line openings. Of course I'm not buying things that are supposed to be aircraft grade, so don't do that!
Friday, August 16, 2019
1.5 hrs. on the fuel system.
Using hot water to soften the fuel hose.

Slid on easily and cimped on the 15.7mm single-ear Oetiker clamp. The only thing I can think of which would explain why the factory might be able to use the 2-ear 15mm clamps is if their hose is thinner walled. This hose is pretty thick walled. I bought hose from Aircraft Spruce that has a noticeably thinner wall and that would probably work with the 15mm.

I bought some edge grommet to try and put some protection on the hole in the fuselage side where the hose comes through, but I could not bend it tight enough to fit well. So, I came up with this alternate usage (temporary of course). Wish I had this on before I sliced my hand open...
I'll have to get some large regular grommets to fit those holes. The bottom hole is 1 3/8" wide.

Put some edge grommet here...

But, after I did that I realized that I was wrong (mistake #243 😜) about where the selector is located.... It's further back here... So, it wasn't going to reach going through the uprights... Started to get nervous that I'd have to redo the lines, but then I pushed the selector through the upright and rerouted it this way. Reaches just fine now.

Another view of the correct location.

I also remember seeing that the Sling TSi manuals have more info that the 4 manuals don't have. Here's an example of some useful info.

And more useful info. This shows the return line going through the upper hole (which is not open in my fuselage). Maybe it's different in the TSI, but it would be difficult to go through the upper hole on the 4 because there's an interior skin that's right behind the upper cutout. I think it's fine if both go through the lower hole.

Wanted to try that gasket material...

But, when I went to tighten the clamp it actually pushed the plastic nipple out! So, I took some of the material off and put it back on, this time not tightening it as much. I'll see if it dries sufficiently overnight and if I can further tighten the clamp without that happening. If not, off it comes. The one on the right doesn't have the gasket on it, so I can compare in the AM.

Subscribe to:
Posts (Atom)