Subcribe to our RSS feeds Join Us on Facebook Follow us on Twitter Add to Circles

Categories

Wednesday, November 30, 2016

1 hr. on aileron autopilot pushrod and misc.

Gathering the parts to attach the pushrod.

Tight area to work in...

But, I got it in.  Even torquing it properly.

Gathered the parts for the elevator pushrod torque tube end.  Not doing it until I've riveted the 3 sleeves on the torque tube.

Test fitting some more parts.  These are skin 24's.

And skin 25's.

I realized that the center cover part goes on the other side of the 24's.  Tight fit now, but I think once it's riveted in place, this part will slide in just fine.

Tuesday, November 29, 2016

1 hr. on seat rails (really 30 min of real work and 30 minutes contemplating my navel.. :-)).

You have to snip off the end of the plastic sliders for them to fit flat.

Assembled and ready for countersinking.

Checking out my inventory of countersunk rivets.

You need all the sizes!

This is the countersink bit I've used before, but I've not been happy with it.  It "chudders" and it turns out (in looking at the comments on Amazon for these types of countersink bits) that it's a common complaint.  I'm going to try this to see if it's better (the commenters say it is).   Arriving Friday, so I'll let you all know.

Monday, November 28, 2016

1.5 hrs. on the backing plate section of the center fuselage, center console skins and seat rails.

Put in the last center fuselage section of soundproofing with a minimal cutout for the antenna backing plate.  Left just enough room to be able to slide a washer under the plate for the two mounting holes.  Here I show how I'll do that - by attaching a washer to some painter's tape and sliding it under the plate.

Got my aileron autopilot pushrod from SA, so I'll be installing that soon (along with the other pushrods of the CF).

Test fit of the center console skins.  Seems that people don't put these on until later to allow access for putting in the wiring, rudder cables, etc.

Test assembly of the seat rails.

Looks like the ends of the plastic slide plates need trimming.

All together now..  Confirming with the factory all the holes which need countersinking.

Where the left side left rail will go.

Both left side rails in place.

Sunday, November 27, 2016

1 hr. finishing up the transponder/ADS-B antenna backing plate.

Since I don't have a big enough drill bit I had to grind it to size.  So, I made an appropriate sized template to draw the hole size on the plate.  I carefully measured the distance to the mounting holes so that it would be properly placed.

Hole drawn (slightly large so that I have some wiggle room).

My grinding tool.

And it's done!  Lots of vacuuming of aluminum shards was necessary....

I knew there would be lots of debris under the plate (there's a space) I slid several pieces of duct tape under it to get it out.  Worked perfectly.  When I mount the antenna I will use washers to bridge the gap of the mounting bolts and it will be mounted nice and tight.

Saturday, November 26, 2016

1.5 hr's priming some parts.

Seat rails, couple of console skins and the firewall were primed.

Wednesday, November 23, 2016

When I tell people I'm building a plane, many people ask what I'm going to name it.  Hadn't really given it much thought until this week when the perfect name came to me.

"Sadie" - For the grandmother I never knew, who my mother says was an amazing person and gentle soul.  My mother was only in her 20's when she lost her to cancer and she speaks about her to this day, nearly 60 years after she passed.

Here's Sadie and Adolph Braun (who I did know) back in the 1920's.

She doesn't know any of this yet, but I'm going to give my mom this framed photo of the paint scheme in which I added in her mother's name.  I think she'll like it. ;-)

Sunday, November 20, 2016

Got an alert that the Sling 4 build manuals were updated, so I downloaded those (just got the fuselage, finishing and undercarriage) and had them printed 11x17 over at Staples.  Also bought a nice binder. ;-)  Better than the water-logged 8.5x11 set I had...

Otherwise been busy with other things.  And will also be busy this week in general, so not too much work will get done on the plane.  If I do I'll post it!

My nice new manual in it's nice new binder.

Friday, November 18, 2016

2 hrs. finishing the fabrication and installation of the transponder/ADS-B blade antenna backing plate.

Riveted in place and holes drilled.  The center hole for the BNC connector is not yet final size (9/16") since I don't have a drill bit that big (I think).  Ended up not using the lower layer of the backing plate since it moved on me.  I'll just use some washers to bridge that space.  I may also end up enlarging the mounting holes slightly so that I can adjust the angle of the blade if I find that it's not perfectly lined up (once it's on the gear I'll measure the hole positions relative to the rivets on the outside).

Added a new Sling 4 builder in Austria, Peter V to the Links page.  Good luck Peter!

If there are any other builders out there that want their build log on my links page, please let me know.

Thursday, November 17, 2016

2 hrs. drilling out seat rails and fabricating a backing plate for the transponder blade.

Just test fitting some covering skins.

This line of holes on ANG-050 (4 pieces), seat locking rail, need to be drilled out to 8mm.

Drill baby drill! ;-)

One angle done.

All done!

Time to fabricate a backing plate.

First large piece.

Slots to accommodate the rivets already there.

 A smaller piece underneath to account for the thickness of the rib flanges.

Then on top is the wacky shaped piece that will be riveted to the rib.  I'm gluing together the pieces tonight and tomorrow I'll rivet it in place.  Then it will be time to properly place the mounting holes.  That blade will not move.

Been contemplating the transponder/ADS-B antenna...  Monopole or blade?  Seems like most people are going for the monopole, but I was told by someone at TAF USA to go with a blade because it won't break as easily as a monopole.

Also, my own research shows that the monopole does not actually meet the Garmin antenna requirements for the GTX 45R.  See thread here: http://www.vansairforce.com/community/showthread.php?t=93785

But, if you read down the comments on that thread you'll see that while a monopole doesn't meet the requirements, it's probably good enough.

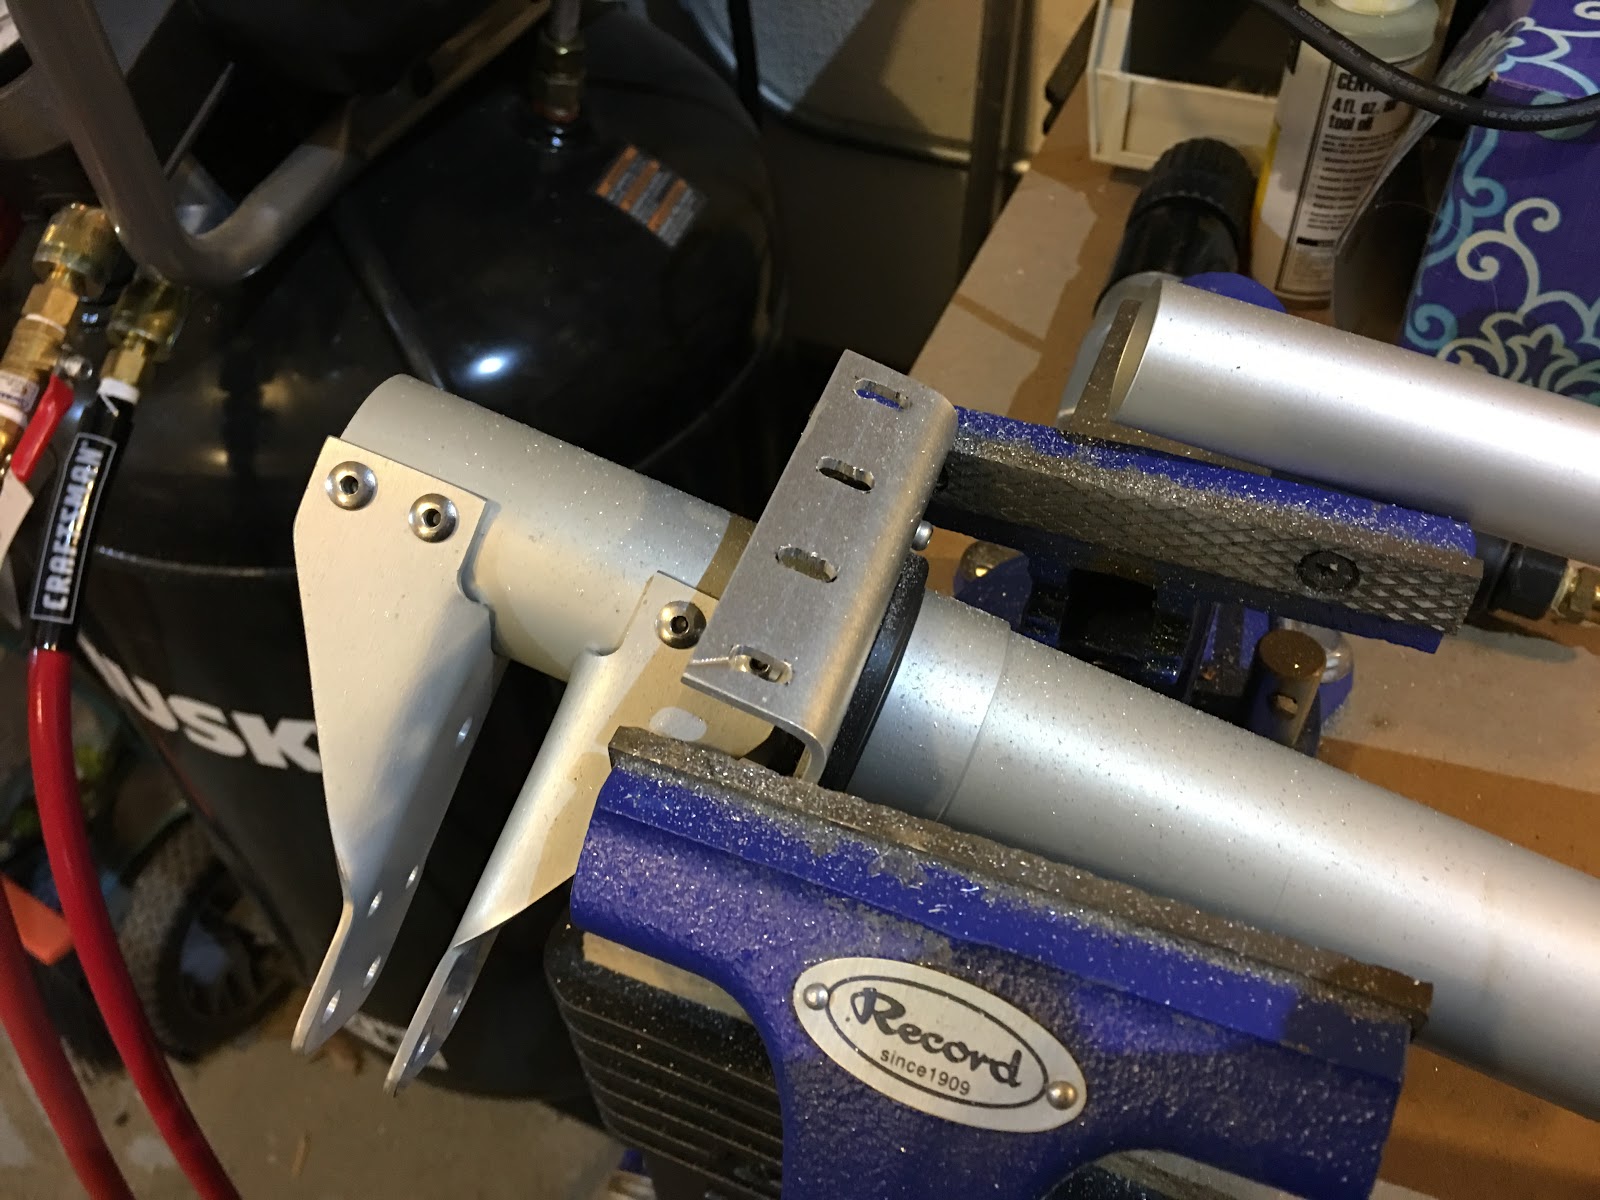
The blade, despite it's much larger size, has much lower drag than a monopole.  I'm not surprised by that since a circular cross section has terrible drag (my fluid dynamics class in college was one of my favorite classes!  To demonstrate a shock wave the prof exploded an M80 in class. :-})

Of course a monopole is easier to install...  Decisions decisions!

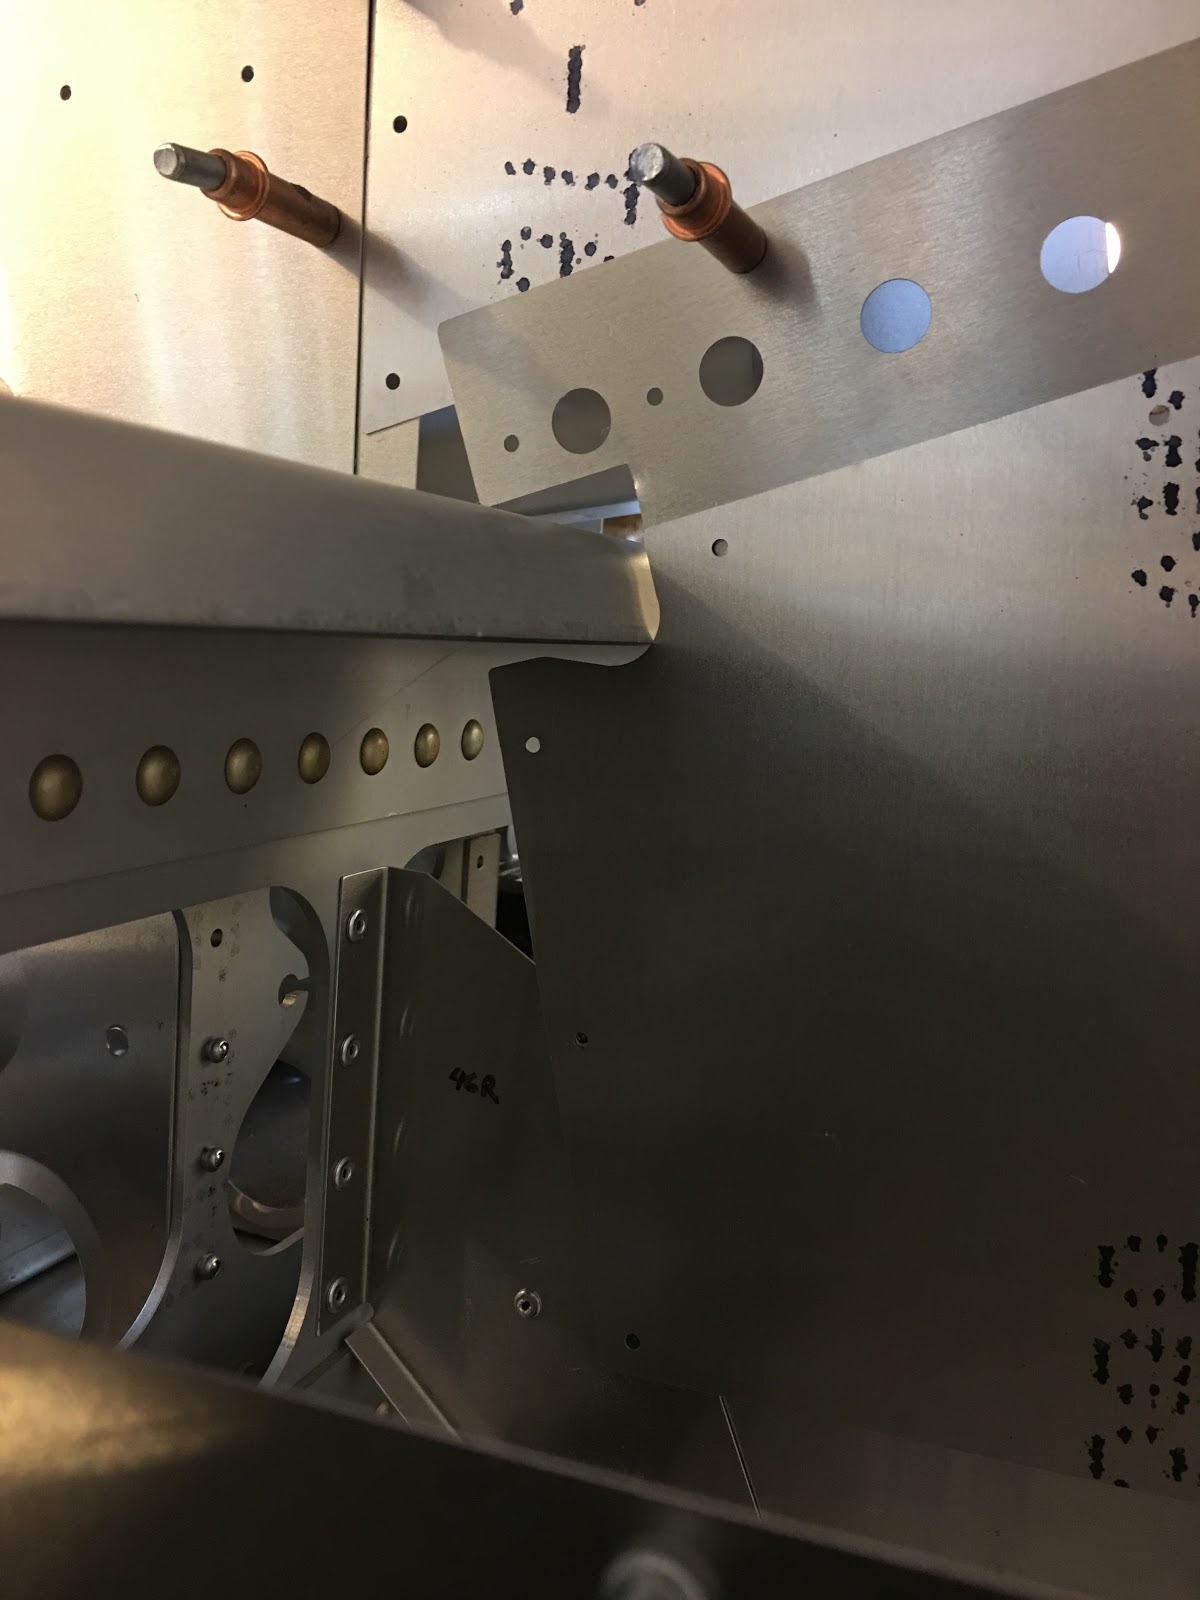
Decision: I'm going to go ahead and fabricate a backing plate and see how that comes out.  My two considerations are that it's firmly attached to the two adjoining ribs and that the mounting holes line up the blade perfectly with the airflow.  I think fab the plate without the holes, install it, then drill the holes to perfectly line up.

Wednesday, November 16, 2016

Been investigating carpeting/upholstery material and came across this stuff: https://www.scs-interiors.com/feather-weight-aircraft-carpet.html

Anybody use it?  Looks decent.  I think I'll order some color swatches since I'm not sure what color to use.  Black, licorice, smoke,...

Monday, November 14, 2016

2 hrs. center fuselage

Put in these 8 M4 rivnuts.

Put in more soundproofing.  This section was tricky, but not too bad.

Other than the outside section (which I'll do later once I know what's going there) it's done.  I'm also leaving open the section where I think I'll put the transponder blade antenna until I put in the backing plate and holes.

1 hr. yesterday working on the plane and 2 hrs blowing fall leaves...

This console skin bumps up against the main spar so I needed to file it back.

And it's filed back...  Checked the fit and it's good.

Saturday, November 12, 2016

2 hrs. misc. center fuselage work

Time to take off the left side skin.  I labeled the parts and skin locations numerically so it will be trivial to put it back together when it's time.

Kept on the skin what I could, which isn't much.

I saw that Jim P elongated these holes, so I figured I'd also need to...

The sleeves which butt up against the bushes will need to be riveted in place.

I saw in the factory photos that these two skins connect with rivnuts.

Rivnuts in!

I want to make sure the pushrod connection to the aileron servo to good before committing to riveting those sleeves and installing the assembly.  The pushrod should be on it's way from SA.