Subcribe to our RSS feeds Join Us on Facebook Follow us on Twitter Add to Circles

Categories

Wednesday, December 29, 2021

Haven't posted much, but I've been flying, mostly for my instrument rating.

Though, the weather has been crappy, so not as much flying as I'd like.

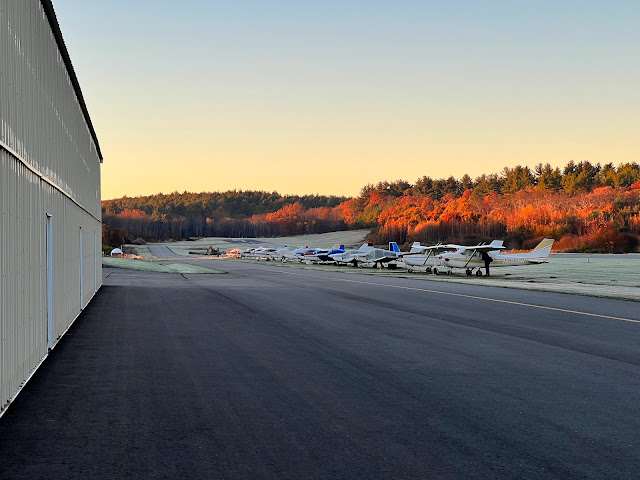
Tucked into the hangar on a cold winter day.

The plate I made to cover up part of the oil cooler so I can keep the oil temp to at least 190F (ish) during the Winter months.

Updated the G3X (and LRU's) SW to the latest revision, which came out a few days ago.  The biggest change I saw in the revision notes was an improvement to the glide ring in that it takes into consideration terrain and obstacles (I'm surprised those weren't already in there...).

My CFII Alan.

Quabbin Reservoir.

Some rolling hills in Massachusetts.

6B6 at dawn.


Thursday, November 25, 2021

I installed the latest G3X SW and an oil cooler blocking plate.  I've found (as have many other Rotax users) that in the cold temps the oil stays cooler than desired.  According to some experts on Rotax-Owner.com you really want at least 190F and preferably 200F for the oil temperature.  On a recent flight, I was seeing it get no higher than 140F and sometimes lower.

So, taking some advice from others I fashioned a simple piece of aluminum sheet that wedges into the fiberglass holding the oil cooler.  It covers about 2" of the cooler.  I'll post a pic next time and report the temps I'm seeing.

Updating the SW (it doesn't just update the G3X, but any of the other connected avionics (except the 650, which is separate).  Here it's doing the G5.


I'm definitely a fanboy of Wyze.com and buy nearly any product they come out with (because it's decent quality and cheap!).  I couldn't resist their new color LED strip.  It looks especially cool in the dark.  I can remotely check on the plane (2 video cameras), turn on electric heat, or a floodlight, and now turn on the LED light strip. 😁

I never tire of looking at the plane...


Tuesday, November 16, 2021

Some minor tweaks to my flap control config., looking at the AOA config, and a cool way to make a POH booklet I saw on Facebook.

Made slight changes to the Up and Down Endpoints based on further reading of the VPX Manual.  Also enabled slow retract for go-around scenarios.  So now, it'll slowly retract the flaps if the engine RPM is above 4500 RPM.  "Continuous Flap Enabled" allows you to click again before it reaches the next stop point and it'll skip that stop and continue to the next one.

In my last post, I said you needed an initial click to activate up or down movement, but that no longer seems to be the case.  Not sure why, but it's not necessary - The first click and it starts movement.


I've been wondering why the AOA display doesn't show when I'm on final and I think it must be because the "Approach Target AOA Calibration" has not been done.  I'll have to figure that out.

Someone on one of the FB Sling groups came up with a way to make the POH into a compact booklet.  I must do this.  My current printout is pretty big.


Monday, November 8, 2021

The way my flaps were set up (down in OK, of course...) has been the annoying "momentary" setting.  You have to hold the switch either up or down to get it to move and you had to watch the position to know when to stop.

But, the VPX can be set to "position" to be much easier to use.  Click it down or up and it goes to the next preset position.  I just hooked up the VPX via my crossover Ethernet cable to my laptop and did the change.

I set it to one click is about 8% (I used what I've been using on takeoff and downwind), next click is half flaps (base) and the last click takes it to full flaps for final.

I noted that you need to do an initial click before the first click to move it down from 0 or up from full.  I assume that's to prevent an inadvertent flap movement.  So it's Click to activate, Click to 8%, Click to Half, Click to Full.  Much easier!!

The laptop all hooked up and connected to the VPX.

The settings before changing them.

The settings after.  Initially, I had the default 255 in the "Down Endpoint", but that caused the flap breaker to fault.  It needs to be a lower number (this is described in the VPX manual).  I did confirm that the flaps were fully up and down when using this mode.

Finally got around to extracting the filter material.  Looked good and nothing stuck to the magnet when I moved it around the material.

A Sling Grin! :-)


Saturday, November 6, 2021

Removed the spark plugs and I could see that the #1 and #2 cylinder plugs were fairly carbonized.  So, since I'm getting close to the 100 hr replacement (I use 100LL), I just replaced all the plugs with new ones.

Did the run-up and all was well.  Then did two circuits and the engine purred like a cat. 😎

#1 Top plug.  Pretty carbonized


Especially when compared to the #3 plugs.

I don't tire of this sight.


Wednesday, November 3, 2021

I was going to do a flight this morning with my instructor (instrument lesson) and I did the run-up (It was 34F (~1C) outside, but the airplane was in a 50F hanger all night) and the drop was about 300 on the Right and a more typical 140-ish on the Left. Normally it's about the same 140-ish drop on both sides.

It was also running rough on the Right and I noticed the EGT's for #1 and #2 were much colder (Maybe 250F to 300F) than #3 and #4 (maybe a red herring).

All other engine parameters were normal (oil temp was about 130F to 135F). The engine/airplane has about 80 total hours on it and I did an oil change 2 weeks ago (oil analysis was fine).

Hmm.... It's been running fine up until now (it's been at least 20 degrees warmer until now). Maybe some plugs are fouled? Extra cold air revealed the issue? I'll pull the plugs this weekend and see what's what.

It was beautiful this morning at 6B6... Too bad we didn't fly.

Screengrab from a Rotax-Owner.com video on installing plugs. Not much thermal paste should be applied.

Tuesday, November 2, 2021

Misc. stuff over the last week.

I need a better blade to cut the filter out of the housing...  The box cutter knife I have just wasn't.... umm, cutting it. ;-)  I'll try an Xacto blade next.  I did get the oil analysis report back and it looks fine.  They/we won't really know about any issues until the next analysis to look for trends.  They said some metals were slightly elevated since it's a new engine.


I've been wanting to tweak the aiming of the taxi/landing lights, so I got to that last night.  Not much range to adjust, unfortunately.  I did manage to point the taxi lights a bit lower than the landing lights.  I keep both on when landing at night.

Enjoying the fall colors....

One more. ;-)


Thursday, October 28, 2021

 My first attempt at video editing.  Not terrible for a complete newbie at it.  Flight was this past Sunday.

Wednesday, October 20, 2021

Sadie was due for an oil change, so I got that done.  Not too bad.

I like to work from checklists, so I made a super detailed one for doing the oil change:

  • Remove upper cowl
  • Warm up the engine to operating temperature (120F) (remove keys after that!)
  • Detach air intake from NACA duct
  • Remove lower cowl
  • Burp engine
  • Put on gloves (there's lead in that oil!)
  • Remove oil tank drain plug (using 17mm and 19mm wrenches (the 19 is used to hold the tank nut so you're not twisting the tank))
  • Drain oil - Take a sample from mid-stream of oil draining for oil analysis (I use Blackstone Labs)
  • Reinstall drain valve with new crush washer to 25Nm (18.5 ft-lb)
  • Prepare new filter by spreading clean oil on the contact surface
  • Remove oil filter, protecting components underneath with paper towels/towel since oil will leak
  • Put on new filter until fully touching
  • 3/4 more turn
  • If inspecting magnetic plug:
    • Remove safety wire
    • Use 16 mm socket to loosen (may need long-armed wrench) (Use paper towels underneath for dripping oil)
    • No whiskers longer than 3mm in length
    • Should feel like a fine metallic paste
    • Clean plug and re-install to 25Nm (18.5 ft-lb) (I found that coming from above to torque worked best)
    • Safety wire
  • Remove dipstick (so you’re not covering it in oil)
  • Add 2.5 L Aeroshell Oil Sport Plus 4 
  • Turn prop 20+ times (very tiring!)
  • Put lower cowl on
  • Reattach air intake to NACA duct
  • Run engine to operating temp making sure oil pressure immediately rises (remove keys after this!)
  • Check for leaks
  • Burp engine
  • Check level before adding the final .5 L (Should be in the upper half of the min/max range (max if you're going on a long flight))
  • Put upper cowl on
  • Note Engine Time & Total Time in Engine Logbook
  • Cut open oil filter to inspect
Is that detailed enough? 😁

Dirty oil out...

Paper towels to keep the dripping oil away from the other parts

New filter ready with a coating of clean oil

Magnetic Plug coming out.  Oil comes out when taking that out, so more paper towels are in place.

Relieved to see very little accumulation on the plug.  They say to rub some between your fingers to check for any chips/shards, so I did that and it was just pasty as they say it should be.

Plug cleaned and safety-wired back in place.

2.5L in (will fill after a run and burp of the engine) and the air intake back in place.

My beautiful airport at twilight.

A random picture taken over the weekend at Walden Pond in Concord, MA.


Friday, October 15, 2021

Another fun nighttime instrument flying lesson.  Beautiful night, even though I missed most of it because I was under the hood. 😎


Wednesday, October 13, 2021

Started my instrument training last night (my first time flying at night in Sadie too).  Fun!

Friday, September 24, 2021

I contacted the factory about the 108% TCU setting at the 100% throttle position and this was their response (I added some notes):

  1. Set the throttle lever on the quadrant to the 100% stop, then adjust the throttle cable on the left carb from 108% down to 100% (as read from the TCU software in Monitor mode).
  2. Next, you will have to balance the right-hand carb the same at the left (using the usual Rotax carb balancing procedure).
  3. With the throttle set up correctly, the TPS will provide the correct reading to the TCU. If there is slack in the TCU cable it can be adjusted but avoid excessive tension.

I asked them if I can defer fixing this as long as I keep the MAP below Rotax specified max values and they said yes (as expected).  So, I'll keep it below 40" for the takeoff sequence (5-minute max) and below 35" continuous otherwise.

It's clear that this is yet another thing that was not done in Oklahoma...

Wednesday, September 22, 2021

I contacted the factory about the 115% = 41.5" and they said I just needed to do a TCU calibration.

So, I got and installed the TLR4.6a software and the right cable (as all described on Jim's blog) to connect to the TCU and went to the hangar tonight after watching this video on Rotax-Owner.com...

My setup...


The TLR software is ancient 32b DOS software, so it's a little bit of work to get it all working on a modern 64b laptop running Win10.  The DOS window doesn't scale, so bring a magnifying glass...

Powered up all the electronics and started the software.  The first thing I did was the monitor function to see what the current settings are (Press M).  This is at Idle throttle.  3.7% is out of spec.  Should be no more than 3%. 

This is Throttle @ 100%.  Out of spec.

Throttle @ 115%.  IN spec...  Though this is my problem area....

This is after I ran the calibration (Press T).  Throttle @ Idle = 0%.  Good.

Throttle @ 100%...  The same as before.. Out of spec.  Hmm..

Throttle @ 115%...  The same as before.

Another pic of the 100% position.  Should be within +/-3 of 100.  Nope...

Now what?