Subcribe to our RSS feeds Join Us on Facebook Follow us on Twitter Add to Circles

Categories

Thursday, August 18, 2016

1.5 hrs doing various things on the rear/center fuselage.

When assembling the rear seat backrest stop these two parts seem to leave a gap...

But, a little pulling and they seem to cleco together. 

Some piece is supposed to close off the front of this rib, but I don't know what that part is...

I tie-wrapped my position/strobe wire bundle all the way through the rear fuselage.  Also put some edge grommet where it comes out of the longeron to head up to the rudder.

The right side aileron stop.  Not sure the manual mentions that there has to be one on the right too.

For some reason I have two Elevator Torque Tubes (CT-AEL-002-C-C) and they seem slightly different.  Which is the right one?

It will go here.

RF-ANG-019 a luggage support bracket goes here on each side.

NEXT TASKS:
  1. Make dimensionally correct dummy wing spars to insert and bolt into position in the center fuselage so that the slot and it's uprights are properly spaced when it's being riveted into position.  Do this while the main spar is not cleco'ed to anything so that it's free to move.  This was recommended by various people so that the side skins don't buckle when the wing is finally installed (I saw this on the Sling 4 at OSH).  DONE.
  2. Fix landing gear uprights.  I have to reverse brackets that attach to the uprights. DONE.
  3. Redo rivets in rear cone.  I have 1 short vertical line of rivets that need to be up-sized to match the other side. DONE.
  4. Rivet rudder cable guides in place. DONE.
  5. Run wires through rear fuselage (see paper note #3). Peter's 6-8-2016 entry.  STARTED.  TRIM WIRE COMING TOMORROW.
  6. Fit aux. luggage floor gusset (needed for original rearward seat location?)  WAITING FOR ANSWER FROM SA.
  7. Fit rear seat backrest stops for rearward location (see paper note #7).  See Gordon's 4/3/2016 entry.  CLECO'ED ON.
  8. Rivet main spar control and autopilot brackets (pg. E2).  Some holes should be drilled out to 4mm.
  9. Install servos and connections (see various paper notes).  Maybe next step first??
  10. Install pushrods to servos.
  11. Install CF-BKT-019-L/R on landing gear box.
  12. Ream out landing gear holes to proper size before main spar is in place.
  13. Rivet gear mounting channel before main spar is in place.  But, don't rivet to floor as that will have a cover installed later.
  14. See paper note #6.
  15. Install luggage floor cross brace.
  16. Install RF-LGN-303-C-C-O as seen on Peter's 5-17-2016 entry.
  17. Install RF-ANG-019 Luggage Floor Support (see paper note #4). Peter's 6-13-2016 entry.  CLECO'ED IN PLACE.
  18. Where do these parts go?:
    1. RF-BKT-023-L/R
    2. CF-BKT-027-L/R 
  19. Install joystick control column.  See Peter's 5-13-2016 entry.
  20. Install elevator control stop on the torque tube (see paper note #2).
  21. #8 locking rings for torque tubes?  See Peter's 5-4-2016 entry. 
  22. See Gordon's 4/3/2016 entry concerning flap torque tube installation.
  23. Test fit all control torque tubes
  24. See Peter's 5-18-2016 entry on the control bush mounting bracket install.
  25. Complete any work on Pg. E3 of manual (main spar & undercarriage channel).
  26. Pg. E6 Forward Floor Sub-structure.
  27. Work on parachute box and rear bulkhead.
  28. Flap actuator bolted before riveting - investigate further.
  29. Rear/Center Fuselage Join heads up: Need room to rivet 2nd longeron from the top on the center fuselage, so next one below shouldn't be installed until that is done.  See paper notes: #1, #5 and #8.
  30. Luggage support/strengthening channel - See Peter's 7-20- 2016 entry and 7-15-2016 entry.
  31. Sound proofing installation. 
  32. Test fitting of forward fuselage side skins.
  33. Make sure you understand where various spacers go in the center fuselage.
  34. To be continued... ;-)

Monday, August 15, 2016

1 hr. contemplating my elevator trim motor wiring.  Needs to be 5-core, but I didn't see any of my current inventory of wire fitting the need, so I'll order that.

Of that 1 hr half of it I wasted trying to find the flap actuator, which I came to realize comes in the finishing kit, which I don't have yet.... Ugh...

Probably won't get back to work on this until Thursday...  Next couple of days are busy with other things...

This is the trim servo used in the Slings (Ray Allen T2-7A): http://www.aircraftspruce.com/catalog/elpages/ractrimservos2.php

This is the recommended wire: https://www.aircraftspruce.com/catalog/elpages/wc2wire.php

Thursday, August 11, 2016

2 hrs. stringing the tail position/strobe wire.

Left over from my wing tip lights wiring, I have 3-core and 1-core shielded wires for the 4 wires needed for the tail position/strobe light.  2 power for the position and strobe, 1 gnd and 1 sync.

Grommets in.

My ultra sophisticated measuring method to determine how much wire I need. ;-)

Putting the sheathing on the 2 wires.  Very tedious!  And you'll burn your fingers pulling the sheathing down, so wear a glove on that hand!

Over 90 degrees F in my garage, so I'm dripping sweat....

Test the light and all 4 cores.  Good to go!

Wrapping with electrical tape so it will pull through the very tight grommet.

And it's through!

Pulled through the middle longeron.  Now to figure out where the 5-core trim wire will go.  The other side or is the same longeron OK?  I think I need the other side for some antenna RG-400 coax, so I'll have to think about it.  Other builders. what did you do?

NEXT TASKS:
  1. Make dimensionally correct dummy wing spars to insert and bolt into position in the center fuselage so that the slot and it's uprights are properly spaced when it's being riveted into position.  Do this while the main spar is not cleco'ed to anything so that it's free to move.  This was recommended by various people so that the side skins don't buckle when the wing is finally installed (I saw this on the Sling 4 at OSH).  DONE.
  2. Fix landing gear uprights.  I have to reverse brackets that attach to the uprights. DONE.
  3. Redo rivets in rear cone.  I have 1 short vertical line of rivets that need to be upsized to match the other side. DONE.
  4. Rivet rudder cable guides in place. DONE.
  5. Run wires through rear fuselage (see paper note #3). Peter's 6-8-2016 entry.  STARTED.
  6. Fit aux. luggage floor gusset (needed for original rearward seat location?)
  7. Fit rear seat backrest stops for rearward location (see paper note #7).  See Gordon's 4/3/2016 entry.
  8. Rivet main spar control and autopilot brackets (pg. E2).  Some holes should be drilled out to 4mm.
  9. Install servos and connections (see various paper notes).
  10. Install pushrods to servos.
  11. Install CF-BKT-019-L/R on landing gear box.
  12. Ream out landing gear holes to proper size before main spar is in place.
  13. Rivet gear mounting channel before main spar is in place.  But, don't rivet to floor as that will have a cover installed later.
  14. See paper note #6.
  15. Install luggage floor cross brace.
  16. Install RF-LGN-303-C-C-O as seen on Peter's 5-17-2016 entry.
  17. Install RF-ANG-019 Luggage Floor Support (see paper note #4). Peter's 6-13-2016 entry.
  18. Where do these parts go?:
    1. RF-BKT-023-L/R
    2. CF-BKT-027-L/R 
  19. Install joystick control column.  See Peter's 5-13-2016 entry.
  20. Install elevator control stop on the torque tube (see paper note #2).
  21. #8 locking rings for torque tubes?  See Peter's 5-4-2016 entry. 
  22. See Gordon's 4/3/2016 entry concerning flap torque tube installation.
  23. Test fit all control torque tubes
  24. See Peter's 5-18-2016 entry on the control bush mounting bracket install.
  25. Complete any work on Pg. E3 of manual (main spar & undercarriage channel).
  26. Pg. E6 Forward Floor Sub-structure.
  27. Work on parachute box and rear bulkhead.
  28. Flap actuator bolted before riveting - investigate further.
  29. Rear/Center Fuselage Join heads up: Need room to rivet 2nd longeron from the top on the center fuselage, so next one below shouldn't be installed until that is done.  See paper notes: #1, #5 and #8.
  30. Luggage support/strengthening channel - See Peter's 7-20- 2016 entry and 7-15-2016 entry.
  31. Sound proofing installation. 
  32. Test fitting of forward fuselage side skins.
  33. Make sure you understand where various spacers go in the center fuselage.
  34. To be continued... ;-)
Quick note that I updated the Avionics & Electrical Page with the antennas/wiring info on the bottom of that page.  It's expanded from the list I posted here last week.


Tuesday, August 9, 2016

1 hr. resizing some rivets on the tail cone and riveting the rudder cable, um, thingys... ;-)

This line of 6 rivets are 3.2mm while the other side are 4mm.  Oops.  Gee, looking at the picture the skin looks pretty warped in the area, but it certainly doesn't look that way when I'm standing there.

Stuck in some duct tape and paper towels to catch as much of the debris from the drilling and reaming as possible.

Drilled out, reamed to 4mm, deburred and cleco'ed up.

And done!  Total time from start to finish: 10 min.

Riveted in the rudder cable thingys.

This part goes here me thinks...

NEXT TASKS:
  1. Make dimensionally correct dummy wing spars to insert and bolt into position in the center fuselage so that the slot and it's uprights are properly spaced when it's being riveted into position.  Do this while the main spar is not cleco'ed to anything so that it's free to move.  This was recommended by various people so that the side skins don't buckle when the wing is finally installed (I saw this on the Sling 4 at OSH).  DONE.
  2. Fix landing gear uprights.  I have to reverse brackets that attach to the uprights. DONE.
  3. Redo rivets in rear cone.  I have 1 short vertical line of rivets that need to be upsized to match the other side. DONE.
  4. Rivet rudder cable guides in place. DONE.
  5. Run wires through rear fuselage (see paper note #3). Peter's 6-8-2016 entry.
  6. Fit aux. luggage floor gusset (needed for original rearward seat location?)
  7. Fit rear seat backrest stops for rearward location (see paper note #7).  See Gordon's 4/3/2016 entry.
  8. Rivet main spar control and autopilot brackets (pg. E2).  Some holes should be drilled out to 4mm.
  9. Install servos and connections (see various paper notes).
  10. Install pushrods to servos.
  11. Install CF-BKT-019-L/R on landing gear box.
  12. Ream out landing gear holes to proper size before main spar is in place.
  13. Rivet gear mounting channel before main spar is in place.  But, don't rivet to floor as that will have a cover installed later.
  14. See paper note #6.
  15. Install luggage floor cross brace.
  16. Install RF-LGN-303-C-C-O as seen on Peter's 5-17-2016 entry.
  17. Install RF-ANG-019 Luggage Floor Support (see paper note #4). Peter's 6-13-2016 entry.
  18. Where do these parts go?:
    1. RF-BKT-023-L/R
    2. CF-BKT-027-L/R 
  19. Install joystick control column.  See Peter's 5-13-2016 entry.
  20. Install elevator control stop on the torque tube (see paper note #2).
  21. #8 locking rings for torque tubes?  See Peter's 5-4-2016 entry. 
  22. See Gordon's 4/3/2016 entry concerning flap torque tube installation.
  23. Test fit all control torque tubes
  24. See Peter's 5-18-2016 entry on the control bush mounting bracket install.
  25. Complete any work on Pg. E3 of manual (main spar & undercarriage channel).
  26. Pg. E6 Forward Floor Sub-structure.
  27. Work on parachute box and rear bulkhead.
  28. Flap actuator bolted before riveting - investigate further.
  29. Rear/Center Fuselage Join heads up: Need room to rivet 2nd longeron from the top on the center fuselage, so next one below shouldn't be installed until that is done.  See paper notes: #1, #5 and #8.
  30. Luggage support/strengthening channel - See Peter's 7-20- 2016 entry and 7-15-2016 entry.
  31. Sound proofing installation. 
  32. Test fitting of forward fuselage side skins.
  33. Make sure you understand where various spacers go in the center fuselage.
  34. To be continued... ;-)

Monday, August 8, 2016

1.5 hrs. doing the spar spacers and fixing the landing gear channel brackets.

Tried to find some material that was just short of 27mm thick (thickness of the main wing spar) but didn't find anything, so I decided I would just make pieces that were that thick.

I'll make 4 of these.  Here before sanding down to size.

Matching up against the actual spar I'm trying to emulate.

Four should be enough.

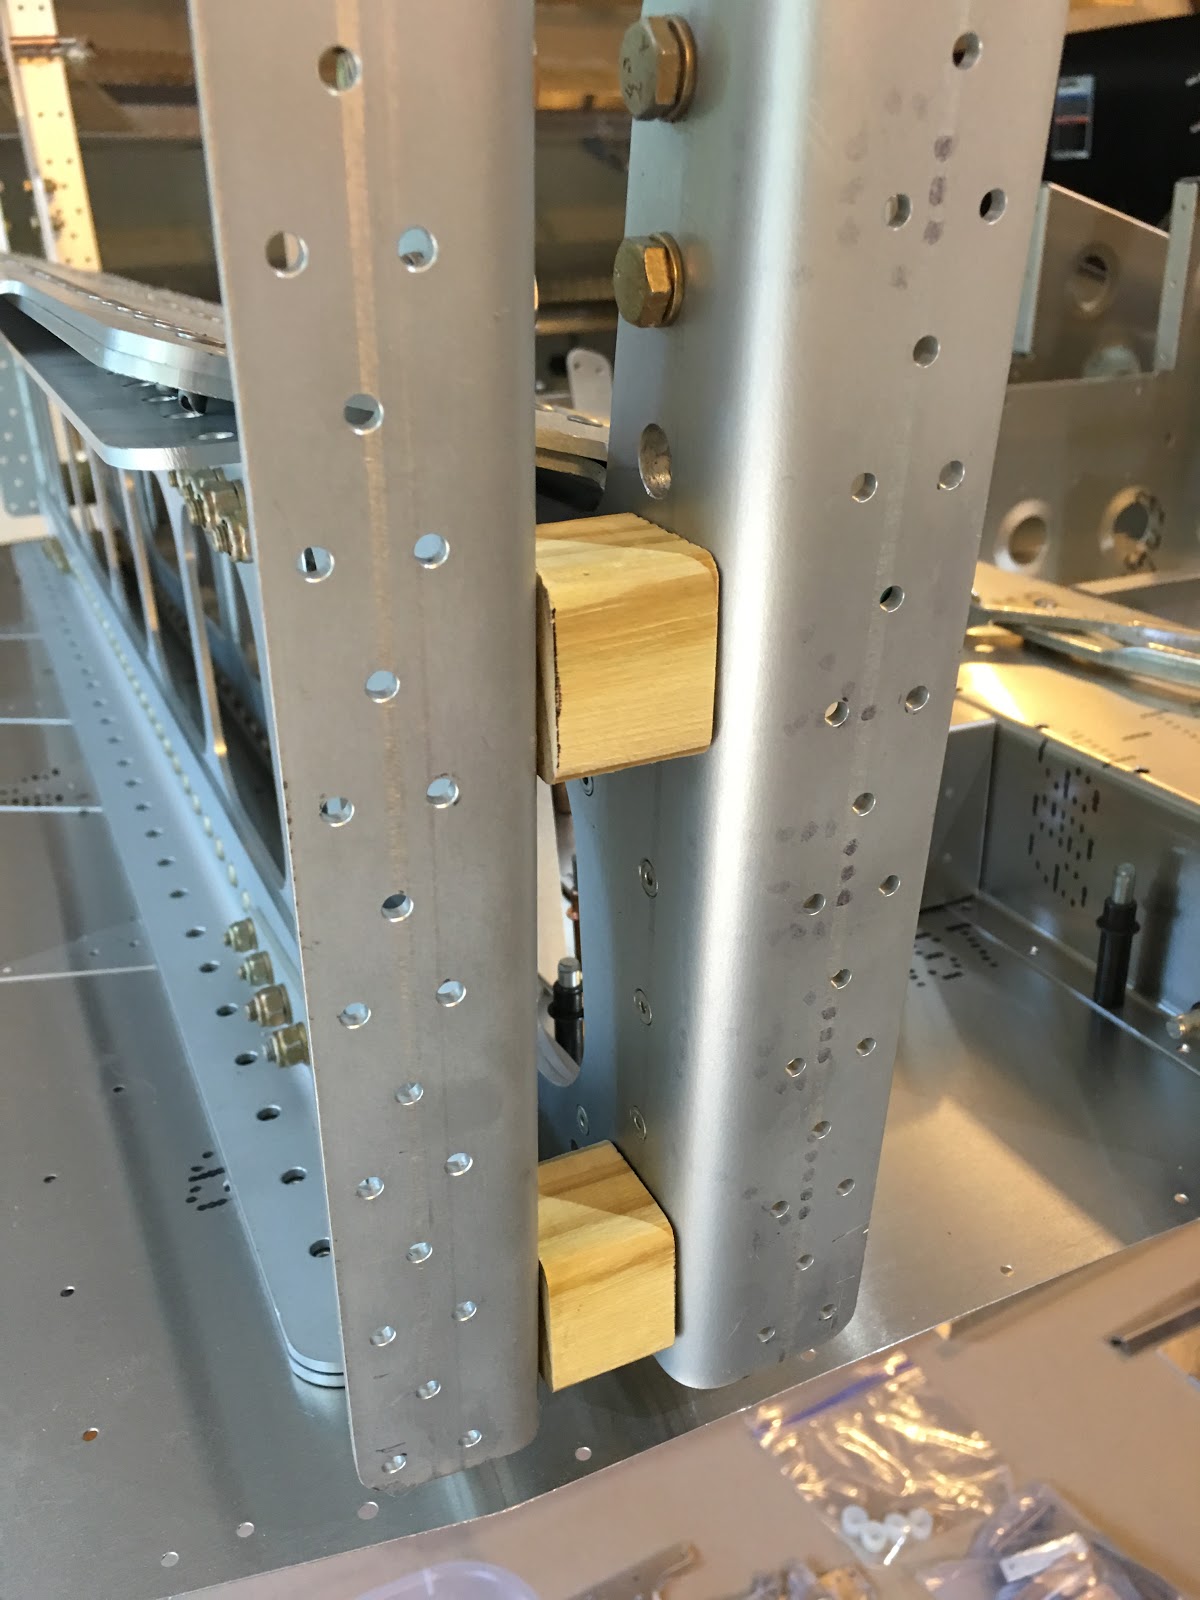
I uncleco'ed one side's attachment to the bottom skin so it can move and inserted two spacers per side.  It definitely pushed them apart.  Before commiting any rivets I will double make sure the spar will slip in just right, without trouble.  Not too tight and not loose.

Swapped the cross-braces for the uprights at the gear mounting channel ends and the holes seem better lined up now.  Nice.
Also, another builder had mentioned that the ribs you see in this photo ended up being warped when it was riveted to the bottom skin and I did see this on the quick build at Oshkosh.  I was glad to return to my build to see that I do not have this problem at all.  My ribs are perfectly straight and taut.  Double nice.

NEXT TASKS:
  1. Make dimensionally correct dummy wing spars to insert and bolt into position in the center fuselage so that the slot and it's uprights are properly spaced when it's being riveted into position.  Do this while the main spar is not cleco'ed to anything so that it's free to move.  This was recommended by various people so that the side skins don't buckle when the wing is finally installed (I saw this on the Sling 4 at OSH).  DONE.
  2. Fix landing gear uprights.  I have to reverse brackets that attach to the uprights. DONE.
  3. Redo rivets in rear cone.  I have 1 short vertical line of rivets that need to be upsized to match the other side.
  4. Rivet rudder cable guides in place.
  5. Run wires through rear fuselage (see paper note #3). Peter's 6-8-2016 entry.
  6. Fit aux. luggage floor gusset (needed for original rearward seat location?)
  7. Fit rear seat backrest stops for rearward location (see paper note #7).  See Gordon's 4/3/2016 entry.
  8. Rivet main spar control and autopilot brackets (pg. E2).  Some holes should be drilled out to 4mm.
  9. Install servos and connections (see various paper notes).
  10. Install pushrods to servos.
  11. Install CF-BKT-019-L/R on landing gear box.
  12. Ream out landing gear holes to proper size before main spar is in place.
  13. Rivet gear mounting channel before main spar is in place.  But, don't rivet to floor as that will have a cover installed later.
  14. See paper note #6.
  15. Install luggage floor cross brace.
  16. Install RF-LGN-303-C-C-O as seen on Peter's 5-17-2016 entry.
  17. Install RF-ANG-019 Luggage Floor Support (see paper note #4). Peter's 6-13-2016 entry.
  18. Where do these parts go?:
    1. RF-BKT-023-L/R
    2. CF-BKT-027-L/R 
  19. Install joystick control column.  See Peter's 5-13-2016 entry.
  20. Install elevator control stop on the torque tube (see paper note #2).
  21. #8 locking rings for torque tubes?  See Peter's 5-4-2016 entry. 
  22. See Gordon's 4/3/2016 entry concerning flap torque tube installation.
  23. Test fit all control torque tubes
  24. See Peter's 5-18-2016 entry on the control bush mounting bracket install.
  25. Complete any work on Pg. E3 of manual (main spar & undercarriage channel).
  26. Pg. E6 Forward Floor Sub-structure.
  27. Work on parachute box and rear bulkhead.
  28. Flap actuator bolted before riveting - investigate further.
  29. Rear/Center Fuselage Join heads up: Need room to rivet 2nd longeron from the top on the center fuselage, so next one below shouldn't be installed until that is done.  See paper notes: #1, #5 and #8.
  30. Luggage support/strengthening channel - See Peter's 7-20- 2016 entry and 7-15-2016 entry.
  31. Sound proofing installation. 
  32. Test fitting of forward fuselage side skins.
  33. Make sure you understand where various spacers go in the center fuselage.
  34. To be continued... ;-)
And I forgot to thank Bob Zaleski for all the heads-up emails from him!  Many of his emails have been incorporated into my task list!

Thanks Bob!

Here's a picture of Bob when he was still flying jets: