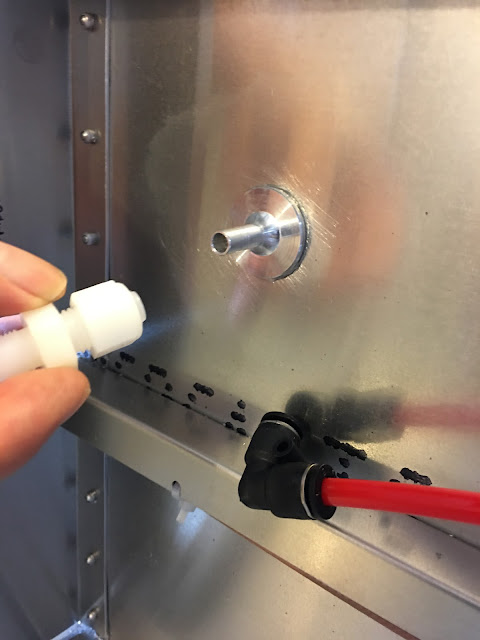
.5 hr replacing the remaining fittings for the static lines.
Also just did lots of updates to my Task List. Makes me more serene to see that updated. ;-)
Preparing to replace the T-connector fitting. Don't forget to put in the small inserts into the tubing (not shown here).
Super tight fit!
Tied down and all set!
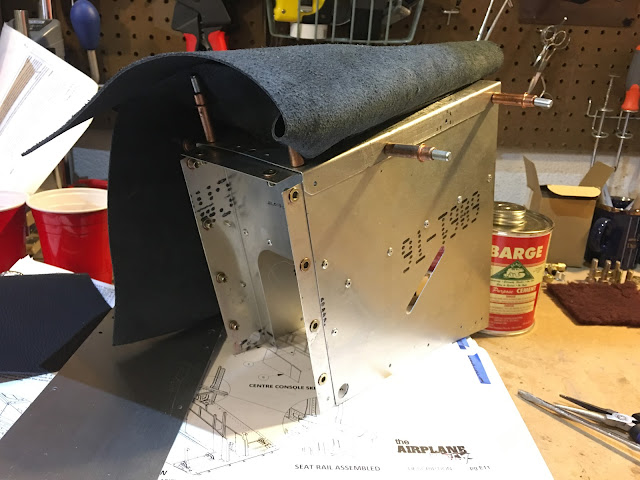
This is where the throttle assembly goes. Just waiting on the replacement hinge for the cover of the center console and I'll be able to finish up this section: Rivet the console in place and rivet the seat rails in place.
Categories
ailerons
(16)
avionics
(141)
electrical
(180)
elevator
(23)
Empennage
(55)
firewall forward
(222)
flaps
(12)
fuel cells
(68)
fuselage
(596)
horizontal stabilizer
(14)
instructions
(3)
interior
(104)
paint
(36)
Painting Planes
(3)
panel
(67)
propeller
(3)
rudder
(16)
seats
(5)
ServiceBulletin
(1)
shop
(33)
Sling Central
(23)
tools
(41)
vertical stabilizer
(20)
video
(37)
welcome
(22)
wheels
(44)
wings
(147)
Wednesday, June 28, 2017
Sunday, June 25, 2017
1 hr (maybe more later) today figuring out how the Nylo-Seal fittings work. And thanks to BobZ down in FL, I figured it out! ;-)
Bob and Joan recently finished their Sling 2 and here it is next to a friend's RV-7A. They were faster, but the Sling 2 uses half the fuel. The Sling looks gorgeous and fast just sitting there!
Since Bob finished the required 40 hours of testing he was able to take up his wife Joan. Here they are sporting their Sling Smiles!! :-D
With Bob's help, here is how you connect the Nylo-Seal fittings. First push in the insert (259-N04 NYLO-SEAL FITTINGS).
Then put the fitting (265-N04 NYLO-SEAL FITTINGS) on and tighten down the nut until, as Bob says, it's reached German Torque: Gutten Tight. ;-) You'll find you can't pull it off.
Then I tried to put the tube in and.... this is not how you do it...
This is how you do it. Insert in the tube with the nut part already on the tube. Then just apply German Torque.
Nice! Now to replace the other fittings and I can move on...
Saturday, June 24, 2017
2 hrs. misc.
Maybe I'm dumb, but I have no idea how to use these Nylo-Seal connectors... Time to do some Googling...
Spinning my Exacto blade to get through the leather for the holes that will be rivets. I ran the reamer through after this.
And this is where it will go.
Hmm... This top plate seems a bit long to fit behind the console. This probably is related to the issue I had with fitting the landing gear channel through some ribs - I had to do some flange bending to get it though, so that probably altered the distance here. Some measuring and thinking will be required to figured out the right way to address this.
I assume the console goes between that thick piece and the seat rail.
Finally got around to riveting these covers in place.
Goes there.
Sunday, June 18, 2017
3 hrs. and nearly done with the center console.
Measuring the part of the seat belt that has to go through the slot and accounting for the leather thickness I figure I need 15mm for the slot width. It's 10mm, so time for some cutting...
The plan...
Cut with a circular blade on my Dremel.
And it fits!
Time to glue on the top and one side.
Cut a slit for the belt slot.
So that I'll be able separate and fold the sides and glue it on the other side.
Nice!
Time to trim off all the excess.
Looking good.
The back plate.
Done.
The only remaining item is to attach the hinge (which unfortunately is not drilled properly). I want to be careful here because I want the top to line up with the bottom when it's down, so I need to line up the drilled holes properly.
Using my Exacto blade I poked holes through where there are rivnuts. The factory seems to make larger holes here, but I found I was able to push a screw through with just a small hole in the leather.
The holes in the bottom are correct, so I drilled through those.
Measuring the part of the seat belt that has to go through the slot and accounting for the leather thickness I figure I need 15mm for the slot width. It's 10mm, so time for some cutting...
The plan...
Cut with a circular blade on my Dremel.
Then finished with the grinder bit.
And it fits!
Time to glue on the top and one side.
Cut a slit for the belt slot.
So that I'll be able separate and fold the sides and glue it on the other side.
Nice!
Time to trim off all the excess.
Looking good.
The back plate.
Done.
The only remaining item is to attach the hinge (which unfortunately is not drilled properly). I want to be careful here because I want the top to line up with the bottom when it's down, so I need to line up the drilled holes properly.
Using my Exacto blade I poked holes through where there are rivnuts. The factory seems to make larger holes here, but I found I was able to push a screw through with just a small hole in the leather.
The holes in the bottom are correct, so I drilled through those.
Wednesday, June 14, 2017
1 hr. working on the center console.
Also, I'm thinking of switching to the new mid-sized iPad Pro for my panel right side. The largest one was a bit of a tight fit, so I think the 10.5" will be perfect. Looks amazing: https://www.apple.com/ipad-pro/
Needed to trim off some of the leather and this method worked well: Cut through with an exacto blade and then peeled off like this.
Since the inside of the cubby is done it's time to rivet the top on.
Done.
Riveting the top surface. Wasn't sure what the extra holes were for, but according to the factory the center holes are not used on this end of the center console.
Hmm, the hinge end holes don't line up... I've been told by the factory to just red-drill holes. The hinge goes over the leather too, not under.
Sunday, June 11, 2017
1.5 hrs on the center console.
Test fitting pieces.
Barge is used by showmakers so I guess it's the go to glue for leather and whatever.
The cover will go on like this.
We're going to cover the interior first, so let's scruff up the surfaces.
Blow out all the dust.
Clean it with my Extreme Simple Green solution.
Cover each surface with the Barge and let sit for at least 5 minutes.
VERY sticky stuff, so place very gingerly....
Inside done and looking good!
Now to start the top. Just doing the inside surface at this point.
And it's down. And it's not going anywhere!
Flipped over...
...and in place for a fit test. Next session I'll take this further.
Subscribe to:
Comments (Atom)


