Subcribe to our RSS feeds Join Us on Facebook Follow us on Twitter Add to Circles

Categories

Thursday, June 30, 2016

1 hr. hunting down parts...

I think I've decided to take all the parts out of the various labeled bags and simply alphabetize them.  I'm spending way too much time trying to find parts in the multitude of bags.  While the bags are designed to organize items by when you'll need them, I'm finding that I don't know which bag to look in to find a particular part because there's much overlap between the various sections you're working on.  For example I've spent close to half an hour looking for CF-PLT-017 and 018, which are reinforcing plates and have still not found them.

So, tomorrow I'm going to burn several hours taking everything out of their bags and sorting them by part number.  All the RF's, all the CF's, etc.  And then sorting within those groups: AMS, ANG, BKT, CHL, etc.  Then by number.  Then I'm going to distribute them around my garage and label them.

I would actually recommend the factory re-do the bags this way (e.g. Bag: CF-BKT's 001-027...).  Just my two cents.  Maybe I'm wrong, but that works better for me.  I'll bet it's organized that way at the factory...?

Which is the right part?  I have a question into the factory to figure out which is the correct part to use.  It could be that the smaller one is generic and the bigger one is for Garmin autopilots?

Lots of parts!  Time to mega-organize!!  Probably should have done this a couple of months ago... ;-)

NEXT TASKS:
  1. ORGANIZE PARTS!!
  2. Prep of next batch of parts for center fuselage.
  3. Rivet the one on the left wing's step rib that needs special handling.?? (to be done in "spare" time).

Wednesday, June 29, 2016

1 hr. gathering parts for the next steps.

Lots of parts to gather...

NEXT TASKS:
  1. Prep of next batch of parts for center fuselage.
  2. Rivet the one on the left wing's step rib that needs special handling.?? (to be done in "spare" time).
I just wanted to post something quickly regarding the VS fit issue.  Once I told the factory about my concern about how it's fitted they have been very responsive in explaining how it's done at the factory and I really appreciate that.

I can't wait to finish this plane!!


Tuesday, June 28, 2016

I heard back from the factory on two items:

1) 915 weight and balance: Keeping the parachute in the new forward location and moving the rear seat back to it's original position (simply by not installing some parts that move them forward) will be OK with the 915 (or in my mind the 914 with the fuel injection add-on).  So, that's the plan.  With this I can make the 914/915 decision later.

2) The VS fitting issue:  They said my measurements are within range and the way they put it in at the factory is to use plastic guides on either side of the VS as you push it in from the rear.  It will likely push out the sides a bit, but that is expected.  Since Peter and Gordon are well ahead of me, they'll be testing this out before I do, so I'll be anxious to see how it goes.


Monday, June 27, 2016

1 hr. measuring my VS rear spar vs. the channel in the rear fuselage that it's supposed to fit into and contemplating the manual for next parts to prep.


Trying to figure out how the VS fits into the rear fuselage.

Courtesy of Bob Zaleski, this is his Vertical Stabilizer rear spar width: 94.82mm

And my VS rear spar width: 97.22mm.

That is not going to slide down into a channel that is 94.46mm at this point...

NEXT TASKS:
  1. Prep of next batch of parts for center fuselage.
  2. Rivet the one on the left wing's step rib that needs special handling.?? (to be done in "spare" time).

Sunday, June 26, 2016

3 hrs. doing various tasks..  Waiting for the factory to get back to me on the weight and balance using the Rotax 915 so I can understand what parts I will use for the parachute.  So, a bunch of rear fuselage work will have to be deferred until that's resolved.

If you orient the metal guides (whatever they're called) as shown in the manual (long slots on the inside) then the guide just behind is upside down.

Swap them and the guide can be attached.  Based on the Sling 2 rudder cable assembly instructions Bob Zaleski just sent me, this is correct.

Looking back, the cables cross over between ribs 3 and 4.

I assume those holes have to have some protection installed to protect the cables, but the manual makes no mention of it.  I removed the cables since I don't want them damaged and will wait until I understand what goes there.

If I had reread Peter Calley's blog I would have remembered that these inner holes shouldn't have gotten riveted yet.  Two more on the other side and two at the inside top.  Oh well, drilled them out.

With all the reaming and drilling it was time for some cleaning of the rear fuselage.

Main spar out and rear spar temporarily assembled.  I'll collect the next batch of parts of do the prep work.

NEXT TASKS:
  1. Prep of next batch of parts for center fuselage.
  2. Rivet the one on the left wing's step rib that needs special handling.?? (to be done in "spare" time).

Saturday, June 25, 2016

1 hr today (lots of home stuff to catch up on...). trying out the vertical stabilizer fit, installing the gusset and more rudder cable box work.

Took down the vertical stabilizer to see how it's going to fit in the rear fuselage...  Hmmm...  Can't push it in from the rear because there's a taper.   The piece on the right is the VS and you see it won't just slide in.

So, I tried pushing it in from the top...  But, there's another taper that prevents that...  You can see it's pushing out the skins as I try to push it down.  Short of de-riveting the nearby skin rivets there's no way it's going in.  Anybody try this?

On to less frustrating activities..  I installed the gusset that had been missing.

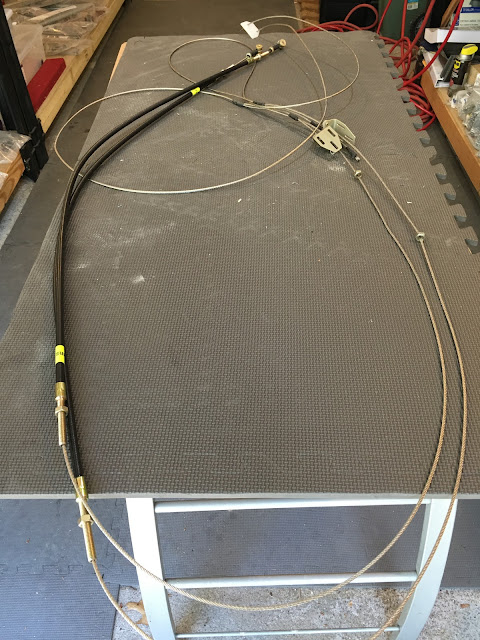
Got the rudder cables out.

Here's a video of how to install rivnuts.


All the rivnuts installed in the rudder cable box.

Bottom view so you can see how much to squeeze the rivnuts.

NEXT TASKS:
  1. Rudder cable install.
  2. Rivet the one on the left wing's step rib that needs special handling.?? (to be done in "spare" time).

Thursday, June 23, 2016

.5 hr priming the gusset part I had gotten from the factory and riveting in the rudder cable box.

A rare time that I brush the primer on.  I'll install the part tomorrow.

Using my customized hand riveter to get into the rivets for the rudder cable box.

Was at a Lowe's and saw these paint chips so I grabbed a bunch to see what colors might work for my plane.   The picture doesn't really capture the actual colors, but I'm liking the bottom two together.  The colors are somewhat darker in real life.

NEXT TASKS:
  1. Rudder cables and supporting structure is next.
  2. Rivet the one on the left wing's step rib that needs special handling.?? (to be done in "spare" time).

Wednesday, June 22, 2016

1 hr yesterday and 2 hrs. today riveting!

Riveting the sides.

On to it's side with the wife's help. ;-)

All of the bottom and sides are done!

NEXT TASKS:
  1. Rudder cables and supporting structure is next.
  2. Rivet the one on the left wing's step rib that needs special handling.?? (to be done in "spare" time).

Monday, June 20, 2016

2.5 hrs. riveting the rear skins.

Bouncing side to side, riveting in symmetrical batches.

Lots done, but plenty more to go...  Won't be riveting the top row as that mates with the top skins.

NEXT TASKS:
  1. Continue to rivet the rear skins on.
  2. Rivet the one on the left wing's step rib that needs special handling.?? (to be done in "spare" time).

Sunday, June 19, 2016

1 hr starting to rivet the rear skins.

I like to do the riveting in a symmetrical manner.  I did the first set of rivets for two rows on the left side then I did the same set of rivets on the right side.  Next will be back on the left side to do the second set (removing the cleco's) and then the same on the right side.  Back and forth to even out the tension I'm creating.  Frankly I don't know that it makes any difference to do it that way, it just seems like a good idea. :-)

Was in NYC (my hometown!) over the weekend and got to enjoy a treat we had in Venice, Italy; Grom's all-natural gelato.   Delicious!!  This one is right near Columbus Circle in Manhattan.

Also saw this wonderful play on Broadway.  If you can, see it!!  I think it's coming to Boston soon, so any locals should see it when it gets here.


NEXT TASKS:
  1. Continue to rivet the rear skins on.
  2. Rivet the one on the left wing's step rib that needs special handling.?? (to be done in "spare" time).

Wednesday, June 15, 2016

Just wanted to let people know that I won't be able to do much, if any, work on the plane for the next few days.  Should be back at it Sunday night.

To entertain you in the meantime, here's a chocolate chip cookie recipe you MUST make! :-)  Use the best ingredients you can find (e.g. Ghirardelli semi-sweet chocolate chips, quality vanilla extract and the best butter you can buy) and follow the directions exactly (e.g. you need parchment paper on the baking sheets)!  You won't regret it!!

The wet stuff all mixed.

Ready for the combining (don't forget the baking soda in the dry mix!).

Ready to go!

And into the oven....

Here they are.  OK, I over-baked them a bit, but they were still AMAZING.  Trust me, you'll thank me!!  Email me (my profile has my email) and let me know how they came out! :-)


Monday, June 13, 2016

1 hr. drilling out and riveting the gusset on Rib 3.

Here's the gusset attachment to be drilled through now that the skins are cleco'ed into place.

Thought I'd use my Tight-Fit drill attachment, but I still really couldn't get in there to drill a proper hole.  So, I tried this extra long drill bit and it worked perfectly.

Drilled one hole, reamed it out to size and cleco'ed it while I drilled the other holes.

And it's done! :-)

As I've been alerted not to rivet where the step gets attached, I'm trying to understand which rivets exactly not to rivet.  If I read the Sling 2 instructions correctly it would be the center holes around where the top arrow points (maybe the center 6 rivets?) and the corresponding line of holes underneath where the lower arrow is pointing.  Look right?

NEXT TASKS:
  1. Rivet the rear skins on.
  2. Rivet the one on the left wing's step rib that needs special handling.?? (to be done in "spare" time).

Sunday, June 12, 2016

3 hrs. continuing work on the rear skins.

Got my Super Soundproof material (1/4") from Aircraft Spruce yesterday.  This is way better quality than what came with the kit (thicker and denser).  I bought 10' of it.

On it's side to put on the side skins.

Working my way up the right side.

Rounded out these flanges a bit (this is before).

Looking good.

Making my way up the left side.

Done for the day.  Maybe rivet tomorrow?  I'll want to double check everything, especially the instructions before riveting...

A satisfying view.

NEXT TASKS:
  1. Drill out and rivet the gussets on Rib 3.
  2. Rivet the rear skins on.
  3. Rivet the one on the left wing's step rib that needs special handling.?? (to be done in "spare" time).
2 hrs. on Friday re-applying skins to the rear fuselage.

The skin doesn't bend easily around the bottom.  The only way is to start at one end and put the cleco's in and it slowly bends into position.

Making progress.

I don't want the skin to have facets so these flanges should be rounded.  Here's before.

And using some needle-nose pliers, here's after.  Much better!

On its side to more easily put in cleco's.

Holes don't line up.  See the video below.

You can see how far they are from this angle.

Video showing the holes being off.


I'm thinking the solution is to drill out the holes to larger rivets and be done with it.

Just a pic showing the big view of how it looks right now.  More work today and will post an update later.

NEXT TASKS:
  1. Start putting on the 3 rear fuselage skins as per the instructions.
  2. Rivet the one on the left wing's step rib that needs special handling.?? (to be done in "spare" time).