


Realized the only way to assemble Rib 2 on the jig was to have the top of the assembly be on top of the jig and the rest of it under the jig.

Made sure to mark the holes indicated in the instructions that were not to be riveted.

Properly done!

Need to use my angle riveting widget to get to these rivets. The instructions should be revised to have this piece installed first.

I wasn't completely certain of the proper torquing of the bolts on the rear tail cone assembly because I'm not convinced my click-type torque wrench is accurate (seemed way too tight), so I removed the self-locking nuts, threw those out and re-tightened new ones with my manual inch-pound torque wrench. Here a new self-locking nut is put on the bolt (down to where it starts to peak out) so I can measure the friction drag torque.

So, you slowly turn the nut and measure the natural torque of the nut, which is called the friction drag torque. I measured 5 in-lbs, as shown here.

That gets added to the table value (table from the Van's website) for what you're using, which in this case is an AN3 with a self-locking nut. So that value is 28 in-lbs. 28 + 5 = 33 in-lbs is the final torque to be applied. No picture, but I hand tightened it down until it resisted, then I put on the torque wrench and slowly turned it until it pointed to 33 in-lbs, and we're done!

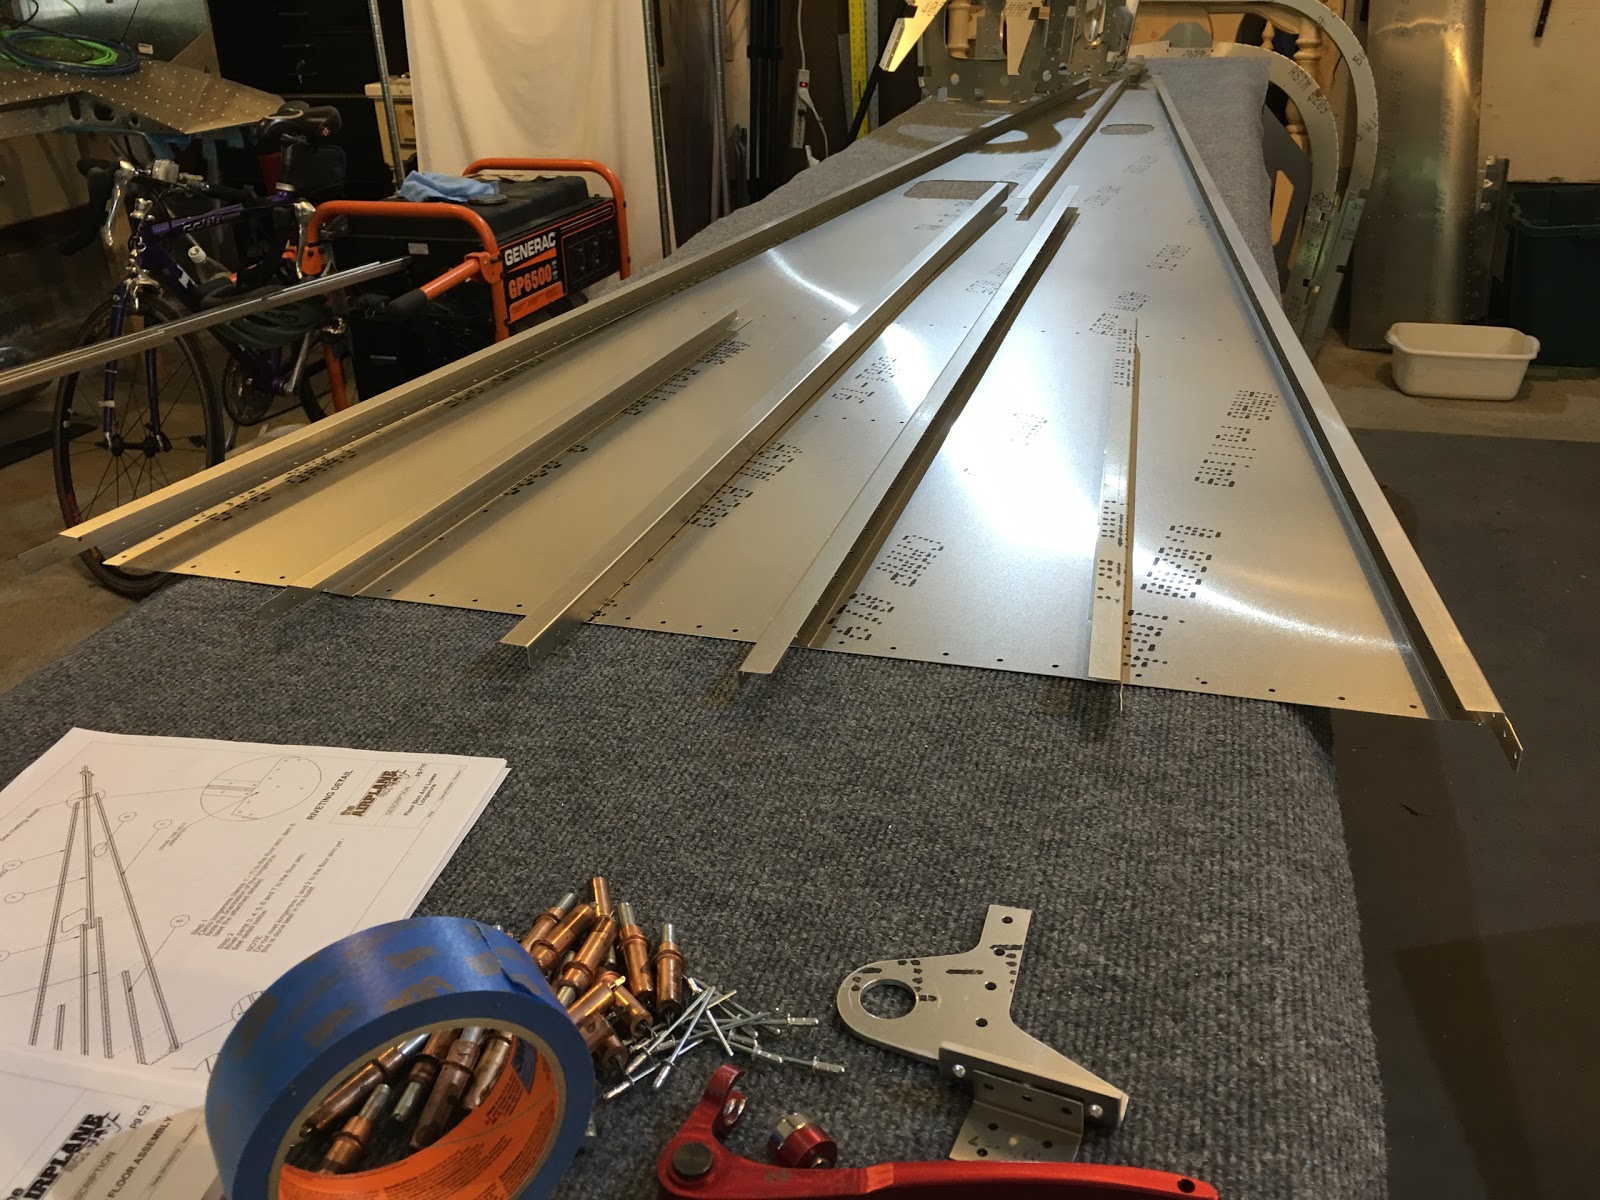
Laying out the bottom skin with the longerons. Making double sure they're oriented correctly. It's not clear in the instructions, so I went with what Gordon told me is correct for the Sling 4.
Putting in the parts related to the tail tie-down (the tie-down itself fits lower than shown here).

Flipped the bottom over to start the riveting.

Tie-down parts in place.

Another view of it.

All riveted (not the outside longerons though, which should not be riveted as the instructions imply).

It's not shown but these were cleco'ed in place while the assembly was on it's side. The Sling 2 instructions say to do that, but the Sling 4 instructions give no guidance. I think on the side is the easiest way, but it's a tricky operation because the whole structure is loose and you don't want anything to fall over.

With the longerons tie-wrapped in place and we're done for the day. Great progress!

NEXT TASKS:
- Tail cone assembly continued.
- Need to find the rudder and elevator guides for these assemblies as they weren't in the Rib assembly parts bags (I think I found them in the rudder cable bag - to be confirmed).
- Fill bottom rivets of elevator and fillet the composite tips of it to the skin (to be done in "spare" time).
- Rivet the one on the left wing's step rib that needs special handling.?? (to be done in "spare" time).
No comments:
Post a Comment