


Good article on fuel systems that PascalL pointed me to. Thanks Pascal!
Wednesday, August 14, 2019

Wasn't able to work on the plane last night (or tonight...), but I did find out from the factory that the plastic filters are 50 micron, so that meets the "fine" filter recommendation in the Rotax manual (100 micron) (not sure why the manual calls them "coarse"). So, I will use those (using the aviation gasket material I mentioned the other day) and put them in the cockpit as described in the build manual.
In the meantime, here's a picture of Crosby just waking up in the shower - his preferred sleeping accommodations in the summer. ;-)

I was thinking about the location and I think it's better to have the filters closer to the engine than further away in the wings.
In the meantime, here's a picture of Crosby just waking up in the shower - his preferred sleeping accommodations in the summer. ;-)

Monday, August 12, 2019
1 wasted hour on the fuel selector...
I should have known better from my struggles with the fuel pump clamps, but I tried to put the 15mm Oetiker clamps on the 5/16" hose... Despite using oil to make it slide, I struggled to get those (specified...) clamps in place. And this was as far as I could get them (and they damaged the hose in the process). No way I'm happy with that result....

... So off they come... You can really see the damage in this pic.

Using the same tool that you use to put them on, I slowly cut them off. While 15mm clamps will slide on the hose fairly easily, when you expand the hose over the barbs - no way 15mm is an appropriate size.

And they're off. I'll use the 1-ear 15.6mm Oetiker clamps instead when I recover from my exhaustion... BTW, here's a good source for Oetiker clamps in the US. Updated my Suppliers Page with that info.


I should have known better from my struggles with the fuel pump clamps, but I tried to put the 15mm Oetiker clamps on the 5/16" hose... Despite using oil to make it slide, I struggled to get those (specified...) clamps in place. And this was as far as I could get them (and they damaged the hose in the process). No way I'm happy with that result....
... So off they come... You can really see the damage in this pic.

Using the same tool that you use to put them on, I slowly cut them off. While 15mm clamps will slide on the hose fairly easily, when you expand the hose over the barbs - no way 15mm is an appropriate size.

And they're off. I'll use the 1-ear 15.6mm Oetiker clamps instead when I recover from my exhaustion... BTW, here's a good source for Oetiker clamps in the US. Updated my Suppliers Page with that info.

I asked about the in-line plastic fuel filters on Rotax-Owner.com and got this response from their top commenter. I ordered the product he mentions and I'll use that to make sure it's secure. Maybe I'll use it even further as he describes (after more research on my part). I'm a big fan of preventing flammable liquid leaks....

Sunday, August 11, 2019
2 hrs. today on the fuel system.
Cutting off the barbs for use in the fuel flow sensor assembly. Pretty good job if I do say so myself. 😁

The tool of choice.

Smoothing out the cut.

OK, I've got all the parts...

Not much positioning room... SimonK mentioned he took the line out to do this and that certainly makes sense as there's really no way to do it in place.

Marking where the clamp is so I know not to interfere with that.

Is this a problem? Seems rather close to the mount... Hmm... I should ask the factory about it.

The carb end of the fuel line. Not sure yet how I'm going to loosen that nut. No obvious room to get a wrench or socket in... Hmmm...

The 4 fuel filters I found. Can't say I've seen a part labeled "Made in Israel". That one seems to have the filter except it's white.

This is the assembly. Can't say it seems super secure without any barbs. Maybe I'll use two clamps for each connection... 😎

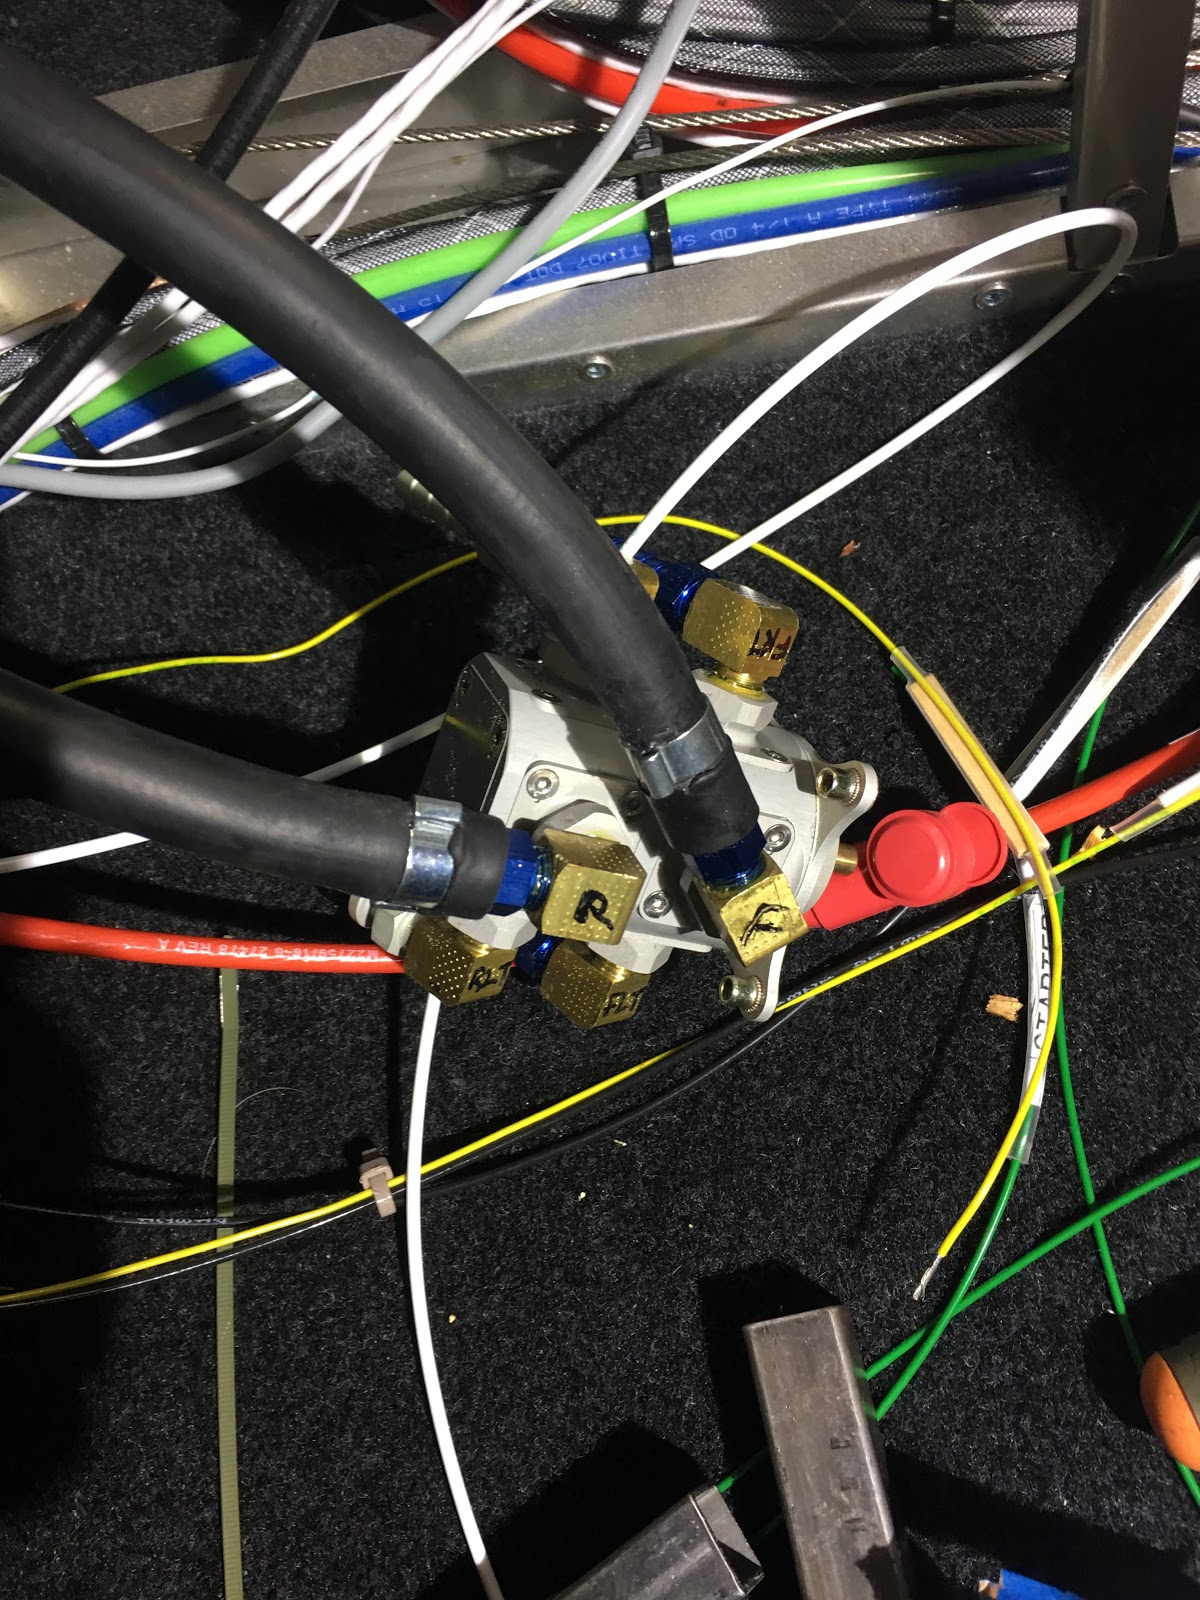
Labeling the fuel selector. Example: "RLT" - Return Left Tank.

Goes about here... Need to figure out how much to trim the lines from the engine. Not too much and not too little...

I forgot to warm up (with hot water) the first line I tried.... So it was a bitch to push on. With soaking for a few minutes in hot water - goes on really easy... Still a pain to slide the Oetiker clamps down though... Maybe a bit of engine oil to help it? That should be ok for the hose since they're by definition impervious to oil/fuel, right?

Cutting off the barbs for use in the fuel flow sensor assembly. Pretty good job if I do say so myself. 😁

The tool of choice.

Smoothing out the cut.

OK, I've got all the parts...

Not much positioning room... SimonK mentioned he took the line out to do this and that certainly makes sense as there's really no way to do it in place.

Marking where the clamp is so I know not to interfere with that.

Is this a problem? Seems rather close to the mount... Hmm... I should ask the factory about it.

The carb end of the fuel line. Not sure yet how I'm going to loosen that nut. No obvious room to get a wrench or socket in... Hmmm...

The 4 fuel filters I found. Can't say I've seen a part labeled "Made in Israel". That one seems to have the filter except it's white.

This is the assembly. Can't say it seems super secure without any barbs. Maybe I'll use two clamps for each connection... 😎

Labeling the fuel selector. Example: "RLT" - Return Left Tank.

Goes about here... Need to figure out how much to trim the lines from the engine. Not too much and not too little...

I forgot to warm up (with hot water) the first line I tried.... So it was a bitch to push on. With soaking for a few minutes in hot water - goes on really easy... Still a pain to slide the Oetiker clamps down though... Maybe a bit of engine oil to help it? That should be ok for the hose since they're by definition impervious to oil/fuel, right?

Saturday, August 10, 2019
3 hrs. on the fuel system.
My tools and materials for the silver soldering have arrived!

The nozzle installed.

I decided to add another layer of rubber to keep the mount nice and isolated.

Notches cut and easily installed. Yeah, the outside slots became open because of the notch cutting, but I wasn't too concerned since there was still the inside slots to keep things positioned. I tightened down the mount screws (with medium Loctite), but not overly so as to not negate the effect of the cushioning.

Made sure to label the correct wires with Main vs. Aux.

In place and ready for tightening up.

Positioned and tightened. No amount of pushing could move the pumps.

Good clearance.

Connecting the wiring to the main and aux. Used a lock washer with the regular nuts and Loctite.

This clamp will work perfectly. I thought about Oetiker clamps, but there's no way you can get in there to crimp them.

Positioning the clamp so it's perfectly in position.

Connected!! I still need to tie down the wiring, but I'll get to that later.

Putting in the 6mm barbed fittings into the fuel flow sensor. Loctite 577 on. Hand tight and then 1.5 turns with a wrench (it was hard to get to 1.5).

Figuring out the positioning. Not much room.

The big view. 😁

The sculpture I mentioned the other day. About 40 years old and shows it.

Saw this cartoon today. Love it. 😂

My tools and materials for the silver soldering have arrived!

The nozzle installed.

I decided to add another layer of rubber to keep the mount nice and isolated.

Notches cut and easily installed. Yeah, the outside slots became open because of the notch cutting, but I wasn't too concerned since there was still the inside slots to keep things positioned. I tightened down the mount screws (with medium Loctite), but not overly so as to not negate the effect of the cushioning.

Made sure to label the correct wires with Main vs. Aux.

In place and ready for tightening up.

Positioned and tightened. No amount of pushing could move the pumps.

Good clearance.

Connecting the wiring to the main and aux. Used a lock washer with the regular nuts and Loctite.

This clamp will work perfectly. I thought about Oetiker clamps, but there's no way you can get in there to crimp them.

Positioning the clamp so it's perfectly in position.

Connected!! I still need to tie down the wiring, but I'll get to that later.

Putting in the 6mm barbed fittings into the fuel flow sensor. Loctite 577 on. Hand tight and then 1.5 turns with a wrench (it was hard to get to 1.5).

Figuring out the positioning. Not much room.

The big view. 😁

The sculpture I mentioned the other day. About 40 years old and shows it.

Saw this cartoon today. Love it. 😂

Thursday, August 8, 2019
2 hrs. on the fuel pumps.
Success! Pressurized it to 28 psi, and brushed it everywhere there was a connection, both sides, multiple times. Not a single growing bubble! From my experience, if there's any leak at all, it will blow easily noticeable bubbles and there was not a hint. 😁
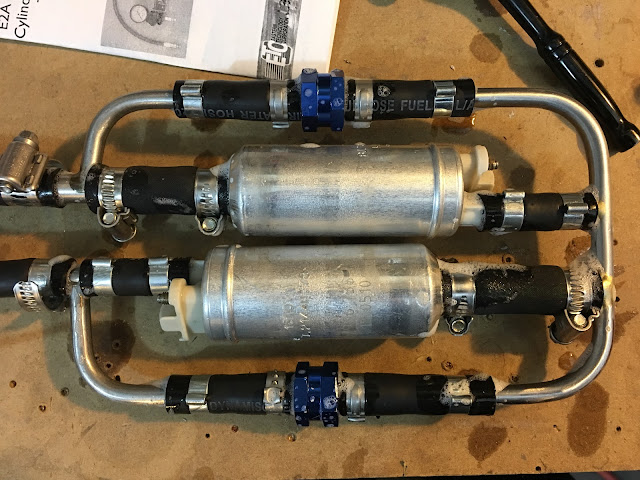
Test fitting the pumps onto the mount... It will be tricky...

My solution to installing the cap with the power and ground wires. Multiple strong pulls show no slippage at all.

For added security some heat shrink.

And the other one done.

The manual indicates to put some cushioning under the mount, and this is what I had.

Pre-loading the screws and Loctite....

...but with that lip there it's a major pain to try and turn those screws. I'm going to take it back out and cut a notch so I can put a screwdriver straight onto the screw head.

Success! Pressurized it to 28 psi, and brushed it everywhere there was a connection, both sides, multiple times. Not a single growing bubble! From my experience, if there's any leak at all, it will blow easily noticeable bubbles and there was not a hint. 😁
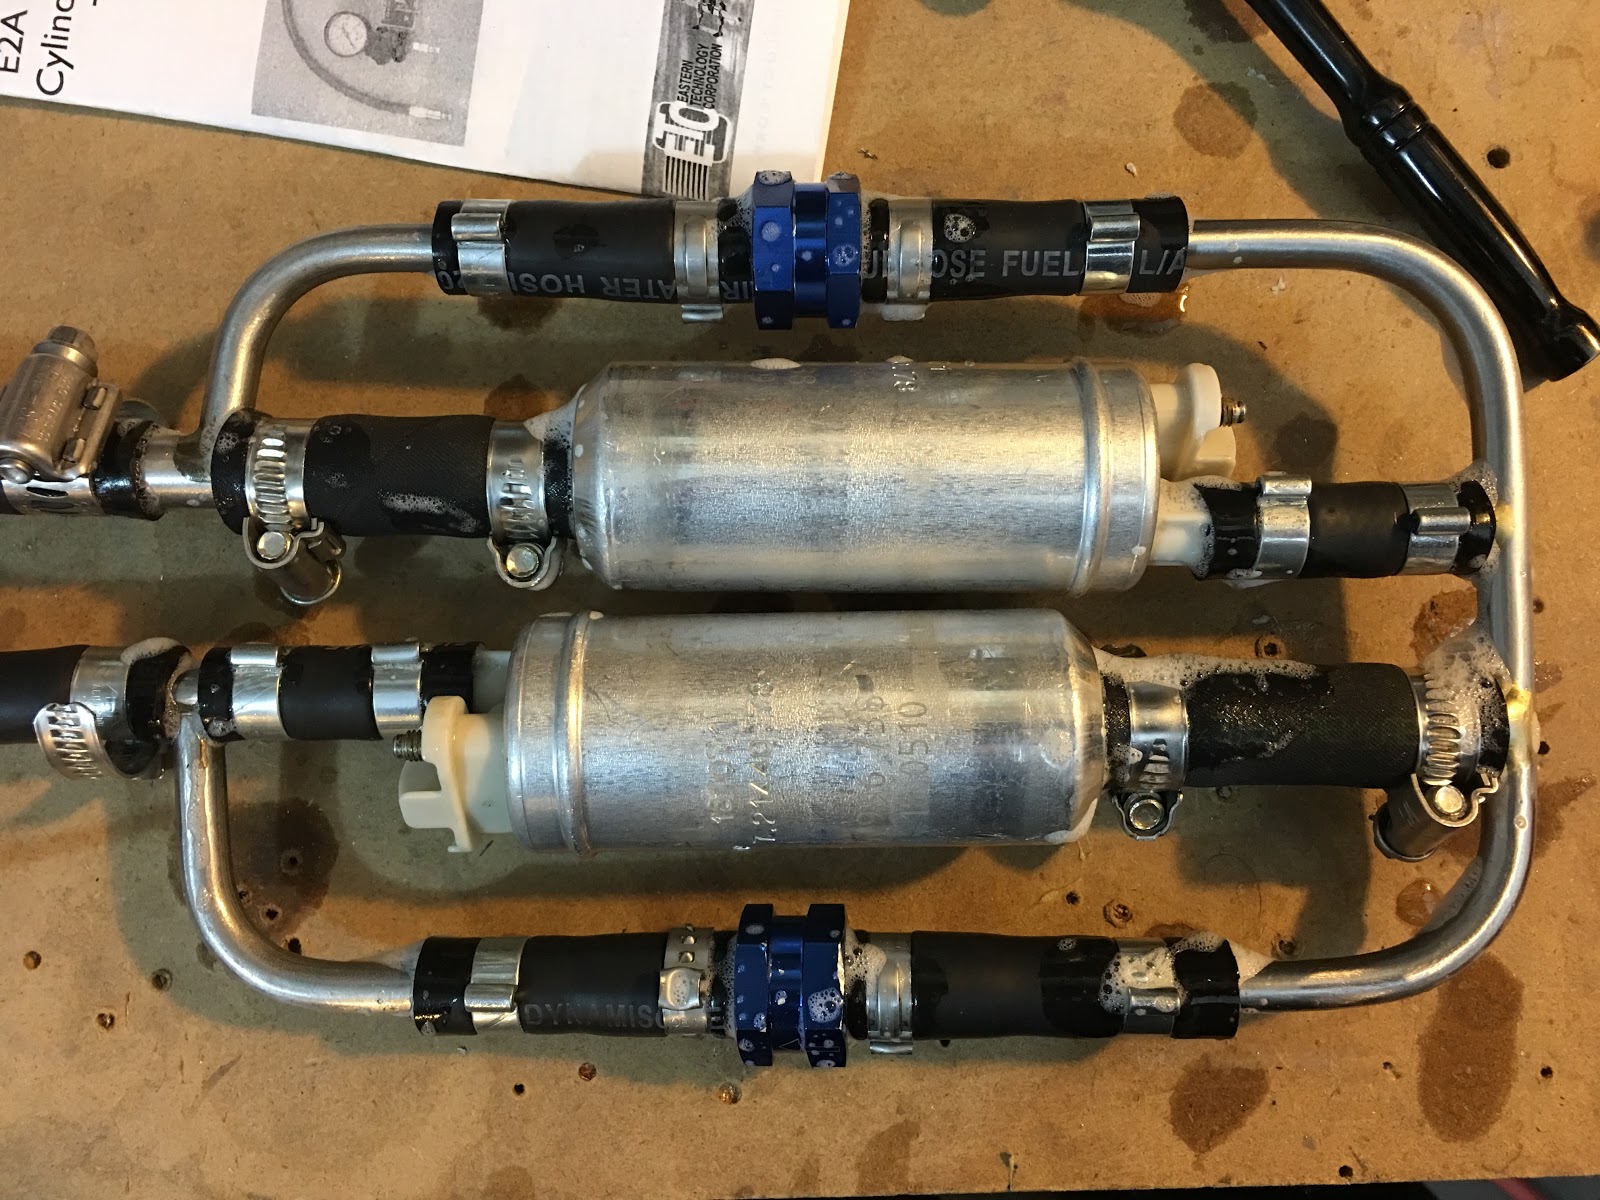
Test fitting the pumps onto the mount... It will be tricky...

My solution to installing the cap with the power and ground wires. Multiple strong pulls show no slippage at all.

For added security some heat shrink.

And the other one done.

The manual indicates to put some cushioning under the mount, and this is what I had.

Pre-loading the screws and Loctite....

...but with that lip there it's a major pain to try and turn those screws. I'm going to take it back out and cut a notch so I can put a screwdriver straight onto the screw head.

Out of curiosity I looked up the professor I had at RPI for my sculpture and welding class and I see that's he's retired now (I think he eventually became department chair), but still exhibiting his work (he was always a working artist).
Here's a recent exhibition and his bio on his website. I'm proud to say that he enjoyed the works I did in his class. I also visited him at one of his exhibitions in New York City a few years after I took his class and he remembered me. :-)
I still have one of the sculptures I did in that class - it's on my front porch. I'll take a pic of it and post when I get a chance this weekend.
As a matter of fact, after I take that picture, I'll email him with it and see if, after ~40 years, he still remembers me. :-D
Here's a recent exhibition and his bio on his website. I'm proud to say that he enjoyed the works I did in his class. I also visited him at one of his exhibitions in New York City a few years after I took his class and he remembered me. :-)
I still have one of the sculptures I did in that class - it's on my front porch. I'll take a pic of it and post when I get a chance this weekend.
As a matter of fact, after I take that picture, I'll email him with it and see if, after ~40 years, he still remembers me. :-D
Subscribe to:
Posts (Atom)